Category: British recipes

  • Traditional British Trifle: An Easy Recipe for American Kitchens

    Traditional British Trifle: An Easy Recipe for American Kitchens

    Few desserts look quite as impressive on the table as a traditional British trifle. Layers of soft sponge cake, fruit, custard and whipped cream are piled into a glass bowl so that every colorful layer can be seen.

    Despite its grand appearance, trifle is wonderfully forgiving. In fact, it’s one of those desserts that often tastes even better when made ahead, giving the sponge time to absorb the fruit juices, custard and — if you’re using it — a little sherry.

    British families have been making their own versions of trifle for generations, which means there is plenty of friendly disagreement about exactly what belongs in one. Some include jelly, some don’t. Some use sherry, while family-friendly versions use fruit juice. Fresh fruit, canned fruit, jam, sponge fingers and leftover cake can all make an appearance.

    This version gives you a classic British-style trifle while using ingredients that are easy to find in an American supermarket.

    What Is a Traditional British Trifle?

    At its heart, British trifle is a layered dessert consisting of:

    • Sponge cake or ladyfingers
    • Jam
    • Fruit
    • Sherry or fruit juice
    • Custard
    • Whipped cream

    Some traditional versions also include a layer of fruit jelly — what Americans would call Jell-O.

    The ingredients are arranged in a large glass serving bowl and chilled before serving.

    The result is creamy, fruity and wonderfully nostalgic.

    What Kind of Sponge Should I Use?

    In Britain, trifle sponge fingers or small trifle sponges are commonly used.

    In the United States, ladyfingers are an easy substitute.

    You can also use slices of plain pound cake, yellow cake or homemade sponge cake.

    If you’d like to make the sponge yourself, my Classic Victoria Sponge Cake is a lovely place to start. You won’t need the assembled sandwich cake — simply use some of the plain sponge in your trifle.

    Slightly stale cake actually works very well because it absorbs the liquid without immediately falling apart.

    Brit & Skillet Tip

    Trifle is a brilliant way to use leftover sponge cake. Don’t worry if the cake isn’t picture-perfect — once it’s layered with fruit, custard and cream, nobody will ever know.

    Ingredients

    For the Sponge and Fruit Layers

    • 7–8 oz (200–225g) ladyfingers, sponge cake or pound cake
    • 1/3 cup (110g) raspberry or strawberry jam
    • 1/3 cup (80ml) sweet or medium sherry, optional
    • 1 lb (450g) fresh strawberries
    • 6 oz (170g) fresh raspberries
    • 1 tablespoon (12g) granulated sugar

    For the Custard

    • 2 cups (480ml) whole milk
    • 1 cup (240ml) heavy cream
    • 5 large egg yolks
    • 1/2 cup (100g) granulated sugar
    • 3 tablespoons (24g) cornstarch
    • 2 teaspoons vanilla extract
    • Pinch of salt

    For the Whipped Cream

    • 1 1/2 cups (360ml) heavy whipping cream
    • 2 tablespoons (15g) powdered sugar
    • 1 teaspoon vanilla extract

    For Decorating

    • Fresh strawberries
    • Fresh raspberries
    • Toasted sliced almonds, optional

    Prepare the Fruit

    Set aside several of your prettiest strawberries and raspberries for decorating the top of the trifle.

    Hull and slice the remaining strawberries.

    Place the sliced strawberries and raspberries in a bowl and sprinkle them with the tablespoon of sugar.

    Gently stir and leave them for about 15–20 minutes.

    The sugar will draw some juice from the berries, creating a lovely syrup that can soak into the sponge.

    Make the Custard

    Place the milk and cream in a medium saucepan.

    Heat over medium-low heat until steaming but not boiling.

    Meanwhile, place the egg yolks, sugar, cornstarch and salt in a large bowl.

    Whisk until smooth.

    Slowly pour a small amount of the hot milk mixture into the egg mixture while whisking continuously.

    Gradually add the remaining hot milk, continuing to whisk.

    Pour everything back into the saucepan.

    Cook over medium-low heat, stirring continuously, until the custard becomes thick.

    This usually takes about 5–8 minutes.

    Once thickened, remove the pan from the heat and stir in the vanilla.

    Transfer the custard to a clean bowl.

    Press plastic wrap directly onto the surface of the custard to prevent a skin from forming.

    Allow it to cool, then refrigerate until completely chilled.

    Brit & Skillet Tip

    The custard for trifle should be thicker than a pouring custard. It needs enough structure to form a distinct layer rather than disappearing into the sponge underneath.

    What Is British Custard?

    Custard is an important part of many traditional British desserts.

    British custard is usually made from milk or cream thickened with eggs, although custard powder is also extremely common in British home cooking.

    For trifle, you want a custard thick enough to hold its own between the fruit and cream layers.

    If you enjoyed the baked custard in my Traditional British Custard Tart, trifle is a lovely way to see the same basic combination of eggs, dairy and sugar used in a completely different British dessert.

    Assemble the Sponge Layer

    Cut the sponge cake into chunks if necessary.

    If using ladyfingers, break or cut them into pieces that fit comfortably in your serving bowl.

    Spread some of the jam over the sponge pieces.

    Arrange them across the bottom of a large glass trifle bowl.

    Drizzle the sherry evenly over the sponge.

    Don’t completely drown the cake. You want it pleasantly soaked but still able to hold some texture.

    Can I Make Trifle Without Alcohol?

    Absolutely.

    For an alcohol-free trifle, replace the sherry with:

    • Orange juice
    • Apple juice
    • Cranberry juice
    • A little of the juice released by the berries

    This makes the trifle suitable for children and anyone avoiding alcohol.

    Add the Fruit

    Spoon the prepared strawberries and raspberries over the sponge, including some of the juices that have collected in the bowl.

    For a particularly pretty presentation, press several strawberry slices against the inside of the glass bowl before adding the rest of the fruit.

    This creates a visible ring of strawberries around the finished trifle.

    Add the Custard

    Make sure the custard is completely cool before assembling this layer.

    Spoon the chilled custard over the fruit.

    Gently spread it into an even layer.

    Try not to stir the layers together — part of the beauty of a trifle is being able to see each one through the glass bowl.

    Cover and refrigerate for at least 2 hours before adding the final cream layer.

    Make the Whipped Cream

    Place the cold heavy whipping cream, powdered sugar and vanilla in a large bowl.

    Whip until soft-to-medium peaks form.

    The cream should hold its shape but still look soft and billowy.

    Avoid whipping until it becomes extremely stiff.

    In British recipes you may see double cream used here. American heavy whipping cream works beautifully as a substitute.

    For more help translating British ingredients into their American equivalents, see my British Baking Ingredients Americans Need to Know guide.

    Finish the Trifle

    Spoon the whipped cream over the chilled custard.

    You can spread it casually with a spoon or create soft swirls across the surface.

    Decorate with the reserved strawberries and raspberries.

    Add a scattering of toasted sliced almonds if you like.

    Return the trifle to the refrigerator until you’re ready to serve.

    Does Traditional Trifle Have Jelly?

    This is where British trifle can become surprisingly controversial!

    Many British families consider a layer of fruit jelly essential, while others wouldn’t dream of putting jelly in their trifle.

    In Britain, jelly refers to the gelatin dessert Americans generally know by the brand name Jell-O.

    If you’d like to include it, prepare a raspberry or strawberry gelatin dessert according to the package directions, using slightly less water than directed for a firmer set.

    Pour it over the sponge and fruit and refrigerate until completely set before adding the custard.

    If you prefer a softer, more old-fashioned fruit-and-custard trifle, simply leave the jelly out.

    Both versions have a long place in British home cooking.

    Fresh Fruit or Canned Fruit?

    Either works.

    Fresh berries make the trifle particularly beautiful and give it a fresh flavor.

    Canned peaches, pears or fruit cocktail have also appeared in countless British trifles over the years.

    If using canned fruit, drain it well before adding it.

    You can even use a little of the fruit juice to soak the sponge in an alcohol-free version.

    Can I Use Store-Bought Custard?

    Yes.

    Homemade custard gives you excellent control over the thickness, but convenience has always had a place in British home cooking.

    If you can find a thick refrigerated vanilla custard, it can be used.

    British-style custard made from custard powder is another option.

    Avoid very thin pouring custards because they can make the lower layers watery.

    Why Is My Trifle Watery?

    Too much liquid is usually the culprit.

    Possible causes include:

    • Using too much sherry or fruit juice
    • Adding very wet fruit
    • Using custard that is too thin
    • Adding custard before it has cooled
    • Using whipped cream that hasn’t been whipped enough

    Each layer should be moist, but the finished trifle shouldn’t have liquid collecting at the bottom of the bowl.

    Why Did My Trifle Layers Mix Together?

    The key is allowing the layers to cool and set.

    Never pour warm custard over the fruit.

    Once the custard has been added, refrigerating the trifle before adding the whipped cream helps keep those beautiful layers distinct.

    A large glass bowl also gives you plenty of room to spread each layer gently rather than pressing everything together.

    Can I Make Trifle Ahead of Time?

    Yes — and that’s one of the best things about it.

    You can assemble the sponge, fruit and custard layers the day before serving.

    Cover the bowl and refrigerate overnight.

    Add the whipped cream and fresh decorations either later that day or several hours before serving.

    This makes trifle particularly useful for holidays and entertaining.

    Brit & Skillet Tip

    If you’re making trifle for a gathering, do most of the work the night before. On the day itself, all you need to do is add the whipped cream and decorations.

    How Long Does Trifle Keep?

    Cover leftover trifle and store it in the refrigerator.

    It is best eaten within 2–3 days.

    The sponge will continue to soften as it sits, but that’s part of the traditional trifle texture.

    Because the dessert contains custard and whipped cream, don’t leave it sitting at room temperature for extended periods.

    Can You Freeze Trifle?

    I don’t recommend freezing an assembled trifle.

    Custard and whipped cream can both change texture after freezing, while fresh fruit can release additional liquid as it thaws.

    Fortunately, trifle is an excellent refrigerator dessert and can already be prepared well in advance.

    What to Serve with British Trifle

    Nothing!

    Trifle is one of those desserts that really doesn’t need anything alongside it.

    It’s particularly lovely for:

    • Christmas
    • Easter
    • Sunday lunch
    • Afternoon tea
    • Family gatherings
    • Summer celebrations

    For an afternoon-tea-style spread, you could serve smaller portions alongside my Classic British Scones and Traditional British Butterfly Cakes.

    Traditional British Trifle

    Prep time: 40 minutes
    Custard cooling/chilling: 2 hours
    Final chilling: At least 2 hours
    Serves: 10–12

    Traditional British trifle is gloriously old-fashioned: soft sponge, jam, juicy fruit, thick custard and clouds of whipped cream all piled together in one beautiful glass bowl.

    You can make it with or without sherry, add jelly or leave it out, and use whichever fruits your family loves. That’s part of the charm — there isn’t just one trifle that every British family agrees upon.

    And once you have a proper trifle sitting in the middle of the table, it certainly feels like an occasion.

    For more nostalgic puddings, cakes, pies and savory classics, explore all of my British Recipes made approachable for American kitchens.


  • Traditional Welsh Rarebit: An Easy Recipe for American Kitchens

    Traditional Welsh Rarebit: An Easy Recipe for American Kitchens

    Welsh rarebit is one of those wonderfully simple British dishes that manages to be far more delicious than its short ingredient list suggests. Thick slices of toasted bread are covered with a rich, savory cheese mixture flavored with mustard and Worcestershire sauce, then placed under the broiler until bubbling and beautifully browned.

    Despite the name, there is no rabbit involved. Welsh rarebit is essentially the ultimate British cheese on toast — although calling it simply cheese on toast doesn’t quite do it justice.

    It’s quick enough for lunch, comforting enough for supper and particularly good on a cold day with a cup of tea or a pint of ale.

    If you’ve never made Welsh rarebit before, this traditional version is an easy place to start, with ingredients readily available in American supermarkets.

    What Is Welsh Rarebit?

    Welsh rarebit is a traditional dish made by spooning or spreading a seasoned cheese mixture over toasted bread and cooking it until hot, bubbling and golden.

    The cheese mixture usually contains a strong Cheddar cheese along with mustard, Worcestershire sauce and often ale or beer.

    Unlike ordinary cheese on toast, the ingredients are combined into a thick sauce before being spread over the bread. That gives Welsh rarebit its distinctive creamy texture and much deeper flavor.

    The dish has been associated with Britain for centuries and remains particularly connected with Wales.

    Why Is It Called Welsh Rarebit?

    The name has a rather curious history.

    Earlier versions of the dish were known as “Welsh rabbit,” despite containing no rabbit at all. Over time, “rarebit” became the commonly used name for the cheese dish.

    Whatever the exact origin of the joke behind the name, one thing is certain: there is absolutely no rabbit in Welsh rarebit.

    Ingredients

    • 8 oz (225g) sharp or extra-sharp Cheddar cheese, freshly grated
    • 1 tablespoon (14g) unsalted butter
    • 1 tablespoon (8g) all-purpose flour
    • 1/3 cup (80ml) brown ale, amber ale or milk
    • 1 teaspoon English mustard or Dijon mustard
    • 1 teaspoon Worcestershire sauce
    • 1/4 teaspoon freshly ground black pepper
    • Pinch of cayenne pepper, optional
    • 1 large egg yolk
    • 4 thick slices sturdy bread
    • Chopped fresh chives or parsley, optional, for serving

    What Kind of Cheese Should I Use?

    A mature British Cheddar is the classic choice.

    In an American supermarket, look for a sharp or extra-sharp Cheddar with plenty of flavor.

    Avoid mild Cheddar if possible. Welsh rarebit has only a handful of ingredients, so the flavor of the cheese really matters.

    Freshly grating the cheese also helps it melt more smoothly than pre-shredded cheese.

    Brit & Skillet Tip

    British recipes often use the word mature to describe Cheddar. In an American grocery store, sharp or extra-sharp Cheddar is the closest equivalent.

    If you’re learning your way around other British ingredient terminology, my British Baking Ingredients Americans Need to Know guide explains several other common differences you’ll encounter in British recipes.

    What Kind of Bread Is Best for Welsh Rarebit?

    Choose bread sturdy enough to support the cheese topping.

    Good choices include:

    • Sourdough
    • Country-style white bread
    • Thick-cut sandwich bread
    • Rustic whole-grain bread

    Very thin or extremely soft bread can become soggy underneath the cheese mixture.

    The bread is toasted before the topping is added, which helps it stay crisp.

    For another classic British recipe where bread takes center stage, try my Traditional Bread and Butter Pudding.

    Can I Make Welsh Rarebit Without Beer?

    Absolutely.

    Ale adds a traditional malty flavor, but Welsh rarebit can easily be made without alcohol.

    Simply replace the ale with the same quantity of whole milk.

    You can also use a non-alcoholic brown or amber ale if you’d like some of the beer flavor without the alcohol.

    What Kind of Beer Should I Use?

    A brown ale, amber ale or mild British-style ale works particularly well.

    Avoid extremely bitter or heavily hopped beers such as many IPAs. Their bitterness can become much more noticeable when combined with the strong cheese and mustard.

    You only need a small amount, so choose something you’d be happy to drink alongside the finished rarebit.

    How to Make Traditional Welsh Rarebit

    1. Toast the Bread

    Toast the bread until golden and fairly crisp on both sides.

    Place the slices on a baking sheet and set aside.

    Preheat your broiler.

    2. Make the Base

    Melt the butter in a small saucepan over medium-low heat.

    Add the flour and stir continuously for about 1 minute.

    Slowly add the ale or milk while stirring.

    Continue cooking for another minute or two until the mixture begins to thicken.

    3. Add the Cheese

    Reduce the heat to low.

    Add the grated Cheddar a handful at a time, stirring until melted before adding more.

    Stir in the mustard, Worcestershire sauce, black pepper and optional cayenne.

    The mixture should become thick, smooth and spreadable rather than runny.

    Remove the pan from the heat.

    4. Add the Egg Yolk

    Allow the cheese mixture to cool for about a minute.

    Stir in the egg yolk until completely combined.

    Do not return the mixture to a strong heat after adding the yolk.

    Brit & Skillet Tip

    The finished rarebit mixture should be thick enough to sit on top of the toast rather than running over the sides. If it looks very loose, let it cool for a few minutes before spreading it onto the bread.

    5. Top the Toast

    Divide the cheese mixture evenly between the four slices of toasted bread.

    Spread it almost to the edges.

    6. Broil

    Place the baking sheet under the broiler.

    Broil for approximately 2–4 minutes, watching it very closely.

    The cheese should be bubbling with deeply golden patches across the surface.

    Broilers vary enormously, so don’t walk away from it.

    Remove from the oven and serve immediately.

    What Is English Mustard?

    Traditional English mustard is considerably stronger and hotter than standard yellow American mustard.

    Brands such as Colman’s are commonly used in Britain.

    If you don’t have English mustard, Dijon mustard makes an excellent substitute and is readily available in American supermarkets.

    I wouldn’t recommend ordinary American yellow mustard here because its flavor is quite different.

    Worcestershire Sauce in Welsh Rarebit

    Worcestershire sauce adds savory depth and a little acidity to the cheese mixture.

    It’s a classic British pantry ingredient and is widely available in the United States.

    You don’t need much — about a teaspoon is enough to deepen the flavor without making the rarebit taste strongly of Worcestershire sauce.

    Can I Just Put Sliced Cheese on the Bread?

    You can make cheese on toast that way, but it won’t really have the same texture or flavor as Welsh rarebit.

    The seasoned cheese sauce is what makes the dish distinctive.

    Combining Cheddar with mustard, Worcestershire sauce and ale produces something richer and more complex than simply melting cheese over toast.

    Why Is My Welsh Rarebit Runny?

    The topping should be thick and spreadable.

    If yours is too loose, a few things may have happened:

    • Too much ale or milk was added.
    • The flour mixture wasn’t cooked long enough to thicken.
    • The cheese mixture was still extremely hot when spread on the bread.
    • A particularly moist cheese was used.

    Letting the mixture stand for several minutes will often thicken it considerably.

    Why Did My Cheese Sauce Turn Grainy?

    Cheese sauces can become grainy when they’re exposed to excessive heat.

    Once you begin adding the Cheddar, keep the saucepan over low heat and stir gently.

    Freshly grated cheese also melts more reliably than packaged shredded cheese, which often contains anti-caking ingredients.

    Welsh Rarebit Variations

    As with many traditional dishes, there are plenty of variations.

    Buck Rarebit

    Place a fried or poached egg on top of Welsh rarebit and it becomes what is commonly known as buck rarebit.

    It makes an especially satisfying breakfast or brunch.

    Tomato Rarebit

    Slices of fresh tomato can be placed on the toast before adding the cheese mixture.

    Mustard Variations

    English mustard provides the strongest traditional flavor, while Dijon produces a slightly gentler result.

    You can adjust the amount depending on how much mustard heat you enjoy.

    What to Serve with Welsh Rarebit

    Welsh rarebit works beautifully as a simple lunch or light supper.

    Try serving it with:

    • A crisp green salad
    • Sliced tomatoes
    • Pickles or chutney
    • Tomato soup
    • Roasted vegetables

    For a larger British-inspired meal, you could serve a smaller portion before something hearty like my Traditional British Beef and Ale Stew.

    And if you’re looking for another classic savory British dish that’s perfect for lunch or a picnic, try my Traditional British Scotch Eggs.

    Can I Make Welsh Rarebit Ahead?

    The cheese mixture can be prepared ahead of time.

    Allow it to cool, transfer it to an airtight container and refrigerate it for up to 2 days.

    When you’re ready to eat, toast the bread, spread the chilled rarebit mixture over it and broil until bubbling and golden.

    You may need an additional minute under the broiler when starting with a cold topping.

    Can I Freeze Welsh Rarebit?

    The cheese mixture can technically be frozen, although its texture may change slightly after thawing.

    Because it’s so quick to prepare, I prefer making it fresh or refrigerating the topping for a day or two.

    Traditional Welsh Rarebit

    Prep time: 10 minutes
    Cook time: 10 minutes
    Serves: 4

    Welsh rarebit is a brilliant example of traditional British cooking at its simplest: good bread, strong cheese and a few carefully chosen seasonings transformed into something far greater than the sum of their parts.

    Whether you make it with ale or milk, it’s warm, savory, deeply cheesy and remarkably satisfying.

    For more classic dishes like this one, explore all of my British Recipes made approachable for American kitchens.

  • Traditional British Custard Tart: An Easy Recipe for American Bakers

    Traditional British Custard Tart: An Easy Recipe for American Bakers

    There are few British desserts quite as comforting as a traditional custard tart. With crisp, buttery pastry surrounding a smooth baked egg custard and a generous dusting of nutmeg across the top, it is simple, old-fashioned baking at its best.

    Custard tarts have been enjoyed in Britain for centuries, and versions of the dessert can be found everywhere from traditional bakeries to afternoon tea tables. Unlike an American custard pie, a British custard tart is usually fairly shallow, with a delicate layer of softly set custard rather than a deep pie filling.

    The good news is that you don’t need any unusual British ingredients to make one at home. This recipe uses ingredients readily available in American supermarkets, with both US and metric measurements.

    What Is a British Custard Tart?

    A traditional British custard tart consists of a shortcrust pastry shell filled with a simple mixture of eggs, cream, milk and sugar.

    Freshly grated nutmeg is scattered generously over the custard before baking, giving the tart its distinctive appearance and warm, fragrant flavor.

    The trick is to bake the custard gently. It should be set around the edges but still have a slight wobble in the center when it comes out of the oven.

    As it cools, the custard finishes setting into a wonderfully smooth, creamy filling.

    Ingredients

    For the Shortcrust Pastry

    • 1 1/2 cups (190g) all-purpose flour
    • 2 tablespoons (25g) granulated sugar
    • 1/4 teaspoon salt
    • 8 tablespoons (113g) cold unsalted butter, cut into small pieces
    • 1 large egg yolk
    • 2–3 tablespoons (30–45ml) ice-cold water

    For the Custard Filling

    • 4 large eggs
    • 1/3 cup (65g) granulated sugar
    • 1 cup (240ml) heavy cream
    • 1 cup (240ml) whole milk
    • 1 teaspoon vanilla extract
    • 1/4 teaspoon salt
    • Freshly grated nutmeg, for the top

    Equipment

    You will need a 9-inch (23cm) tart pan, preferably one with a removable bottom.

    You will also need parchment paper and pie weights or dried beans for blind baking the pastry.

    Make the Shortcrust Pastry

    Place the flour, sugar and salt in a large mixing bowl.

    Add the cold butter and rub it into the flour with your fingertips until the mixture resembles coarse breadcrumbs with a few slightly larger pieces of butter remaining.

    Add the egg yolk.

    Gradually add the ice water, one tablespoon at a time, mixing gently until the dough just begins to come together.

    Avoid adding more water than necessary.

    Bring the dough together into a disc, wrap it and refrigerate for at least 30 minutes.

    Roll Out the Pastry

    Lightly flour your work surface.

    Roll the chilled pastry into a circle large enough to line a 9-inch tart pan.

    Carefully lift the pastry into the pan and gently press it into the bottom and sides without stretching it.

    Trim away most of the excess pastry, leaving a small amount above the rim because the pastry may shrink slightly while baking.

    Prick the bottom lightly with a fork.

    Refrigerate the lined tart shell for another 20 minutes.

    Blind Bake the Pastry

    Preheat the oven to 375°F (190°C).

    Line the chilled pastry shell with parchment paper and fill it with pie weights or dried beans.

    Bake for 15 minutes.

    Carefully remove the parchment and weights.

    Return the pastry shell to the oven for another 7–10 minutes, until the base looks dry and is just beginning to turn golden.

    Remove it from the oven.

    Reduce the oven temperature to 325°F (165°C).

    Brit & Skillet Tip

    Blind baking is particularly important with a custard tart. The liquid filling doesn’t give the pastry much opportunity to crisp once it has been added, so partially baking the shell first helps prevent the dreaded soggy bottom.

    Make the Custard

    Crack the eggs into a large bowl and whisk gently.

    Add the sugar and whisk just until combined.

    Try not to whisk too vigorously because you don’t want lots of air bubbles in the custard.

    Place the cream and milk in a saucepan over medium-low heat.

    Heat until steaming and hot but do not allow it to boil.

    Slowly pour the warm milk mixture into the eggs while whisking continuously.

    Add the vanilla and salt.

    For an especially smooth custard, pour the mixture through a fine-mesh strainer into a large measuring jug or clean bowl.

    Fill the Tart

    Place the blind-baked tart shell on a baking sheet.

    Carefully pour the custard into the pastry shell.

    Grate a generous layer of fresh nutmeg over the surface.

    If possible, place the tart on the oven rack before pouring in the final little bit of custard. This makes it much easier to get a full tart into the oven without spilling it.

    Brit & Skillet Tip

    Freshly grated nutmeg makes a noticeable difference here. Nutmeg is one of the defining flavors of a traditional British custard tart, rather than merely a decoration on top.

    Bake the Custard Tart

    Bake at 325°F (165°C) for approximately 30–40 minutes.

    Start checking it toward the lower end of the baking time.

    The outer portion of the custard should look set, while the very center should still wobble gently when the tart is moved.

    It should not ripple like liquid.

    Do not wait until the entire filling becomes completely firm in the oven. Overbaking is one of the main causes of a rubbery or cracked custard.

    Remove the tart from the oven and allow it to cool completely in the pan.

    How Do I Know When Baked Custard Is Done?

    This is probably the most important part of making custard tart.

    Gently shake the tart.

    The edges should be set, but an area in the center should move with a soft jiggle.

    Think wobble rather than wave.

    The residual heat will continue cooking the custard as the tart cools.

    If the custard puffs dramatically or begins developing cracks, it has probably been baked a little too long.

    British Custard Tart vs American Custard Pie

    The two desserts are certainly related, but they are not quite the same.

    British custard tarts are traditionally shallower and often have a higher pastry-to-custard ratio than American custard pies.

    Nutmeg is also an especially characteristic part of the British version.

    Traditional British recipes often use shortcrust pastry, producing a crisp, crumbly shell around the delicate custard.

    Can I Use Store-Bought Pastry?

    Yes.

    Homemade shortcrust pastry gives the tart a lovely buttery flavor, but refrigerated pie crust can be used when you want to save time.

    Choose an unflavored pastry rather than something particularly sweet.

    You should still blind bake it before adding the custard.

    Can I Make Individual Custard Tarts?

    Absolutely.

    Small custard tarts are a classic British bakery treat.

    Divide the pastry between a muffin tin or individual tart tins, blind bake the shells and fill them with the custard mixture.

    Because the tarts are smaller, they will bake more quickly than one large tart, so begin checking them after about 15–20 minutes.

    Why Did My Custard Crack?

    Cracks usually mean the custard became too hot or baked for too long.

    Custard is much gentler than cake batter. You don’t want it completely firm when you remove it from the oven.

    Using the lower oven temperature and removing the tart while the center still has a slight wobble helps keep the filling silky and smooth.

    Why Is My Pastry Soggy?

    There are several possible causes:

    • The pastry wasn’t blind baked long enough.
    • The pastry shell was still pale or damp when the filling was added.
    • The custard was added to completely raw pastry.
    • The finished tart was cut while it was still very warm.

    Give the tart plenty of time to cool before slicing.

    Can I Make Custard Tart Ahead of Time?

    Yes.

    Custard tart is an excellent make-ahead dessert because it needs time to cool and set properly.

    You can make it earlier in the day or the day before serving.

    Once completely cooled, cover and refrigerate it.

    For the nicest texture, allow the tart to sit at room temperature for around 20–30 minutes before serving.

    How to Store British Custard Tart

    Because the filling contains eggs and dairy, leftover custard tart should be refrigerated.

    Cover it and store it in the refrigerator for up to 3 days.

    The pastry will gradually soften in the refrigerator, so the tart is at its best during the first day or two.

    Can You Freeze Custard Tart?

    You can, although baked custard isn’t quite as silky after freezing and thawing.

    For the best texture, I recommend enjoying this tart fresh or refrigerated rather than freezing it.

    How to Serve a Traditional Custard Tart

    Custard tart doesn’t need much accompaniment.

    Serve it simply on its own with a cup of tea.

    It works beautifully as part of an afternoon tea spread alongside other traditional British bakes, or as a light dessert after dinner.

    It can be served cool or at room temperature rather than piping hot.

    For another nostalgic afternoon tea favorite, try my Traditional British Butterfly Cakes

    Brit & Skillet Tip

    Don’t hide the custard under whipped cream, sauces or elaborate toppings. The contrast between buttery pastry, delicate egg custard and fragrant nutmeg is exactly what makes this old-fashioned British tart so good.

    Traditional British Custard Tart

    Prep time: 30 minutes
    Chilling time: 50 minutes
    Blind baking: 22–25 minutes
    Final baking: 30–40 minutes
    Serves: 8

    A traditional British custard tart is proof that some of the best desserts don’t need a long list of ingredients. Crisp shortcrust pastry, softly baked custard and freshly grated nutmeg are all it takes.

    It’s an especially lovely recipe for anyone discovering traditional British baking — familiar enough to feel comforting, but unmistakably British once that nutmeg-topped tart arrives at the table.

    Looking for more classics? Explore all of my British recipes for more traditional dishes and bakes made approachable for American kitchens.

  • Traditional British Chicken and Leek Pie: An Easy Recipe for American Kitchens

    Traditional British Chicken and Leek Pie: An Easy Recipe for American Kitchens

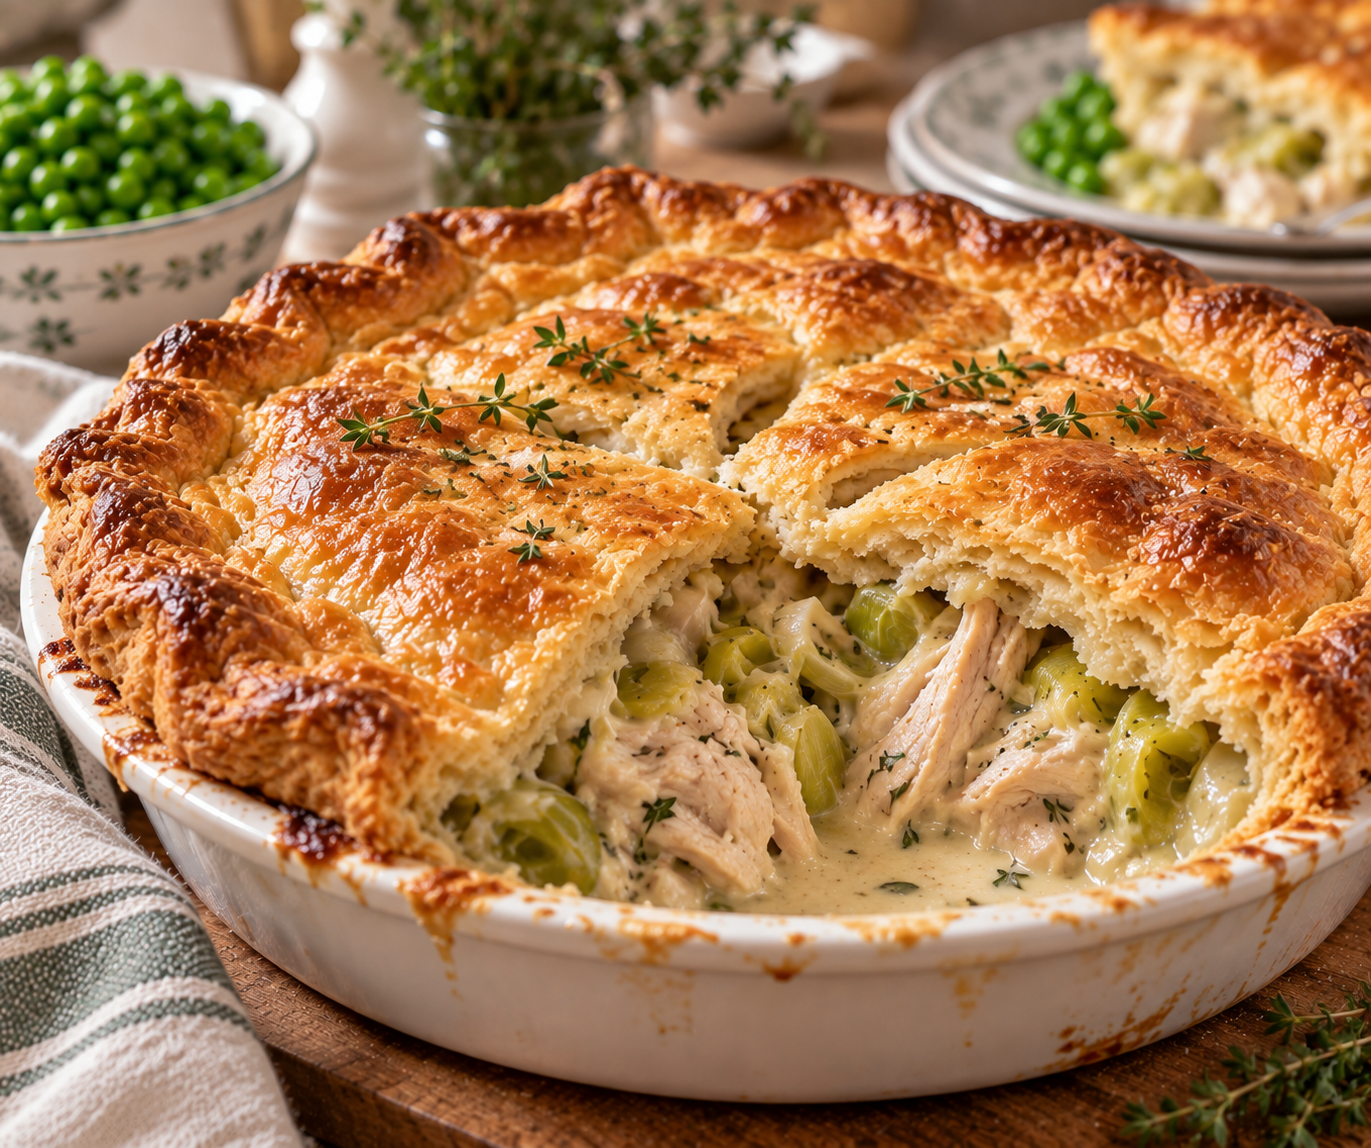
    Chicken and leek pie is British comfort food at its best.

    Tender pieces of chicken and sweet, softened leeks are folded into a creamy herb sauce, then tucked beneath a crisp, golden layer of puff pastry.

    It’s rich without being overly heavy, familiar without being boring and exactly the sort of dinner that feels right when the evenings start getting colder.

    Chicken and leek is also one of those flavour combinations that appears again and again in British cooking. Leeks have a gentler, sweeter flavour than ordinary onions, which makes them particularly good with chicken and cream.

    For American cooks, there’s nothing especially difficult about making a proper chicken and leek pie. You can use chicken thighs or breasts, ordinary American chicken broth and store-bought frozen puff pastry.

    The biggest trick is simply allowing the filling to cool before putting the pastry on top.

    Here’s how to make a classic British-style chicken and leek pie in an American kitchen.

    What Is British Chicken and Leek Pie?

    Chicken and leek pie is a savoury British pie filled with chicken and leeks in a creamy sauce.

    Some versions are completely enclosed in pastry, while others — including ours — use a pastry lid over a pie dish filled with the chicken mixture.

    Using pastry only on top makes the recipe considerably easier and allows us to use store-bought puff pastry without worrying about a soggy pastry base.

    The filling usually includes chicken stock, cream and herbs.

    You’ll also find variations containing bacon, ham, mushrooms, mustard or cheese.

    We’re keeping this version relatively simple so the chicken and leeks remain the stars.

    What Do Leeks Taste Like?

    Leeks belong to the same family as onions and garlic, but their flavour is milder and slightly sweeter.

    Once slowly cooked in butter, they become beautifully soft.

    That’s why they work so well with chicken.

    American supermarkets usually sell leeks individually or in bunches in the produce section.

    Look for leeks with firm white stalks and fresh-looking green tops.

    Which Part of a Leek Do You Eat?

    For this pie, use the white and pale green portions.

    The dark green leaves are considerably tougher.

    Don’t necessarily throw those away — they’re excellent for flavouring homemade stock.

    Trim off the roots and dark green tops before slicing the remaining leek.

    How Do You Clean Leeks?

    Leeks have layers that can trap quite a surprising amount of dirt and grit.

    After trimming them, slice the leeks lengthwise and rinse thoroughly between the layers.

    Alternatively, slice them first, place the pieces in a large bowl of cold water and swish them around.

    Allow the dirt to sink to the bottom, then lift the leeks out rather than pouring everything through a colander and dumping the grit back over them.

    Should I Use Chicken Thighs or Chicken Breasts?

    Either works.

    I prefer boneless, skinless chicken thighs because they stay juicy and tender in the creamy filling.

    Chicken breasts produce a slightly leaner pie but can dry out more easily.

    If using breasts, be especially careful not to overcook them during the initial cooking stage because they’ll continue cooking in the oven.

    Can I Use Leftover Roast Chicken?

    Absolutely.

    Chicken and leek pie is an excellent way to use leftover roast chicken.

    You’ll need approximately 3 cups (450–500 g) of cooked chicken, cut or torn into bite-sized pieces.

    Skip the initial chicken-cooking step and add the cooked chicken once you’ve made the sauce.

    It’s also a wonderful use for leftover rotisserie chicken.

    What Puff Pastry Should Americans Use?

    Frozen puff pastry from an American supermarket works perfectly well.

    Brands vary in size and thickness, so don’t worry if your pastry sheet doesn’t exactly match the dimensions given in a British recipe.

    You simply need enough pastry to cover the top of your baking dish with a small amount of overhang.

    Thaw it according to the package directions, but keep it cold until you’re ready to use it.

    Warm puff pastry becomes soft and difficult to handle.

    Traditional British Chicken and Leek Pie Recipe

    Prep Time: 30 minutes
    Cooling Time: 20–30 minutes
    Bake Time: 30–35 minutes
    Serves: 6

    Equipment

    • Large skillet or Dutch oven
    • 9-inch (23 cm) deep pie dish or approximately 2-quart baking dish
    • Cutting board
    • Sharp knife
    • Wooden spoon
    • Pastry brush

    Ingredients

    For the Filling

    • 1½ lb (680 g) boneless, skinless chicken thighs or breasts
    • 1 teaspoon fine salt, divided
    • ½ teaspoon freshly ground black pepper
    • 1 tablespoon olive or neutral oil
    • 3 tablespoons (42 g) unsalted butter
    • 2 large leeks, white and pale green portions only, thoroughly cleaned and sliced
    • 2 garlic cloves, minced
    • ¼ cup (30 g) all-purpose flour
    • 1½ cups (360 ml) chicken stock or broth
    • ½ cup (120 ml) heavy cream
    • 1 teaspoon Dijon mustard
    • 1 teaspoon dried thyme or 1 tablespoon fresh thyme leaves
    • 2 tablespoons chopped fresh parsley
    • ½ teaspoon Worcestershire sauce, optional

    For the Pastry

    • 1 sheet frozen puff pastry, approximately 8–10 oz (225–285 g), thawed according to package directions
    • 1 large egg
    • 1 tablespoon water

    Instructions

    1. Prepare the Chicken

    Cut the chicken into irregular bite-sized pieces, approximately 1½ inches (4 cm) across.

    Season with about ½ teaspoon of the salt and the black pepper.

    Brit & Skillet Tip

    Don’t cut the chicken into lots of perfectly tiny cubes.

    Slightly larger, irregular pieces stay juicier during cooking and give the finished pie a much more satisfying homemade texture.

    2. Brown the Chicken

    Heat the oil in a large skillet or Dutch oven over medium-high heat.

    Add the chicken in a single layer.

    Cook for approximately 4–5 minutes, turning occasionally, until lightly browned.

    The chicken doesn’t need to be completely cooked through at this point.

    Transfer it to a plate.

    3. Cook the Leeks

    Reduce the heat to medium-low.

    Add the butter to the same pan.

    Once melted, add the sliced leeks and remaining salt.

    Cook gently for approximately 8–10 minutes, stirring occasionally.

    The leeks should become soft and sweet without developing much colour.

    Add the garlic and cook for another 30 seconds.

    Brit & Skillet Tip

    Don’t rush the leeks.

    Cooking them gently rather than aggressively frying them brings out their natural sweetness and gives the filling its characteristic flavour.

    4. Add the Flour

    Sprinkle the flour over the softened leeks.

    Stir thoroughly and cook for approximately 1–2 minutes.

    The mixture will look quite thick.

    This flour will eventually thicken the chicken stock and cream into our pie sauce.

    5. Add the Chicken Stock

    Gradually pour in the chicken stock while stirring continuously.

    Add a little at first and stir until smooth before adding more.

    This helps prevent lumps.

    Once all the stock has been incorporated, bring the mixture to a gentle simmer.

    6. Add the Cream and Seasonings

    Stir in the heavy cream, Dijon mustard, thyme and optional Worcestershire sauce.

    Return the chicken and any juices on the plate to the pan.

    Simmer gently for approximately 5–7 minutes, stirring occasionally.

    The sauce should become creamy and thick enough to coat the chicken.

    Stir in the parsley.

    Taste and adjust the salt and pepper if necessary.

    How Thick Should the Filling Be?

    The sauce should be thicker than an ordinary cream sauce.

    Drag your wooden spoon through the pan.

    You should briefly be able to see the bottom before the sauce flows back into place.

    Remember that the filling will loosen slightly as the chicken and leeks release moisture in the oven.

    If it seems watery now, continue simmering for another few minutes.

    7. Transfer to the Pie Dish

    Spoon the filling into your pie dish or baking dish.

    Spread it evenly.

    Now leave it to cool for approximately 20–30 minutes.

    It doesn’t need to become refrigerator-cold, but it shouldn’t be steaming hot when the pastry goes on.

    Brit & Skillet Tip

    This is one of the most important steps in the entire recipe.

    Putting cold puff pastry directly over piping-hot filling begins melting the butter in the pastry before it reaches the oven.

    That can prevent the pastry from puffing properly.

    Cool filling + cold pastry = a much better pie.

    8. Preheat the Oven

    While the filling cools, preheat the oven to 400°F (200°C).

    9. Add the Puff Pastry

    Keep the puff pastry refrigerated until you’re ready for it.

    Place the pastry over the cooled filling.

    Trim away excessive overhang, leaving approximately ½–1 inch (1–2.5 cm) around the edge.

    Gently press the pastry against the rim of the dish.

    You can crimp the edges with your fingers or a fork if you’d like.

    10. Cut Steam Vents

    Using the tip of a sharp knife, cut 2–3 small slits in the centre of the pastry.

    These allow steam to escape while the pie bakes.

    11. Add the Egg Wash

    Beat the egg with 1 tablespoon of water.

    Brush a thin layer over the puff pastry.

    Avoid allowing large amounts of egg wash to run down the cut edges of the pastry, which can glue the layers together and interfere with the rise.

    12. Bake

    Place the pie on a baking sheet to catch any bubbling filling.

    Bake at 400°F (200°C) for approximately 30–35 minutes.

    The pastry should be well risen, crisp and deeply golden.

    The filling should be bubbling around the edges.

    13. Rest Before Serving

    Let the pie rest for approximately 10 minutes before serving.

    The filling will be extremely hot straight from the oven and will thicken slightly as it rests.

    What Is the Difference Between British Double Cream and American Heavy Cream?

    British double cream contains more fat than American heavy cream and has a thicker consistency.

    But you don’t need to hunt down imported double cream for this recipe.

    Ordinary American heavy whipping cream or heavy cream works perfectly well.

    Because we’re thickening the sauce with flour, the lower fat content isn’t a problem.

    Can I Use Half-and-Half?

    Yes, although the filling won’t be quite as rich.

    You may need to simmer the sauce slightly longer to achieve the proper consistency.

    I wouldn’t recommend ordinary low-fat milk as a direct substitute because the sauce can become too thin.

    Can I Add Bacon?

    Yes.

    Chicken, leek and bacon is another classic combination.

    Cut approximately 4 oz (115 g) bacon into small pieces and cook it in the pan before browning the chicken.

    Remove the crisp bacon, cook the chicken in some of the rendered fat and return the bacon when you add the chicken to the sauce.

    If your bacon is particularly salty, reduce the added salt accordingly.

    Can I Add Mushrooms?

    Absolutely.

    Add approximately 8 oz (225 g) sliced mushrooms after the leeks have softened.

    Cook until the mushrooms release their liquid and begin to brown before continuing with the flour.

    This creates an earthier, more savoury version of the pie.

    Can I Add Peas?

    Yes.

    Stir approximately 1 cup (140 g) frozen peas into the filling immediately before transferring it to the pie dish.

    There’s no need to thaw them first.

    Can I Use Shortcrust Pastry?

    Yes.

    Puff pastry creates the light, flaky top we’re using here, but shortcrust pastry is another traditional option.

    If you prefer a sturdier, more substantial pastry crust, shortcrust works beautifully.

    Why Didn’t My Puff Pastry Rise?

    The most common reasons are:

    • The filling was too hot
    • The pastry became warm before baking
    • The oven wasn’t fully preheated
    • Too much egg wash ran over the pastry edges
    • The pastry was rolled too thinly

    Keep puff pastry cold and put the assembled pie into a properly heated oven as soon as you’ve added the pastry.

    Why Is My Chicken and Leek Pie Watery?

    The filling probably wasn’t thick enough before it went into the pie dish.

    Leeks and chicken can both release additional moisture during baking.

    Make sure the sauce is distinctly thick and creamy before cooling it.

    If you’ve added mushrooms, cook away their excess liquid before adding the flour.

    Why Is My Chicken Dry?

    Chicken breasts are more prone to drying out than thighs.

    Remember that we’re only lightly cooking the chicken before it goes into the sauce because it will continue cooking in the oven.

    If you want the most forgiving option, use boneless skinless chicken thighs.

    Can I Make Chicken and Leek Pie Ahead?

    Yes.

    Prepare the filling up to one day ahead and refrigerate it in the pie dish.

    When you’re ready to bake, add the cold puff pastry and egg wash.

    You may need to add approximately 5–10 minutes to the baking time if the filling is refrigerator-cold.

    Don’t assemble the puff pastry lid a full day ahead because it can absorb moisture from the filling and lose some of its crispness.

    What to Serve With Chicken and Leek Pie

    This pie is lovely with:

    • Mashed potatoes
    • Buttered peas
    • Steamed green beans
    • Roasted carrots
    • Broccoli
    • Simple green salad

    Because the filling is already creamy, you don’t necessarily need additional gravy.

    For a particularly hearty British dinner, serve it with seasonal vegetables and mashed potatoes.

    How to Store Chicken and Leek Pie

    Allow leftovers to cool, then cover and refrigerate for up to approximately 3 days.

    Reheat individual portions in a 350°F (175°C) oven until thoroughly hot.

    The microwave works too, although the puff pastry will lose some of its crispness.

    Can You Freeze Chicken and Leek Pie?

    Yes.

    For the best result, freeze the filling separately before adding the puff pastry.

    Cool the filling completely and transfer it to a freezer-safe container.

    Freeze for up to approximately 3 months.

    Thaw overnight in the refrigerator, place in your pie dish and add fresh puff pastry before baking.

    You can also freeze a fully assembled unbaked pie, but results vary depending on the brand of puff pastry you’re using.

    Can I Use Rotisserie Chicken?

    Yes, and it makes this recipe considerably quicker.

    Use approximately 3 cups (450–500 g) shredded or chopped cooked chicken.

    Make the leek and cream sauce as directed, then stir the cooked chicken into the finished sauce just long enough to warm through.

    Cool before adding the pastry.

    A Proper British Chicken Pie

    There’s something particularly comforting about breaking through a crisp puff-pastry lid and finding a creamy chicken filling underneath.

    Chicken and leek pie isn’t complicated food.

    Its appeal comes from getting a few simple things right: sweet leeks cooked gently in butter, tender chicken, a properly seasoned creamy sauce and pastry that’s allowed to become genuinely crisp and golden.

    And because store-bought puff pastry does most of the difficult work, it’s far easier to make at home than its appearance suggests.

    Serve it with mashed potatoes and peas on a cold evening and you’ve got the sort of uncomplicated British dinner that’s very difficult not to love.

    For more traditional British comfort food, try our Traditional British Steak and Ale Pie, Traditional British Fish Pie, Traditional Cottage Pie, Traditional Lancashire Hotpot and Traditional British Beef and Ale Stew.

    And browse all of our Brit & Skillet Recipes for more British favourites made approachable for American kitchens.

  • Traditional British Butterfly Cakes: An Easy Recipe for American Bakers

    Traditional British Butterfly Cakes: An Easy Recipe for American Bakers

    Butterfly cakes are one of those wonderfully simple British bakes that can instantly transport you back to childhood.

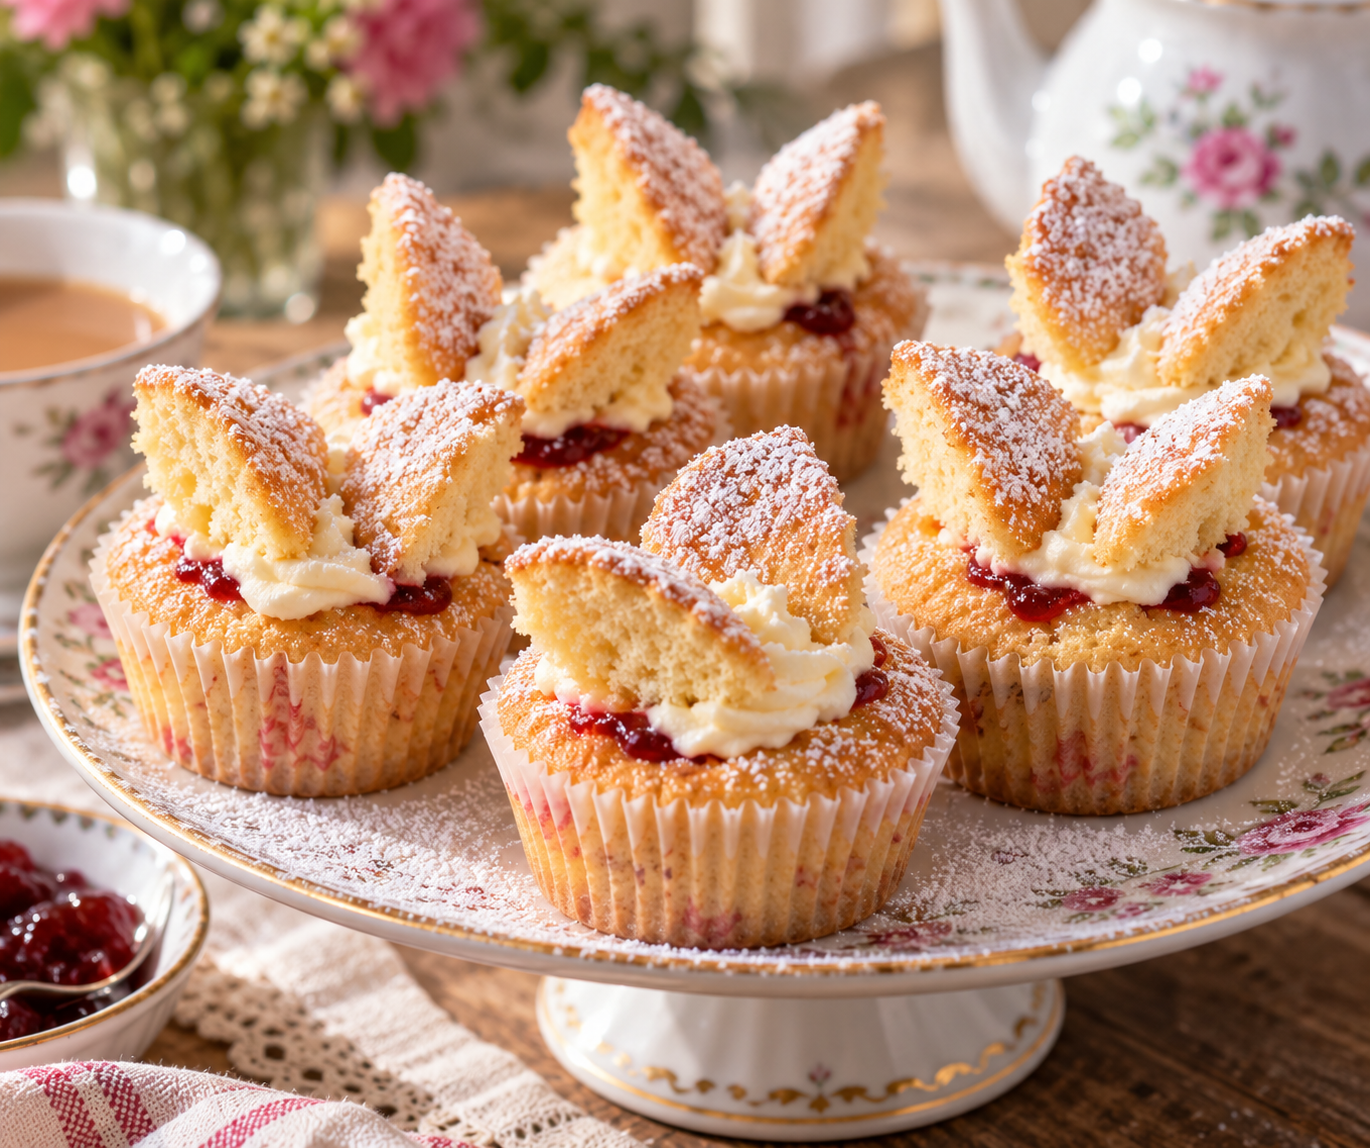
    They’re small, light vanilla cakes with a little piece cut from the top, a spoonful of buttercream tucked into the centre and the removed cake cut in half and placed back on top to resemble a pair of butterfly wings.

    Finish them with a dusting of powdered sugar and you have one of the prettiest little cakes you can make without needing piping skills, complicated decorations or specialty equipment.

    In Britain, butterfly cakes are closely related to fairy cakes — the small individual cakes that appeared at countless children’s parties, school bake sales and afternoon teas.

    For American bakers, they’re perhaps easiest to imagine as the smaller British cousin of a cupcake.

    But there are a few differences.

    British fairy cakes are traditionally smaller and less heavily frosted than American cupcakes. Instead of a towering swirl of buttercream, butterfly cakes have just enough filling to hold their delicate little cake wings in place.

    Here’s how to make them in an American kitchen.

    What Are British Butterfly Cakes?

    Butterfly cakes are individual vanilla sponge cakes made in a muffin or fairy-cake pan.

    Once cooled, a small circle or cone of cake is removed from the top.

    The hole is filled with buttercream, and the piece of cake that was removed is cut in half.

    Those two halves are then placed upright in the buttercream so they resemble butterfly wings.

    A dusting of powdered sugar finishes them.

    They’re sometimes filled with jam as well as buttercream, and lemon versions are also popular.

    Are Butterfly Cakes the Same as Fairy Cakes?

    Not exactly, although the terms are closely connected.

    A fairy cake is the small British sponge cake itself.

    Turn that fairy cake into a butterfly cake by cutting out the top, filling it and arranging the cut cake pieces as wings.

    In everyday British baking, you’ll see plenty of variation in how the names are used.

    Are British Fairy Cakes the Same as American Cupcakes?

    They’re similar, but traditional British fairy cakes are generally smaller and more restrained.

    American cupcakes are often baked in deeper muffin cups and topped with a generous amount of frosting.

    A classic fairy cake is a simple little sponge that rises just above its paper case.

    For butterfly cakes, that’s useful because we want enough cake at the top to create our wings without producing an enormous cupcake.

    You can still make these in a standard American 12-cup muffin pan — just don’t overfill the liners.

    What Makes a Good Butterfly Cake?

    The sponge should be:

    • Light
    • Soft
    • Buttery
    • Gently vanilla-flavoured
    • Firm enough to cut without falling apart

    The buttercream should be smooth and creamy without overwhelming the little cake underneath.

    And the wings certainly don’t need to be identical.

    In fact, slightly uneven butterfly cakes look much more like the homemade British cakes many of us remember.

    Traditional British Butterfly Cakes Recipe

    Prep Time: 25 minutes
    Bake Time: 16–20 minutes
    Cooling and Decorating: 30 minutes
    Makes: 12 butterfly cakes

    Equipment

    • Standard 12-cup muffin pan
    • 12 paper cupcake liners
    • Large mixing bowl
    • Electric hand mixer or stand mixer
    • Spatula
    • Small sharp knife
    • Wire cooling rack
    • Fine-mesh sieve for powdered sugar

    Ingredients

    For the Cakes

    • ½ cup (113 g) unsalted butter, softened
    • ½ cup plus 1 tablespoon (115 g) granulated sugar
    • 2 large eggs, room temperature
    • 1 teaspoon vanilla extract
    • 1 cup (125 g) all-purpose flour
    • 1½ teaspoons baking powder
    • ¼ teaspoon fine salt
    • 2 tablespoons (30 ml) whole milk, as needed

    For the Buttercream

    • ½ cup (113 g) unsalted butter, softened
    • 1½ cups (180 g) powdered sugar
    • 1 teaspoon vanilla extract
    • 1–2 tablespoons (15–30 ml) whole milk or heavy cream
    • Small pinch of salt

    To Finish

    • 2–3 tablespoons strawberry or raspberry jam, optional
    • Powdered sugar, for dusting

    Instructions

    1. Prepare the Pan

    Preheat the oven to 350°F (175°C).

    Line a standard 12-cup muffin pan with paper liners.

    Brit & Skillet Tip

    Traditional British fairy cakes are smaller than many American cupcakes.

    If you’re using a standard American muffin pan, don’t fill the cases as generously as you would for big bakery-style cupcakes.

    We want relatively neat little cakes rather than enormous domes.

    2. Cream the Butter and Sugar

    Place the softened butter and granulated sugar in a large mixing bowl.

    Beat with an electric mixer for approximately 3–4 minutes, until noticeably lighter and fluffy.

    Don’t rush this step.

    Creaming incorporates air into the mixture and helps give the cakes their light texture.

    3. Add the Eggs

    Add the eggs one at a time, beating well after each addition.

    Add the vanilla extract.

    If the mixture begins to look slightly curdled after adding the eggs, don’t panic. Add a spoonful of the measured flour and continue mixing.

    4. Add the Dry Ingredients

    In a separate bowl, whisk together the flour, baking powder and salt.

    Add the dry ingredients to the butter mixture.

    Fold gently with a spatula until almost combined.

    Add enough milk — usually around 2 tablespoons — to produce a soft batter that drops easily from a spoon.

    Don’t overmix.

    5. Fill the Cases

    Divide the batter evenly between the 12 paper liners.

    Each should be approximately half to two-thirds full.

    Smooth the tops lightly.

    6. Bake

    Bake for approximately 16–20 minutes, until the cakes are lightly golden and spring back when gently touched in the centre.

    A toothpick inserted into the middle should come out clean or with just a few soft crumbs.

    Brit & Skillet Tip

    Don’t wait for the cakes to become deeply browned.

    Butterfly cakes are supposed to have a soft, light sponge. Overbaking will make them dry and more difficult to cut neatly later.

    7. Cool Completely

    Allow the cakes to cool in the pan for approximately 5 minutes.

    Transfer them to a wire rack and leave them until completely cool.

    Don’t attempt to decorate warm cakes — the buttercream will melt.

    Make the Buttercream

    8. Beat the Butter

    Place the softened butter in a clean mixing bowl.

    Beat for approximately 2 minutes until smooth and creamy.

    9. Add the Powdered Sugar

    Add the powdered sugar gradually, beating on low speed initially so you don’t cover the kitchen in sugar.

    Once incorporated, increase the speed and beat until light and fluffy.

    Add the vanilla and pinch of salt.

    Add the milk or cream a little at a time until the buttercream is soft enough to spoon easily but still firm enough to support the cake wings.

    Brit & Skillet Tip

    The buttercream doesn’t need to be piped.

    A small spoonful placed in the centre of each cake gives butterfly cakes the simple homemade appearance we’re looking for.

    Assemble the Butterfly Cakes

    10. Cut the Tops

    Using a small sharp knife, cut a shallow circle from the top of each cake.

    Angle the knife slightly inward so you remove a small cone-shaped piece of sponge.

    Set each piece beside its cake so you don’t lose track of them.

    Don’t cut too deeply — you only need enough space for the filling.

    11. Add Jam, If Using

    For a jam-and-buttercream version, place approximately ½ teaspoon of strawberry or raspberry jam into the hollow of each cake.

    The jam is optional but adds a lovely tart contrast to the sweet buttercream.

    12. Add the Buttercream

    Spoon approximately 1 tablespoon of buttercream into each hollow.

    Don’t worry about making it perfectly smooth.

    13. Make the Butterfly Wings

    Take the piece of cake you removed from the top and cut it in half.

    Place the two halves into the buttercream at a slight angle, with the cut sides facing inward.

    They should resemble a pair of little butterfly wings.

    Repeat with the remaining cakes.

    Brit & Skillet Tip

    Don’t obsess over symmetrical wings.

    Some will stand taller, some will lean and some will look more convincing as butterflies than others.

    That’s part of their charm.

    These are supposed to look like homemade fairy cakes, not identical factory-produced cupcakes.

    14. Dust With Powdered Sugar

    Just before serving, lightly dust the tops with powdered sugar.

    And that’s it.

    No piping bag required.

    Can I Use Self-Rising Flour?

    Yes.

    British butterfly cake recipes commonly use self-raising flour.

    If using self-rising flour, replace the all-purpose flour with the same weight — 125 g — and omit the baking powder and salt.

    If you’re unsure about the difference between British and American baking ingredients, our British Baking Ingredients Americans Need to Know guide explains some of the terminology you’ll encounter in British recipes.

    Can I Make Butterfly Cakes With American Cake Flour?

    You can, but it isn’t necessary.

    Regular American all-purpose flour produces an excellent result when combined with baking powder.

    The traditional cake should be light but still sturdy enough to cut and decorate.

    Can I Use Salted Butter?

    Yes.

    Simply omit the additional salt from the sponge and buttercream.

    British baking traditionally uses plenty of butter, so this is one recipe where using good-quality butter makes a noticeable difference.

    Can I Add Lemon?

    Absolutely.

    For lemon butterfly cakes, add the finely grated zest of 1 lemon to the cake batter.

    Replace the vanilla in the buttercream with approximately 1 tablespoon fresh lemon juice, adding additional powdered sugar if necessary to maintain the right consistency.

    Lemon curd can also replace the jam.

    If you enjoy British lemon cakes, our Traditional British Lemon Drizzle Cake is another lovely one to try.

    Can I Use Chocolate Buttercream?

    Yes.

    Chocolate isn’t the most traditional version, but there’s no reason you can’t use it.

    Replace approximately ¼ cup (25 g) of the powdered sugar with unsweetened cocoa powder and adjust the milk as necessary.

    Why Did My Butterfly Cakes Sink?

    A small dip isn’t a disaster because we’re going to cut into the centre anyway.

    More significant sinking can happen if:

    • The oven door was opened too early
    • The batter was overmixed
    • Too much baking powder was added
    • The cakes weren’t completely baked in the centre

    Try not to open the oven during the first 14 minutes of baking.

    Why Are My Cakes Dry?

    The most common cause is overbaking.

    Small cakes cook quickly.

    Start checking around the 16-minute mark and remove them as soon as they’re lightly golden and spring back when touched.

    Too much flour can also produce a dry cake, which is why weighing flour in grams is particularly helpful.

    Why Did My Buttercream Melt?

    Either the cakes were still warm or the butter itself became too warm.

    If the buttercream feels very soft, refrigerate it for approximately 10–15 minutes, then beat briefly before using.

    Make sure the cakes are completely cool before decorating.

    Can I Pipe the Buttercream?

    Of course.

    If you’d like a neater finish, pipe a small swirl into the centre before adding the wings.

    But piping isn’t necessary, and the simpler spooned version is closer to the nostalgic homemade style we’re aiming for.

    What Jam Should I Use?

    Strawberry and raspberry are both excellent.

    Raspberry has a slightly sharper flavour that balances the sweetness of the buttercream particularly well.

    You only need a little.

    Too much jam can make the butterfly wings slide around.

    What to Serve With Butterfly Cakes

    Butterfly cakes are perfect with:

    • A pot of British tea
    • Coffee
    • Fresh berries
    • Afternoon tea sandwiches
    • Other small British bakes

    They would sit beautifully alongside Classic British Scones, Traditional Jam Tarts or slices of Victoria Sponge Cake for an afternoon-tea spread.

    Can Children Help Make Butterfly Cakes?

    Yes.

    This is an especially fun baking project for children because the decoration doesn’t require precision.

    An adult should handle the knife used to cut the cake tops, but children can spoon in the filling, arrange the wings and dust the finished cakes with powdered sugar.

    And because no two butterflies need to look identical, there’s very little pressure for them to be perfect.

    Can I Make Butterfly Cakes Ahead?

    You can bake the cakes one day ahead.

    Once completely cool, store the undecorated cakes in an airtight container at room temperature.

    Prepare and decorate them the following day.

    For the freshest appearance, wait until shortly before serving to dust them with powdered sugar.

    How to Store Butterfly Cakes

    Store finished butterfly cakes in an airtight container at cool room temperature for approximately 2 days.

    If your kitchen is particularly warm, refrigerate them because of the buttercream.

    Bring refrigerated cakes back toward room temperature before serving so the sponge and buttercream soften again.

    Can You Freeze Butterfly Cakes?

    The undecorated cakes freeze very well.

    Cool completely, wrap individually and freeze in an airtight container for up to approximately 3 months.

    Thaw at room temperature before adding the buttercream, jam and wings.

    You can technically freeze decorated cakes, but the finished appearance is much better when they’re decorated fresh.

    A Little British Cake With Plenty of Charm

    Butterfly cakes aren’t complicated, fashionable or extravagant.

    And that’s exactly why they’re so lovely.

    A simple vanilla sponge, a little buttercream and two pieces of cake are enough to create something that generations of British children have been delighted to find on a party table.

    They also prove that a cake doesn’t need six inches of frosting to feel special.

    Put the kettle on, dust your butterflies with powdered sugar and don’t worry if every pair of wings looks slightly different.

    That’s how homemade butterfly cakes should be.

    For more classic British baking, try our Traditional British Lemon Drizzle Cake, Victoria Sponge Cake, Traditional Jam Tarts and Classic British Scones.

    And if you’re translating British recipes for an American kitchen, take a look at British Baking Ingredients Americans Need to Know.

    Browse all of our Brit & Skillet Recipes for more British favourites made approachable for American kitchens.

  • Traditional British Beef and Ale Stew: An Easy Recipe for American Kitchens

    Traditional British Beef and Ale Stew: An Easy Recipe for American Kitchens

    There are few things more comforting than a pot of beef stew slowly bubbling away on a cold afternoon.

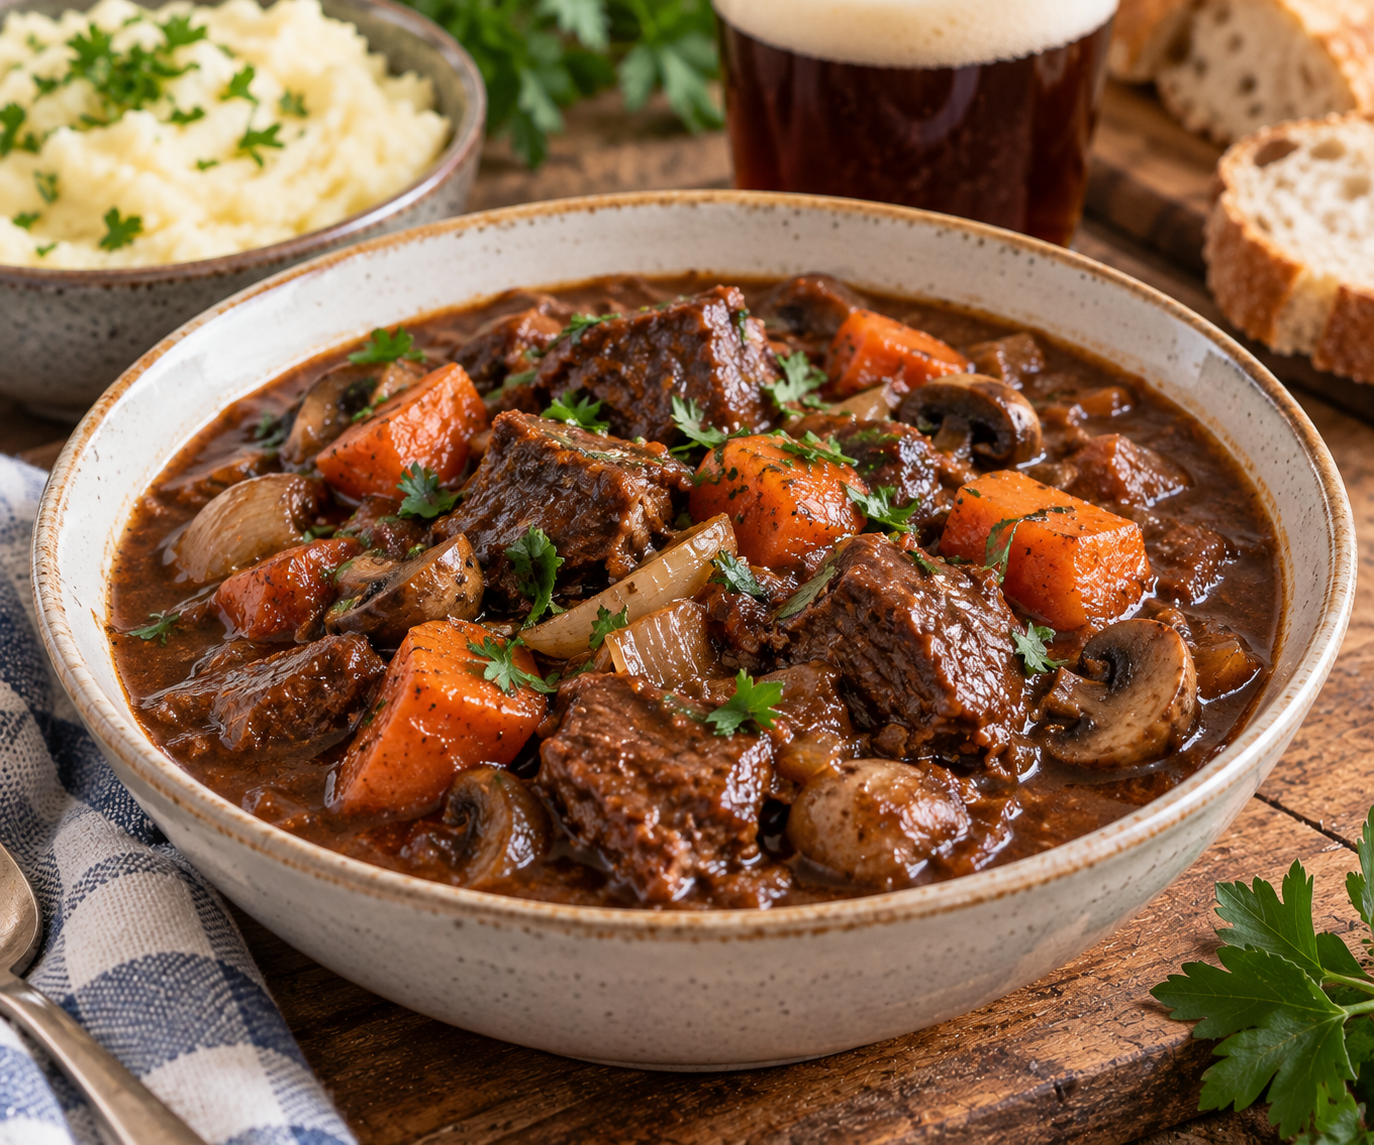
    British beef and ale stew takes that familiar idea and gives it a distinctly pub-style twist: chunks of beef are cooked slowly with onions, carrots, herbs and ale until they’re meltingly tender and surrounded by a rich, deeply savoury gravy.

    It’s hearty, uncomplicated food — exactly the sort of thing you’d hope to find on the menu of a country pub when the weather outside is miserable.

    And although the word ale can make an American version of the recipe seem complicated, it really isn’t. You don’t need a particular British beer, and you don’t need an expensive cut of beef.

    In fact, inexpensive chuck roast is one of the best choices.

    The important things are choosing an ale that won’t make the gravy bitter, browning the beef properly and giving the stew enough time to cook slowly.

    Here’s how to make a proper British-style beef and ale stew using ingredients readily available in an American kitchen.

    What Is British Beef and Ale Stew?

    Beef and ale stew is a traditional British comfort-food dish made by slowly braising pieces of beef with vegetables, herbs, stock and ale.

    As it cooks, the beef becomes tender while the ale, stock and cooking juices reduce into a dark, savoury gravy.

    There isn’t one definitive recipe.

    Some versions contain mushrooms, some don’t. Some include potatoes in the stew, while others are served over mashed potatoes. Worcestershire sauce, tomato paste and herbs are also common additions.

    Our version uses carrots, onions and mushrooms while leaving the potatoes out so there’s plenty of room for creamy mashed potatoes alongside.

    Is Beef and Ale Stew the Same as Steak and Ale Pie?

    They’re closely related, but they’re not the same dish.

    Our Traditional British Steak and Ale Pie uses a rich beef-and-ale filling beneath golden puff pastry.

    Beef and ale stew skips the pastry entirely and is served straight from the pot with plenty of gravy.

    That makes it simpler to prepare and particularly good for slow cooking.

    What Beef Should Americans Use?

    Look for beef chuck roast.

    Chuck contains connective tissue and fat that soften during long, slow cooking. Given enough time, an inexpensive chuck roast becomes much more tender and flavourful than many leaner cuts.

    Packages labelled stew meat can work, but the pieces may come from different cuts of beef and therefore cook unevenly.

    When possible, buy a whole chuck roast and cut it into chunks yourself.

    Aim for pieces approximately 1½–2 inches (4–5 cm) across.

    What Kind of Ale Should I Use?

    Choose an ale you’d be happy to drink.

    Good choices include:

    • Brown ale
    • Amber ale
    • English-style pale ale
    • Mild ale
    • Red ale

    You want something malty rather than aggressively bitter.

    Very hoppy IPAs aren’t my first choice because their bitterness can become stronger as the stew reduces.

    You don’t need to track down an imported British beer. A good American brown or amber ale works beautifully.

    Can I Use Stout Instead?

    Yes.

    A stout will produce a darker stew with a more roasted flavour.

    Something like Guinness works well, although technically you’ll then be making something closer to a beef-and-stout stew than a traditional beef-and-ale version.

    Both are delicious.

    Can I Make Beef and Ale Stew Without Alcohol?

    Yes.

    Replace the ale with additional beef broth or stock.

    For extra depth, add another teaspoon of Worcestershire sauce.

    It won’t have exactly the same flavour as the ale version, but you’ll still have an excellent beef stew.

    Traditional British Beef and Ale Stew Recipe

    Prep Time: 25 minutes
    Cook Time: 2½–3 hours
    Serves: 6

    Equipment

    • Large Dutch oven or heavy-bottomed pot with lid
    • Cutting board
    • Sharp knife
    • Wooden spoon
    • Measuring cups and spoons

    Ingredients

    • 2½ lb (1.1 kg) beef chuck roast, cut into 1½–2 inch chunks
    • 1½ teaspoons fine salt, divided
    • ¾ teaspoon freshly ground black pepper
    • 3 tablespoons (24 g) all-purpose flour
    • 2 tablespoons vegetable or neutral oil, divided
    • 1 large yellow onion, sliced
    • 3 medium carrots, cut into thick pieces
    • 8 oz (225 g) cremini or button mushrooms, halved or quartered
    • 3 garlic cloves, minced
    • 1 tablespoon tomato paste
    • 1 tablespoon Worcestershire sauce
    • 12 oz (355 ml) brown or amber ale
    • 2 cups (480 ml) beef stock or broth
    • 1 teaspoon dried thyme or 3–4 fresh thyme sprigs
    • 2 bay leaves
    • 1 teaspoon brown sugar, optional
    • 1 tablespoon chopped fresh parsley, for serving

    Instructions

    1. Prepare the Beef

    Pat the beef thoroughly dry with paper towels.

    Cut it into approximately 1½–2 inch chunks if your butcher hasn’t already done so.

    Season with about 1 teaspoon of the salt and the black pepper.

    Sprinkle the flour over the beef and toss until the pieces have a light, even coating.

    Brit & Skillet Tip

    Dry beef browns.

    Wet beef steams.

    Taking a minute to pat the meat dry before seasoning makes a surprisingly large difference to the flavour of the finished stew.

    2. Brown the Beef

    Heat 1 tablespoon of the oil in a large Dutch oven over medium-high heat.

    Add the beef in a single layer without crowding the pot.

    You’ll probably need to work in 2–3 batches.

    Brown the pieces for approximately 2–3 minutes per side.

    They don’t need to cook through.

    Transfer the browned beef to a plate and repeat with the remaining batches, adding the second tablespoon of oil as needed.

    Don’t worry about the dark brown bits accumulating on the bottom of the pot.

    We want those.

    Brit & Skillet Tip

    Resist the temptation to put all the beef into the pot at once.

    Crowding lowers the temperature and releases too much moisture, leaving you with grey steamed beef instead of the deeply browned pieces that create a rich stew.

    3. Cook the Vegetables

    Reduce the heat to medium.

    Add the onion and carrots to the same pot.

    Cook for approximately 5 minutes, stirring occasionally and scraping up some of the browned bits.

    Add the mushrooms and cook for another 4–5 minutes.

    Add the garlic and cook for about 30 seconds.

    4. Add the Tomato Paste

    Stir in the tomato paste.

    Cook for approximately 1 minute, stirring constantly.

    This brief cooking step removes the raw tomato flavour and helps deepen the gravy.

    5. Deglaze With the Ale

    Slowly pour in the ale.

    Use your wooden spoon to scrape the bottom of the pot thoroughly.

    All those browned bits from the beef should dissolve into the liquid.

    Let the ale simmer for approximately 3–4 minutes.

    6. Build the Stew

    Return the beef and any accumulated juices to the pot.

    Add the beef stock, Worcestershire sauce, thyme, bay leaves, remaining salt and optional brown sugar.

    The liquid doesn’t need to completely cover the beef.

    Bring everything to a gentle simmer.

    7. Slow Cook

    Cover the pot and reduce the heat to low.

    Cook very gently for approximately 2–2½ hours, stirring occasionally.

    The stew should barely simmer rather than boil vigorously.

    Begin checking the beef after about 2 hours.

    It’s ready when a piece can easily be broken apart with a fork.

    If the beef still feels tough, keep cooking.

    Brit & Skillet Tip

    One of the biggest mistakes with beef stew is assuming tough meat has been overcooked.

    With chuck roast, the opposite is often true.

    If the beef is still chewy after two hours, it usually needs more time for its connective tissue to break down.

    Give it another 20–30 minutes and check again.

    8. Thicken the Gravy

    Once the beef is tender, remove the lid.

    Discard the bay leaves and any woody fresh thyme stems.

    Simmer uncovered for approximately 15–20 minutes, or until the gravy reaches the consistency you like.

    Stir occasionally.

    Taste and adjust the salt and pepper.

    9. Rest Before Serving

    Remove the pot from the heat and allow the stew to sit for approximately 10 minutes.

    This gives the gravy a chance to settle and thicken slightly.

    Sprinkle with chopped parsley before serving.

    How Do I Get a Thick Beef Stew Gravy?

    Three things help thicken this stew naturally.

    First, the beef receives a light coating of flour before browning.

    Second, the stew cooks slowly for several hours.

    Finally, we remove the lid near the end so excess liquid can evaporate.

    If your gravy still seems thinner than you’d like, simply simmer it uncovered for another 5–10 minutes.

    Don’t add large quantities of flour directly to the finished stew — you’ll risk creating lumps and a raw flour flavour.

    What If My Gravy Is Too Thick?

    Add a splash of beef stock.

    Stir it in and simmer for a minute or two.

    Remember that the gravy will thicken slightly as the stew cools, so stop reducing it when it’s just a little thinner than your ideal finished consistency.

    Why Is My Beef Tough?

    It probably needs more time.

    Chuck roast becomes tender when its connective tissue has had enough time to break down.

    Cooking temperature also matters.

    A hard boil can tighten the meat and evaporate the liquid too quickly.

    Keep the stew at a gentle simmer and be patient.

    When it’s ready, the beef should yield easily to a fork without becoming completely shredded.

    Why Does My Stew Taste Bitter?

    The ale is usually the culprit.

    Very bitter or heavily hopped beers can become more bitter as they’re cooked and reduced.

    That’s why a malty brown or amber ale is generally safer than an aggressively hopped IPA.

    If your finished stew has a slight bitter edge, the optional teaspoon of brown sugar can help balance it.

    Don’t add too much — this is a savoury stew, not a sweet one.

    Do I Have to Add Mushrooms?

    No.

    Mushrooms add savoury depth and work particularly well with beef and ale, but they’re completely optional.

    Simply leave them out if you don’t like them.

    You can add another carrot or onion instead.

    Can I Add Potatoes to the Stew?

    Yes.

    Add approximately 1 lb (450 g) Yukon Gold potatoes, cut into large chunks, during the final hour of cooking.

    However, I usually leave them out.

    Serving the stew over mashed potatoes gives you a wonderful contrast between the rich gravy and creamy mash — and feels particularly appropriate for British pub-style comfort food.

    Can I Make This in a Slow Cooker?

    Yes.

    Brown the beef and cook the onions as directed first.

    Deglaze the pan with the ale, scraping up all the browned bits.

    Transfer everything to your slow cooker.

    Because slow cookers don’t allow as much evaporation, reduce the beef stock to approximately 1½ cups (360 ml).

    Cook on:

    LOW: approximately 7–8 hours
    HIGH: approximately 4–5 hours

    Cook until the beef is completely tender.

    If the gravy needs thickening, remove the lid and cook on HIGH for a little longer, or transfer some of the liquid to a saucepan and reduce it separately.

    Can I Cook It in the Oven?

    Absolutely.

    In fact, a Dutch oven in the oven is one of my favourite ways to make it.

    Prepare the recipe through Step 6.

    Cover the Dutch oven and place it in a 325°F (165°C) oven for approximately 2½–3 hours.

    Check occasionally after the first two hours.

    When the beef is tender, remove the lid and return the pot to the oven for approximately 15 minutes if the gravy needs to reduce.

    Can I Make Beef and Ale Stew Ahead?

    Yes — and it’s arguably better the next day.

    Cool the stew, cover and refrigerate overnight.

    The flavours deepen as it rests.

    Reheat gently on the stovetop until piping hot throughout, adding a splash of beef stock if the gravy has become too thick.

    What to Serve With Beef and Ale Stew

    For a proper comfort-food dinner, serve it with:

    • Creamy mashed potatoes
    • Crusty bread
    • Buttered peas
    • Steamed green vegetables
    • Roasted root vegetables

    You could also serve it with Traditional Yorkshire Puddings, particularly if you want something capable of soaking up every last bit of gravy.

    How to Store Beef and Ale Stew

    Allow leftovers to cool, then refrigerate them in an airtight container.

    They’ll keep for approximately 3–4 days.

    Reheat gently on the stovetop or in the microwave until thoroughly hot.

    You may need to add a small splash of stock because the gravy becomes thicker after refrigeration.

    Can You Freeze Beef and Ale Stew?

    Yes.

    This is an excellent freezer meal.

    Cool completely, transfer to freezer-safe containers and freeze for up to approximately 3 months.

    Thaw overnight in the refrigerator before reheating.

    If you’re planning specifically to freeze the stew, leaving potatoes out is another advantage because potatoes can sometimes develop a slightly grainy texture after freezing.

    A Proper British Cold-Weather Dinner

    Beef and ale stew isn’t complicated food, and that’s part of its appeal.

    A relatively inexpensive piece of beef, a bottle of ale and a handful of ordinary vegetables become something deeply comforting when they’re given enough time.

    Brown the beef properly, choose a malty ale and don’t rush the cooking.

    Then put a generous spoonful of mashed potatoes into a bowl, ladle that rich beef-and-ale gravy over the top and you’ll understand exactly why this sort of dinner has remained a British pub favourite.

    If you enjoy hearty British comfort food, try our Traditional British Steak and Ale Pie, Traditional Lancashire Hotpot, Traditional Cottage Pie and Traditional British Toad in the Hole next.

    And don’t forget the Traditional Yorkshire Puddings if you want something particularly good for catching the gravy.

    Browse all of our Brit & Skillet Recipes for more traditional British favourites made approachable for American kitchens.
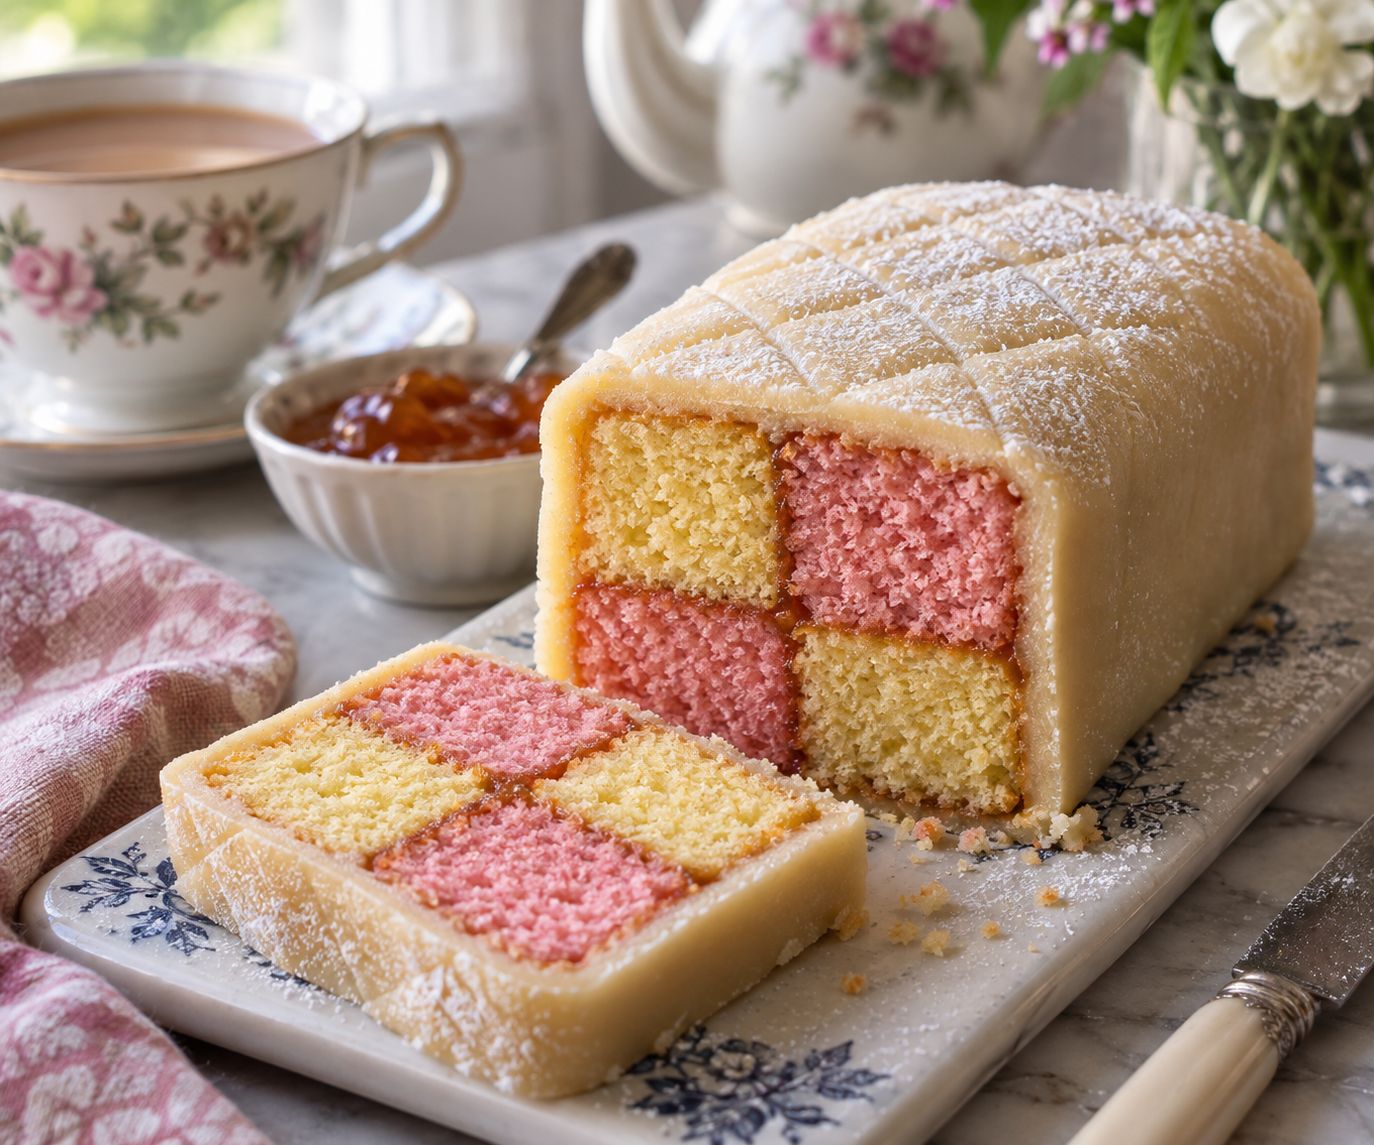

  • Traditional Yorkshire Parkin: An Easy Recipe for American Bakers

    Traditional Yorkshire Parkin: An Easy Recipe for American Bakers

    Yorkshire Parkin is the sort of British bake that doesn’t necessarily look flashy — but give it a couple of days and something rather wonderful happens.

    Made with oats, ginger, golden syrup and black treacle, Parkin is a dark, warmly spiced cake traditionally associated with Yorkshire and the colder months of the year.

    Fresh from the oven, it’s delicious but relatively firm. As it sits, the oats absorb moisture and the flavours deepen, transforming the cake into the wonderfully sticky, dense and slightly chewy Parkin it’s famous for.

    That’s also what makes Parkin unusual: this is one cake you shouldn’t necessarily rush to eat on baking day.

    For American bakers, the ingredients can initially look confusing. British recipes may call for medium oatmeal, black treacle and golden syrup — none of which necessarily mean quite what an American shopper might expect.

    We’ll translate all of that below so you can make a proper Yorkshire-style Parkin using ingredients you can actually find in an American kitchen.

    What Is Yorkshire Parkin?

    Parkin is a traditional northern English ginger cake made with oats, flour, fat and dark syrup.

    It’s particularly associated with Yorkshire, although versions are also found elsewhere in northern England.

    Unlike a light ginger sponge, Parkin has a substantial texture from the oats.

    Golden syrup contributes sweetness, while black treacle provides the characteristic dark colour and slightly bittersweet depth.

    Ground ginger gives the cake its warming spice.

    The finished Parkin is traditionally cut into squares rather than served as a layer cake.

    Why Is Parkin Associated With Bonfire Night?

    Parkin has a long association with Bonfire Night, also called Guy Fawkes Night, which is observed in Britain on November 5.

    The connection is particularly strong in Yorkshire and northern England, where Parkin became a traditional cold-weather treat around the autumn bonfire season.

    That makes it exactly the sort of cake you’d want with a hot drink on a chilly November evening.

    You certainly don’t need to wait until November to make it, though.

    What Is Black Treacle?

    Black treacle is a thick, dark British syrup with a rich flavour that balances sweetness with a slightly bitter edge.

    American molasses is related but isn’t exactly the same product.

    If you can find British black treacle, use it for the most traditional flavour.

    In the United States, regular unsulphured molasses is the easiest practical substitute.

    Avoid blackstrap molasses for this recipe. Its flavour is considerably more intense and bitter and can overwhelm the Parkin.

    If you’d like a deeper explanation of these ingredients, our Treacle vs. Molasses vs. Golden Syrup guide explains how they differ and when they can — and can’t — be substituted.

    What Is Golden Syrup?

    Golden syrup is a thick amber-coloured sugar syrup with a buttery, lightly caramelized flavour.

    It’s an essential flavour in many traditional British bakes and is quite different from American corn syrup.

    Lyle’s Golden Syrup is the classic British version and can increasingly be found in American supermarkets, international food aisles and online.

    Our Golden Syrup in America guide has more information about what to look for when shopping in the U.S.

    What Kind of Oats Should Americans Use for Parkin?

    This is one of the biggest translation problems in traditional Parkin recipes.

    British recipes may specify medium oatmeal, which isn’t the same thing as the cooked breakfast oatmeal Americans usually imagine when they hear the word.

    For this recipe, ordinary American old-fashioned rolled oats work well when they’re briefly pulsed in a food processor to create a coarse meal.

    You don’t want oat flour.

    The oats should still have some texture.

    If you have access to medium oatmeal from a British grocery store, you can use that instead.

    Can I Use Quick Oats?

    They’ll work in a pinch, but old-fashioned rolled oats give better texture.

    Quick oats are processed into smaller pieces and absorb moisture differently.

    Avoid instant oatmeal packets entirely — particularly flavoured or sweetened varieties.

    Traditional Yorkshire Parkin Recipe

    Prep Time: 20 minutes
    Bake Time: 45–55 minutes
    Maturing Time: Ideally 2–3 days
    Serves: 12–16

    Equipment

    • 8-inch (20 cm) square baking pan
    • Parchment paper
    • Medium saucepan
    • Large mixing bowl
    • Food processor, if using rolled oats
    • Whisk
    • Spatula

    Ingredients

    • 1½ cups (135 g) old-fashioned rolled oats
    • 1½ cups (180 g) all-purpose flour
    • 2 teaspoons ground ginger
    • ½ teaspoon ground cinnamon
    • ¼ teaspoon ground nutmeg
    • 1 teaspoon baking soda
    • ¼ teaspoon fine salt
    • ½ cup (113 g) unsalted butter
    • ½ cup (170 g) golden syrup
    • ⅓ cup (110 g) black treacle or regular unsulphured molasses
    • ½ cup packed (100 g) dark brown sugar
    • 1 large egg
    • ½ cup (120 ml) whole milk

    Instructions

    1. Prepare the Pan

    Preheat the oven to 325°F (165°C).

    Grease an 8-inch square baking pan and line it with parchment paper, leaving enough overhang on two sides to help lift the Parkin out later.

    2. Prepare the Oats

    Place the old-fashioned rolled oats in a food processor.

    Pulse several times until they’re broken into smaller pieces and resemble a coarse meal.

    Don’t continue processing until they become fine oat flour.

    A little unevenness is perfectly fine — Parkin is supposed to have texture.

    Brit & Skillet Tip

    If you’re unsure whether you’ve processed the oats enough, stop sooner rather than later.

    Parkin should have a slightly rustic, substantial texture. Turning the oats completely into flour removes some of the character we’re looking for.

    3. Combine the Dry Ingredients

    Place the processed oats in a large mixing bowl.

    Add the all-purpose flour, ginger, cinnamon, nutmeg, baking soda and salt.

    Whisk until evenly combined.

    4. Warm the Butter and Syrups

    Place the butter, golden syrup, black treacle or molasses and dark brown sugar in a medium saucepan.

    Warm gently over low heat, stirring occasionally, until the butter has melted and the sugar has mostly dissolved.

    Don’t allow the mixture to boil.

    Remove from the heat and let it cool for approximately 5 minutes.

    Brit & Skillet Tip

    Golden syrup and treacle are notoriously sticky to measure.

    Lightly greasing your measuring cup or spoon first makes the syrup slide out much more easily.

    If you’re using a kitchen scale, weighing the syrups directly into the saucepan is even easier.

    5. Add the Syrup Mixture

    Pour the warm syrup mixture into the bowl containing the dry ingredients.

    Stir until everything is evenly coated.

    The mixture will be thick.

    6. Add the Egg and Milk

    In a small bowl or measuring jug, whisk the egg and milk together.

    Pour them into the Parkin mixture.

    Stir just until you have an evenly combined batter.

    Don’t overmix.

    7. Fill the Pan

    Scrape the batter into the prepared baking pan.

    Spread it evenly into the corners and smooth the surface.

    8. Bake

    Bake at 325°F (165°C) for approximately 45–55 minutes.

    The Parkin should be set and slightly springy in the centre.

    A toothpick inserted into the middle should come out with a few moist crumbs but no wet batter.

    Don’t wait for the cake to become completely dry.

    Brit & Skillet Tip

    Don’t overbake your Parkin.

    This cake becomes firmer as it cools, and overbaking can leave it dry even after its resting period.

    Begin checking around 45 minutes.

    9. Cool

    Leave the Parkin in the pan for approximately 15 minutes.

    Use the parchment to carefully lift it onto a wire rack.

    Allow it to cool completely.

    10. Wrap and Wait

    Here’s the unusual part.

    Once completely cool, wrap the Parkin tightly in parchment or plastic wrap and place it in an airtight container.

    Leave it at cool room temperature for approximately 2–3 days before serving if you can.

    Yes, really.

    The texture becomes noticeably stickier and the flavours become deeper as it rests.

    11. Slice and Serve

    Cut the Parkin into 12–16 squares.

    Serve at room temperature with tea or coffee.

    You can also warm an individual piece slightly and serve it with custard for a more substantial dessert.

    Why Does Parkin Get Better After a Few Days?

    Moisture gradually redistributes through the cake while it rests.

    The oats soften, the crumb becomes stickier and the ginger, treacle and golden syrup flavours meld together.

    Fresh Parkin can seem surprisingly firm compared with what you expect from cake.

    After a couple of days, it develops the moist, sticky character traditionally associated with it.

    This process is sometimes described as allowing the Parkin to mature.

    Can I Eat Parkin the Same Day?

    Absolutely.

    There are no Parkin police.

    It tastes good once cooled and is particularly tempting while the smell of ginger and syrup is still filling the kitchen.

    But if you’re judging the texture immediately after baking, remember that you’re not tasting the finished version at its best.

    Try one square if you must, then wrap the rest and compare it two days later.

    What Should Parkin Taste Like?

    Parkin should be warmly spiced rather than aggressively hot with ginger.

    Golden syrup provides mellow caramel sweetness.

    Treacle adds darker, slightly bitter notes that prevent the cake from becoming one-dimensional.

    The oats contribute an earthy flavour and a texture that’s more substantial than an ordinary ginger cake.

    It should eventually become moist and sticky without being wet or stodgy.

    Is Parkin the Same as Gingerbread?

    They’re related but not the same.

    British gingerbread can refer to several types of ginger-flavoured cake or biscuit.

    Parkin is distinguished particularly by its oats and association with northern England.

    That oat content gives Parkin its characteristic dense, slightly chewy texture.

    Is Parkin the Same as Ginger Cake?

    Not quite.

    A traditional ginger cake is usually made primarily with wheat flour and can have a lighter sponge-like crumb.

    Parkin combines flour with oats and is intended to mature into a sticky, substantial cake.

    Both may contain treacle, syrup and ginger, but their textures are noticeably different.

    Can I Use Only Golden Syrup?

    You can, but the flavour and colour will be lighter.

    The black treacle is what provides much of Parkin’s dark, slightly bitter complexity.

    If you don’t have black treacle, I’d rather use regular unsulphured molasses than omit the dark syrup entirely.

    Can I Use Only Molasses?

    Technically you could, but I wouldn’t recommend replacing all of the golden syrup with molasses.

    The resulting cake can become too dark and strongly flavoured.

    The combination works because golden syrup contributes mellow sweetness while treacle or molasses adds depth.

    Can I Use Blackstrap Molasses?

    I wouldn’t.

    Blackstrap molasses is significantly more bitter and intense than British black treacle or ordinary American molasses.

    Use regular unsulphured molasses instead.

    Can I Make Parkin Without a Food Processor?

    Yes.

    You can place the rolled oats in a sturdy zip-top bag and crush them with a rolling pin.

    You won’t get quite as uniform a texture, but that’s not a problem.

    Alternatively, use rolled oats as they are. The resulting Parkin will simply have a coarser texture.

    Why Is My Parkin Dry?

    The most likely cause is overbaking.

    Because Parkin is dark in colour, visual browning isn’t a particularly useful way to judge doneness.

    Start testing around the 45-minute mark.

    Another possibility is simply that you haven’t allowed it to mature yet.

    Fresh Parkin is firmer and less sticky than Parkin that has rested for several days.

    Wrap it well and give it some time before deciding something went wrong.

    Why Did My Parkin Sink?

    A slight settling isn’t necessarily a problem.

    Parkin is a moist, relatively dense cake and doesn’t need the tall, airy structure you’d expect from a Victoria sponge.

    A dramatic collapse, however, can indicate that the centre was underbaked or that too much raising agent was used.

    Make sure the middle is properly set before removing it from the oven.

    Why Is My Parkin Crumbly?

    Warm Parkin can be fragile.

    Let it cool completely before slicing.

    If you’ve used oats that are considerably coarser than medium oatmeal, the cake can also initially seem more crumbly.

    Again, allowing it to rest for a couple of days helps as the oats absorb moisture.

    Can I Add More Ginger?

    Yes.

    If you particularly love ginger, increase the ground ginger to 1 tablespoon.

    You can also add a small amount of finely chopped crystallized ginger, although that moves the recipe away from the simplest traditional version.

    I’d make it as written the first time and adjust future batches according to taste.

    What to Serve With Yorkshire Parkin

    The simplest answer is a cup of tea.

    Parkin is traditionally the sort of cake that needs very little accompaniment.

    You can also serve it with:

    • Coffee
    • Warm custard
    • Vanilla ice cream
    • Lightly whipped cream

    Warm Parkin with custard makes an especially comforting cold-weather pudding.

    Can I Make Parkin Ahead?

    You should!

    Unlike many cakes where “make ahead” is merely convenient, Parkin genuinely benefits from it.

    Bake it 2–3 days before you want to serve it, cool completely and store it tightly wrapped in an airtight container.

    That makes it particularly useful for autumn gatherings because the baking can be finished well before guests arrive.

    How to Store Parkin

    Keep Parkin tightly wrapped in an airtight container at cool room temperature.

    It should keep well for approximately one week, and many people find the texture continues improving during the first several days.

    If your kitchen is unusually warm, store it somewhere cooler.

    Refrigeration isn’t normally necessary and can make the cake firmer.

    Can You Freeze Parkin?

    Yes.

    Allow it to cool completely and preferably let it mature for a day or two first.

    Wrap the whole cake or individual pieces tightly, then place them in a freezer-safe container.

    Freeze for up to approximately 3 months.

    Thaw at room temperature while still wrapped.

    A Proper Yorkshire Bake Worth Waiting For

    Parkin isn’t trying to be a delicate afternoon-tea sponge.

    It’s dark, sticky, oaty, gingery and built for cold weather.

    And perhaps its most charming quality is that patience actually improves it.

    Bake it, wrap it up, put the kettle on and try to forget it’s there for a couple of days.

    When you come back, the relatively firm ginger cake you pulled from the oven will have developed into something softer, stickier and much more distinctly Parkin.

    For more traditional British bakes, try our Traditional British Treacle Tart, Traditional Sticky Toffee Pudding and Traditional British Flapjacks.

    If you’re learning to bake with British ingredients in America, our Golden Syrup in America and Treacle vs. Molasses vs. Golden Syrup guides will help translate some of the ingredients you’ll see again and again.

    Or browse all of the Brit & Skillet Recipes for more British favourites made approachable for American kitchens.
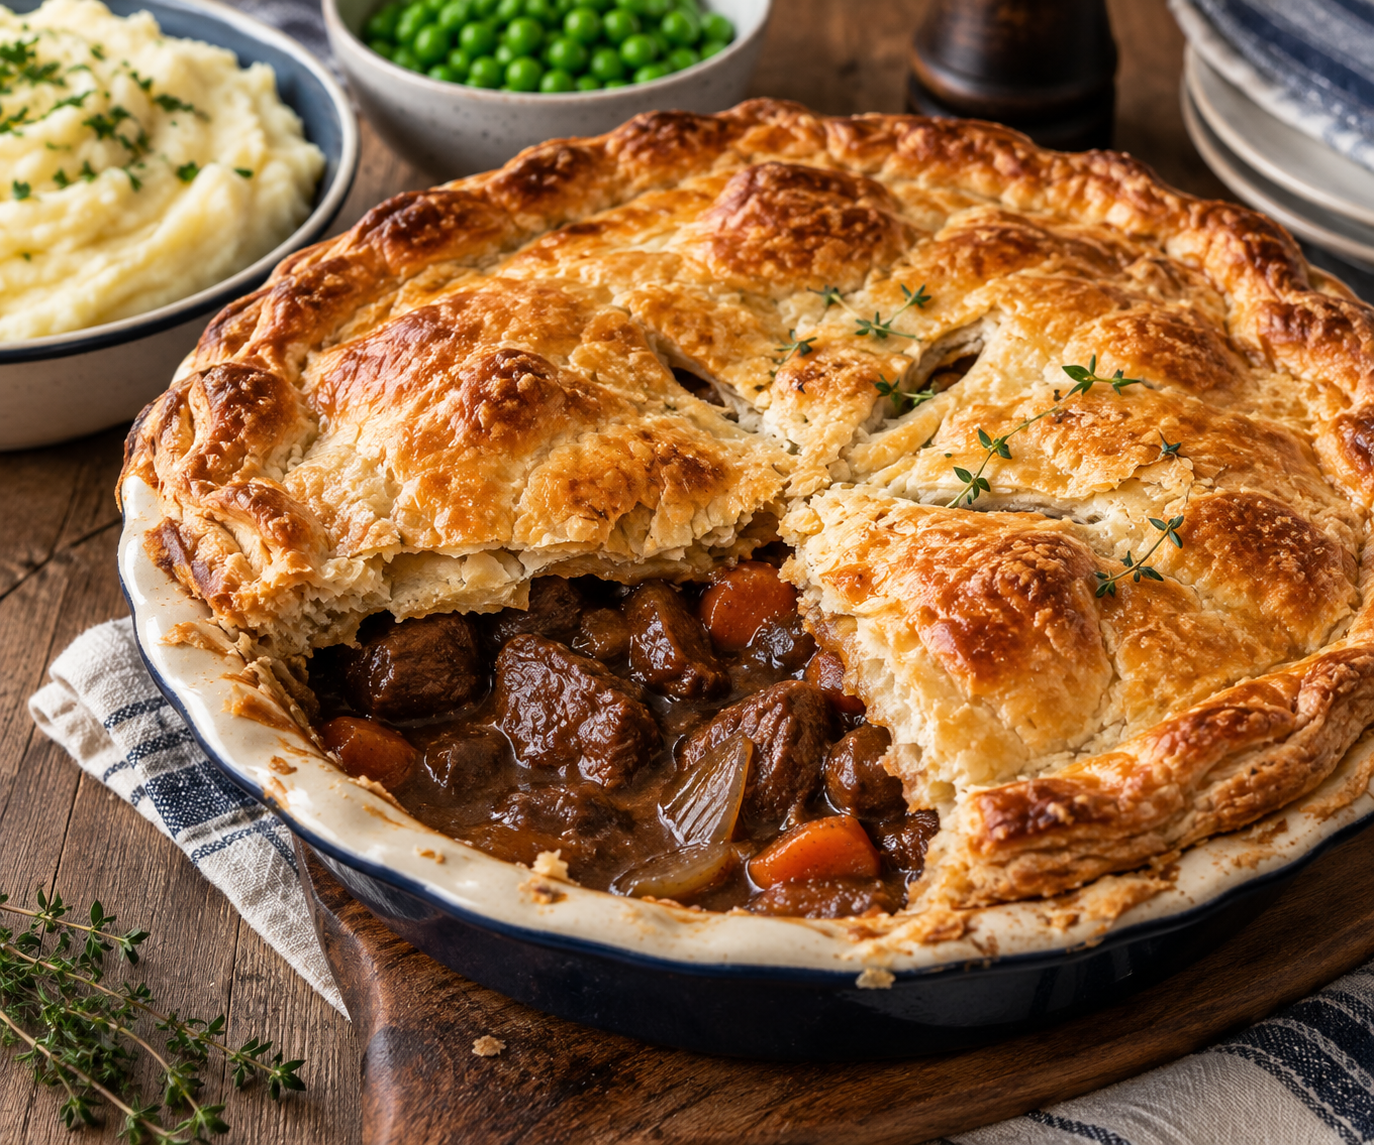

  • Traditional British Fish Pie: An Easy Recipe for American Kitchens

    Traditional British Fish Pie: An Easy Recipe for American Kitchens

    Traditional British fish pie is one of those wonderfully comforting dinners that can be slightly confusing if you’ve never encountered one before.

    Despite the name, there’s no pastry involved.

    Instead, tender pieces of fish are cooked in a creamy white sauce with peas and herbs, then covered with fluffy mashed potatoes and baked until bubbling underneath and beautifully golden on top.

    Think of it as the seafood cousin of cottage pie.

    British versions often combine several types of fish, including smoked haddock, along with prawns and sometimes hard-boiled eggs. But some of those ingredients can be harder to find in an ordinary American supermarket.

    For this Brit & Skillet version, we’re using cod or haddock, salmon and shrimp — all easy to find in the United States — while keeping the creamy sauce and mashed-potato topping that make a proper British fish pie so comforting.

    What Is British Fish Pie?

    Fish pie is a traditional British savoury dish made from fish in a creamy sauce topped with mashed potatoes.

    Despite being called a pie, it doesn’t normally have a pastry crust.

    The filling can contain a mixture of white fish, salmon, smoked fish and shellfish, depending on the recipe.

    Peas are a common addition, and some traditional versions also include chopped hard-boiled eggs.

    Once assembled, the pie is baked until the filling is hot and bubbling and the potato topping has developed crisp golden peaks.

    Is Fish Pie the Same as Fisherman’s Pie?

    The names are sometimes used interchangeably.

    Fish pie is the usual British name.

    You may occasionally see similar dishes called fisherman’s pie, particularly outside Britain, but there isn’t one universally defined recipe that separates the two.

    For Brit & Skillet, we’re sticking with the familiar British name: fish pie.

    What Fish Should I Use?

    A mixture gives the best flavour and texture.

    For American kitchens, I recommend:

    • Cod or haddock for mild, flaky white fish
    • Salmon for richness and colour
    • Shrimp for a little sweetness and texture

    You don’t need to use all three if you don’t want to.

    An all-white-fish pie works perfectly well, and you can adjust the proportions depending on what’s available or affordable.

    Choose fairly thick fish fillets rather than extremely thin pieces, which can become overcooked more easily.

    What About Smoked Haddock?

    Smoked haddock is a classic ingredient in many British fish pies.

    Unfortunately, traditional British smoked haddock isn’t nearly as easy to find in American supermarkets.

    If you can buy undyed smoked haddock, absolutely use some.

    Replace approximately 8 ounces (225 g) of the white fish with smoked haddock.

    If you can’t find it, don’t worry.

    The combination of fresh white fish, salmon and shrimp still makes an excellent fish pie.

    I wouldn’t substitute heavily smoked American fish such as smoked salmon in equal quantities because it can dominate the entire dish.

    Are British Prawns the Same as American Shrimp?

    For everyday cooking purposes, yes.

    British recipes commonly use the word prawns where an American recipe would usually say shrimp.

    There are technical biological distinctions between certain prawns and shrimp, but you don’t need to worry about them when adapting a typical British fish pie recipe.

    Use peeled, deveined American shrimp.

    For this recipe, medium shrimp work particularly well.

    Traditional British Fish Pie Recipe

    Prep Time: 30 minutes
    Cook Time: 45–50 minutes
    Serves: 6

    Equipment

    • Large saucepan
    • Medium saucepan
    • 2½- to 3-quart baking dish
    • Colander
    • Potato masher
    • Whisk
    • Wooden spoon

    Ingredients

    For the Mashed Potato Topping

    • 2 pounds (900 g) Yukon Gold or russet potatoes, peeled and cut into chunks
    • 4 tablespoons (56 g) unsalted butter
    • ½ cup (120 ml) whole milk, warmed
    • ¾ teaspoon salt, or to taste
    • Freshly ground black pepper

    For the Fish Filling

    • 12 ounces (340 g) cod or haddock, skin removed and cut into large chunks
    • 8 ounces (225 g) salmon, skin removed and cut into large chunks
    • 8 ounces (225 g) raw shrimp, peeled and deveined
    • 2 cups (480 ml) whole milk
    • 1 bay leaf
    • ½ small yellow onion
    • 4 tablespoons (56 g) unsalted butter
    • ¼ cup (30 g) all-purpose flour
    • 1 teaspoon Dijon mustard
    • 1 tablespoon finely chopped fresh parsley
    • 1 tablespoon finely chopped fresh chives, optional
    • 1 cup (140 g) frozen peas
    • ½ teaspoon salt, or to taste
    • Freshly ground black pepper
    • 1 teaspoon fresh lemon juice

    Optional for the Top

    • ½ cup (50 g) shredded mature cheddar cheese

    Instructions

    1. Cook the Potatoes

    Place the potatoes in a large saucepan and cover them with cold salted water.

    Bring to a boil, then reduce to a steady simmer.

    Cook for approximately 15–20 minutes, until completely tender when pierced with a knife.

    Drain thoroughly.

    Return the potatoes to the warm pan for a minute or two so excess moisture can evaporate.

    2. Make the Mashed Potatoes

    Add the butter and mash until smooth.

    Gradually add the warm milk until you have soft, fluffy mashed potatoes.

    Season with salt and black pepper.

    Set aside.

    Brit & Skillet Tip

    Don’t make the mashed potatoes too loose.

    A slightly firmer mash is easier to spread over the fish filling and develops better golden ridges in the oven.

    3. Gently Poach the Fish

    Place the cod or haddock and salmon in a medium saucepan or deep skillet.

    Pour over the 2 cups of milk.

    Add the bay leaf and onion.

    Heat gently until the milk is steaming and just beginning to simmer.

    Don’t allow it to boil vigorously.

    Cook the fish very gently for approximately 4–5 minutes.

    The fish doesn’t need to be completely cooked through because it will continue cooking in the oven.

    4. Remove the Fish

    Using a slotted spoon, carefully transfer the fish to your baking dish.

    Discard the onion and bay leaf.

    Keep the poaching milk.

    That’s going to become the base of our creamy sauce.

    Brit & Skillet Tip

    Handle the fish gently.

    You want recognisable chunks in the finished pie rather than completely shredded fish.

    It’s perfectly fine if a few pieces flake apart, but avoid aggressively stirring them.

    5. Make the White Sauce

    In a medium saucepan, melt the butter over medium-low heat.

    Add the flour and whisk or stir continuously for approximately 1–2 minutes.

    Slowly add the reserved warm poaching milk, a little at a time, whisking constantly.

    Continue until all the milk has been incorporated.

    Cook for approximately 3–5 minutes, stirring frequently, until the sauce has thickened.

    It should coat the back of a spoon.

    6. Season the Sauce

    Stir in the Dijon mustard, parsley, chives if using, lemon juice, salt and black pepper.

    Taste and adjust the seasoning.

    Remember that the fish itself is fairly mild, so the sauce should be well seasoned without becoming overly salty.

    7. Add the Shrimp and Peas

    Scatter the raw shrimp and frozen peas over the fish in the baking dish.

    Pour the warm sauce evenly over everything.

    Very gently move the ingredients around with a spoon so the sauce reaches the bottom of the dish, but don’t aggressively mix the fish.

    Do I Need to Cook the Shrimp First?

    No.

    The shrimp cook quickly and will finish perfectly while the assembled fish pie bakes.

    Cooking them separately beforehand makes them much more likely to become rubbery.

    8. Add the Mashed Potato

    Carefully spoon the mashed potatoes over the filling.

    Start around the edges and work toward the centre.

    This helps create a seal and makes it less likely that the sauce will push up through the topping.

    Spread the potatoes gently with a fork.

    Run the fork over the surface to create plenty of ridges and peaks.

    Those uneven areas become wonderfully golden in the oven.

    9. Add Cheese, If Using

    If you’d like a cheesy topping, sprinkle the mature cheddar evenly over the mashed potatoes.

    Cheese isn’t essential to fish pie, but it’s a very good addition.

    10. Bake

    Preheat the oven to 400°F (200°C).

    Place the baking dish on a sheet pan in case the filling bubbles over.

    Bake for approximately 25–30 minutes, until the filling is bubbling around the edges and the potato topping is beginning to brown.

    If you’d like more colour, place the pie under the broiler for 1–3 minutes at the end.

    Watch it carefully.

    11. Rest Before Serving

    Allow the fish pie to stand for approximately 10 minutes before serving.

    This gives the sauce a chance to settle slightly and makes the pie easier to spoon onto plates.

    Brit & Skillet Tip

    If you’re using a glass or ceramic baking dish, don’t move it directly from a very cold refrigerator into a very hot oven unless the manufacturer specifically says that’s safe.

    Sudden temperature changes can damage some bakeware.

    Should Fish Pie Contain Hard-Boiled Eggs?

    It certainly can.

    Chopped or quartered hard-boiled eggs are traditional in some British fish pies, although they’re not included in every version.

    If you’d like to add them, hard-boil 2–3 eggs, peel and quarter them, then arrange them among the fish before adding the sauce.

    We’ve left them optional because the combination of fish and egg can surprise some American readers, and the pie is excellent without them.

    Can I Use Frozen Fish?

    Yes.

    Frozen fish is a practical option and can often be excellent quality.

    Thaw it completely in the refrigerator first, then pat it dry before using.

    Avoid putting frozen fish directly into the pie because the additional water released during cooking can make the sauce thin and watery.

    Can I Use Frozen Shrimp?

    Yes.

    Thaw the shrimp completely and pat them dry before adding them.

    Make sure they’re raw rather than already cooked.

    If you only have cooked shrimp, add them toward the end of the assembly process and remember they need only to heat through.

    Can I Use Tilapia?

    You can, although I prefer cod or haddock.

    Tilapia is relatively thin and delicate, so it’s more likely to break apart during cooking.

    If using it, cut it into fairly large pieces and poach it for less time.

    Can I Use Cream Instead of Milk?

    You can replace a portion of the milk with heavy cream if you’d like an especially rich sauce.

    However, a traditional-style white sauce made with whole milk, butter and flour is already creamy enough for a comforting fish pie.

    Using all heavy cream can make the dish unnecessarily rich.

    Why Is My Fish Pie Watery?

    There are several common causes.

    The fish may have released excess water, particularly if it was previously frozen.

    The white sauce may not have been cooked until sufficiently thick.

    Or the mashed potatoes may have contained too much milk.

    To avoid a watery fish pie:

    • Thoroughly thaw and dry frozen seafood.
    • Cook the white sauce until it clearly coats a spoon.
    • Keep the mashed potatoes relatively firm.
    • Let the finished pie rest for 10 minutes before serving.

    The filling will naturally loosen slightly in the oven, so the sauce should be properly thick before assembly.

    Why Is My Fish Overcooked?

    Remember that the fish cooks twice.

    It gets a brief poach in the milk and then another 25–30 minutes in the oven.

    The initial poaching stage is only meant to partially cook the fish and flavour the milk.

    Don’t wait for the fish to become completely firm and flaky before removing it from the poaching liquid.

    Why Does Fish Pie Use Mashed Potatoes Instead of Pastry?

    British savoury dishes called “pie” don’t always involve pastry.

    Cottage pie and shepherd’s pie are also topped with mashed potatoes.

    Fish pie follows the same general idea: a savoury filling covered with potato and baked until golden.

    If you were expecting something resembling an American seafood pot pie, the British version is quite different — but considerably easier because there’s no pastry to make.

    What to Serve with Fish Pie

    Fish pie is already a substantial meal, so simple vegetables are ideal.

    Try it with:

    • Buttered green beans
    • Steamed broccoli
    • Garden peas
    • Roasted carrots
    • Buttered cabbage
    • A simple green salad

    Because the pie already contains potatoes, you don’t need another starch alongside it.

    Can I Make Fish Pie Ahead?

    Yes.

    Prepare the filling and mashed potato topping, assemble the pie and allow everything to cool.

    Cover and refrigerate for up to 24 hours.

    When ready to cook, bake until piping hot throughout.

    Because the pie will be cold from the refrigerator, it may require an additional 10–15 minutes in the oven.

    Can I Make the Components Separately?

    Absolutely.

    You can prepare the mashed potatoes and sauce earlier in the day and refrigerate them separately.

    Then poach the fish and assemble the pie closer to dinner.

    This is particularly useful if you want to divide the work into shorter stages.

    How to Store Leftover Fish Pie

    Cool leftovers promptly and refrigerate them in an airtight container.

    Eat within approximately 2 days.

    Reheat individual portions until piping hot throughout.

    Because seafood can become dry when repeatedly heated, I recommend reheating only the amount you plan to eat.

    Can You Freeze Fish Pie?

    Yes, although the texture of the potatoes and cream sauce can change slightly after freezing.

    For best results, freeze the assembled pie before its final bake.

    Allow all components to cool completely, wrap the dish securely and freeze for up to approximately 2 months.

    Thaw overnight in the refrigerator before baking.

    Make sure the centre becomes piping hot.

    If your fish was previously frozen before you made the pie, follow appropriate food-safety guidance regarding refreezing seafood.

    A Proper British Comfort-Food Dinner

    Fish pie may not have the pastry crust its name seems to promise, but once you’ve tried that combination of flaky fish, creamy sauce and golden mashed potato, the British logic begins to make perfect sense.

    It’s warming without being as heavy as a beef pie, and using a mixture of fish gives every spoonful slightly different flavour and texture.

    Best of all, you don’t need to find every ingredient used in a British fishmonger.

    Cod or haddock, salmon, American shrimp and ordinary heavy supermarket staples make a lovely fish pie.

    If you enjoy British comfort food, try our Traditional British Cottage Pie, Traditional Lancashire Hotpot, Traditional British Toad in the Hole and Traditional British Steak and Ale Pie next.

    Or browse all of the Brit & Skillet Recipes for more traditional British food made approachable for American kitchens.

  • Traditional British Battenberg Cake: An Easy Recipe for American Bakers

    Traditional British Battenberg Cake: An Easy Recipe for American Bakers

    Battenberg cake might be one of the most instantly recognizable British cakes.

    Slice through its marzipan covering and you’ll reveal four neat squares of sponge — traditionally two pink and two yellow — arranged in a checkerboard pattern and held together with a thin layer of apricot jam.

    It looks wonderfully elaborate, but the secret is that Battenberg is really made from two simple sponge cakes that are trimmed into strips and assembled.

    You don’t even need a special Battenberg pan.

    For this Brit & Skillet version, we’ll use an ordinary 8-inch (20 cm) square cake pan, divide the batter into pink and yellow halves, and create a simple foil divider so the two colours can bake side by side.

    The result is a proper British Battenberg that’s completely achievable in an American kitchen.

    What Is Battenberg Cake?

    Battenberg is a British sponge cake made from alternating blocks of pink and yellow cake.

    The pieces are arranged to create a checkerboard pattern when the cake is sliced.

    Apricot jam holds the sponge pieces together, and the entire cake is wrapped in marzipan.

    Unlike a layer cake, Battenberg is traditionally formed into a long rectangular loaf.

    Every slice reveals the same distinctive four-square pattern.

    Where Did Battenberg Cake Come From?

    Battenberg cake became associated with Britain during the late 19th century.

    It’s often linked with the 1884 marriage of Princess Victoria, a granddaughter of Queen Victoria, to Prince Louis of Battenberg, although the exact history of the cake and how it acquired its name is less certain than the popular story sometimes suggests.

    Whatever its precise beginnings, the pink-and-yellow checkerboard cake became a familiar British teatime classic.

    What Does Battenberg Cake Taste Like?

    The sponge is buttery and lightly flavoured with almond.

    Apricot jam adds a subtle fruity sharpness, while the marzipan provides a sweet almond finish.

    Despite its striking appearance, the flavour itself is fairly delicate.

    It’s especially good with tea or coffee.

    What Is Marzipan?

    Marzipan is a sweet almond paste made primarily from ground almonds and sugar.

    It’s soft enough to roll and is commonly used to cover cakes or make confectionery.

    For Battenberg, marzipan is rolled into a thin sheet and wrapped around the assembled sponge.

    In American supermarkets, you may find marzipan in the baking aisle, particularly around the holidays. It’s also commonly available from specialty baking shops and European food stores.

    Is Almond Paste the Same as Marzipan?

    No.

    Although both are made with almonds and sugar, American almond paste generally contains a higher proportion of almonds and is less sweet and less pliable than marzipan.

    For covering a Battenberg cake, you want a product specifically labelled marzipan.

    Almond paste is better suited to being incorporated into baked goods rather than rolled around the outside of this cake.

    Do I Need a Battenberg Tin?

    No.

    Traditional Battenberg tins contain dividers that create four long strips of sponge.

    They’re convenient, but they’re certainly not essential.

    For this recipe, we’ll bake pink and yellow sponge side by side in one square pan using a simple divider made from foil and parchment paper.

    Once baked, each colour is cut lengthwise into two strips.

    Those four strips create the checkerboard.

    Traditional British Battenberg Cake Recipe

    Prep Time: 35 minutes
    Bake Time: 25–30 minutes
    Cooling and Assembly: Approximately 1 hour
    Serves: 8–10

    Equipment

    • 8-inch (20 cm) square cake pan
    • Parchment paper
    • Aluminum foil
    • Two mixing bowls
    • Electric mixer
    • Serrated knife
    • Rolling pin
    • Pastry brush

    Ingredients

    For the Sponge

    • ¾ cup (170 g) unsalted butter, softened
    • ¾ cup plus 2 tablespoons (175 g) granulated sugar
    • 3 large eggs, at room temperature
    • 1 teaspoon vanilla extract
    • ½ teaspoon almond extract
    • 1½ cups (180 g) all-purpose flour
    • 2 teaspoons baking powder
    • ¼ teaspoon fine salt
    • 3 tablespoons (45 ml) whole milk, divided as needed
    • Pink or red gel food colouring

    For Assembly

    • ⅓ cup (110 g) apricot jam
    • 14 ounces (400 g) marzipan
    • Powdered sugar, for rolling

    Instructions

    1. Prepare the Pan

    Preheat the oven to 350°F (175°C).

    Grease an 8-inch square cake pan and line it with parchment paper.

    Take a piece of heavy-duty aluminum foil and fold it several times to create a sturdy divider approximately the width of your pan.

    Wrap or line the divider with parchment paper.

    Position it securely down the centre of the pan so you have two equal rectangular sections.

    Brit & Skillet Tip

    Take a moment to make the divider as straight and centred as possible.

    The more evenly sized the two cakes are, the easier it will be to cut matching strips for the checkerboard later.

    2. Combine the Dry Ingredients

    In a medium bowl, whisk together the all-purpose flour, baking powder and salt.

    Set aside.

    3. Cream the Butter and Sugar

    In a large bowl, beat the softened butter and sugar together for approximately 3–4 minutes, until noticeably lighter and fluffy.

    This incorporates air into the sponge and helps create a light texture.

    4. Add the Eggs

    Add the eggs one at a time, beating well after each addition.

    Scrape down the bowl as necessary.

    Mix in the vanilla and almond extracts.

    If the mixture looks slightly curdled after adding the eggs, don’t panic. A spoonful of the measured flour can help bring it back together.

    5. Add the Flour

    Add the dry ingredients and fold or mix on low speed just until combined.

    Add approximately 2 tablespoons of the milk.

    The batter should be soft enough to spread easily but shouldn’t be runny.

    Add the remaining milk only if necessary.

    Brit & Skillet Tip

    Once the flour goes in, avoid excessive mixing.

    Overmixing develops more gluten and can make the sponge tougher rather than soft and tender.

    6. Divide the Batter

    Divide the batter as evenly as possible between two bowls.

    Leave one half its natural pale yellow colour.

    Add a very small amount of pink or red gel food colouring to the second half.

    Mix gently until the batter is an even pale pink.

    Add more colouring only if needed.

    Battenberg should traditionally be a soft pink rather than fluorescent red.

    7. Fill the Pan

    Spoon the yellow batter into one side of the prepared pan and the pink batter into the other.

    Spread each side evenly, making sure the batter reaches the corners.

    Smooth the tops.

    8. Bake

    Bake for approximately 25–30 minutes, until the cakes are lightly golden and a toothpick inserted into the centre comes out clean or with only a few moist crumbs.

    Avoid overbaking, because Battenberg sponge can become dry.

    9. Cool

    Allow the cakes to cool in the pan for approximately 10 minutes.

    Carefully remove the divider, then transfer the cakes to a wire rack.

    Allow them to cool completely before trimming.

    10. Warm the Apricot Jam

    Place the apricot jam in a small saucepan or microwave-safe bowl.

    Warm it gently until loose enough to brush.

    If your jam contains large pieces of fruit, press it through a small sieve for a smoother finish.

    Set aside.

    11. Trim the Cakes

    Once completely cool, use a sharp serrated knife to trim the outer edges of both cakes.

    You want two neat rectangles of approximately equal size.

    Trim the tops if necessary so they’re reasonably flat and even.

    12. Cut the Sponge Strips

    Cut each coloured cake lengthwise into two equal strips.

    You should now have:

    • 2 pink sponge strips
    • 2 yellow sponge strips

    Lay them next to one another and trim as needed so all four strips are as close as possible to the same height, width and length.

    Don’t worry if they’re not mathematically perfect.

    A homemade Battenberg can still look beautiful without ruler-perfect squares.

    Brit & Skillet Tip

    Use the first properly trimmed strip as a guide for the remaining three.

    Matching the strips at this stage makes assembling the checkerboard much easier.

    13. Assemble the Checkerboard

    Arrange one pink strip beside one yellow strip.

    Brush the surfaces where they meet with a thin layer of warm apricot jam.

    Brush the tops lightly with jam.

    Place the remaining two strips on top, reversing the colours:

    Bottom: Pink | Yellow
    Top: Yellow | Pink

    Brush jam between every surface that touches another piece of cake.

    Press the strips together gently.

    You should now have a long rectangular cake with the classic Battenberg checkerboard at each end.

    14. Brush the Outside with Jam

    Brush a thin layer of apricot jam over all four long sides of the assembled cake.

    This helps the marzipan adhere.

    Don’t use so much jam that the cake becomes slippery.

    15. Roll the Marzipan

    Dust your work surface lightly with powdered sugar.

    Roll the marzipan into a rectangle approximately ⅛ inch (3 mm) thick.

    It needs to be wide enough to wrap completely around the four long sides of the cake and long enough to cover its full length.

    16. Wrap the Battenberg

    Place the cake onto the marzipan with one long side facing down.

    Carefully roll or wrap the marzipan around the cake.

    Bring the edges together along the bottom and trim away excess marzipan.

    Gently press the seam together.

    Turn the cake so the seam is underneath.

    Smooth the marzipan gently with your hands.

    17. Finish the Cake

    Trim a thin slice from each end using a sharp knife to reveal the clean pink-and-yellow checkerboard.

    For a traditional decorative finish, lightly score the top of the marzipan with a crisscross pattern using the back of a knife.

    Don’t cut deeply through the marzipan.

    You can also gently pinch or crimp the upper edges for an old-fashioned finish.

    18. Slice and Serve

    Cut the Battenberg into slices approximately ½–¾ inch thick.

    Serve at room temperature with tea or coffee.

    Why Is Battenberg Pink and Yellow?

    The pink-and-yellow checkerboard has become the classic Battenberg appearance.

    Modern versions sometimes use different colours or flavours, but traditional Battenberg generally alternates plain yellow sponge with pink-coloured sponge.

    The pink portion doesn’t necessarily need a different flavour.

    Both colours can have the same almond-and-vanilla sponge flavour.

    Do I Need Almond Flour in Battenberg Cake?

    Not necessarily.

    Some Battenberg recipes include ground almonds in the sponge, while others use a straightforward butter cake flavoured with almond extract.

    This version uses all-purpose flour and almond extract, which keeps the ingredient list simple for American bakers while still providing the familiar almond character.

    If you see ground almonds in a British baking recipe, American finely ground almond flour is often a close equivalent, although products can vary in texture.

    What Kind of Food Colouring Should I Use?

    Gel food colouring works best.

    It’s concentrated, so you only need a tiny amount and it won’t add much additional liquid to the cake batter.

    Start with the smallest amount possible.

    You can always add more, but once your sponge turns bright red, there’s no going back to traditional Battenberg pink.

    Why Did My Battenberg Cake Fall Apart?

    The apricot jam acts as the glue holding the sponge strips together.

    If the strips separate, you may not have used enough jam between the pieces or may have handled the cake too aggressively before the marzipan was wrapped around it.

    Brush every joining surface with a thin but complete layer of jam.

    Once the marzipan is wrapped around the cake, it helps hold the entire structure together.

    Why Is My Battenberg Dry?

    The most common cause is overbaking.

    The sponge strips are relatively small, and because the cake is later surrounded by marzipan, you want the sponge itself to remain tender.

    Begin checking the cakes at around 25 minutes.

    Remove them when a toothpick comes out clean or with a few moist crumbs rather than waiting for the cakes to become deeply browned.

    What If My Checkerboard Isn’t Perfect?

    Eat it anyway.

    Seriously.

    The Battenberg pattern looks complicated, but a few millimetres of difference between the strips won’t ruin the cake.

    Trim carefully, use one strip as a size guide for the others and assemble them as evenly as you reasonably can.

    The marzipan hides the outside edges, and once sliced, even a slightly rustic checkerboard still looks impressive.

    Why Is My Marzipan Cracking?

    Marzipan can crack if it’s too cold, dry or rolled too thinly.

    Knead it gently for a minute before rolling to make it more pliable.

    Dust the surface with only enough powdered sugar to prevent sticking. Too much can dry the marzipan.

    If a small crack appears, gently smooth it together with your fingers.

    Why Is My Marzipan Sticky?

    Warm marzipan can become sticky, particularly in a warm kitchen.

    Dust your work surface and rolling pin lightly with powdered sugar.

    If the marzipan becomes very soft, let it rest somewhere cool for a few minutes before continuing.

    Can I Use Another Jam?

    Apricot jam is traditional because its mild flavour works beautifully with almond and its pale colour doesn’t distract from the sponge.

    If you can’t find it, a smooth peach preserve would be one of the closer substitutes.

    Raspberry jam tastes delicious but will give the cake a noticeably different flavour and may stain the sponge or marzipan.

    For the classic version, stick with apricot.

    Can I Make Battenberg Cake Ahead?

    Yes.

    Battenberg is actually an excellent make-ahead cake.

    Once wrapped in marzipan, the sponge is protected from the air and stays moist surprisingly well.

    You can make it a day or two before serving.

    How to Store Battenberg Cake

    Store Battenberg in an airtight container at cool room temperature for approximately 3–4 days.

    If your kitchen is particularly warm, you can refrigerate it, although refrigeration may make the sponge and marzipan firmer.

    Bring refrigerated Battenberg back to room temperature before serving.

    Can You Freeze Battenberg Cake?

    Yes.

    Wrap the finished cake well in plastic wrap followed by foil or place it in a freezer-safe container.

    Freeze for up to approximately 3 months.

    Thaw it overnight in the refrigerator, then allow it to come to room temperature before serving.

    You can also freeze the unassembled sponge pieces and add the jam and marzipan after thawing.

    What to Serve with Battenberg Cake

    Battenberg is very much a teatime cake.

    Serve it simply with:

    • Black tea
    • Earl Grey
    • English breakfast tea
    • Coffee

    Because the marzipan is quite sweet, you don’t need frosting, cream or another sauce.

    A relatively thin slice is usually plenty.

    A British Cake Worth Cutting Into

    Battenberg is one of those cakes that makes people wonder how you did it.

    From the outside, it’s an understated little marzipan-covered loaf.

    Then you cut the first slice and reveal that pink-and-yellow checkerboard.

    The clever part is that the effect doesn’t require complicated decorating or specialist equipment — just four carefully trimmed pieces of sponge, a little apricot jam and a sheet of marzipan.

    And if your squares aren’t absolutely perfect, that simply proves someone made it rather than a machine.

    For more classic British cakes and bakes, try our Traditional British Lemon Drizzle Cake, Classic Victoria Sponge Cake, Traditional Bakewell Tart and Traditional Eccles Cakes.

    Or browse all of the Brit & Skillet Recipes for more British favourites made approachable for American kitchens.


  • Traditional British Steak and Ale Pie: An Easy Recipe for American Kitchens

    Traditional British Steak and Ale Pie: An Easy Recipe for American Kitchens

    Few dishes say British pub food quite like a proper steak and ale pie.

    Underneath that crisp, golden pastry is tender beef slowly cooked with onions, carrots and herbs in a rich, deeply savoury ale gravy. It’s hearty, warming and exactly the sort of dinner that feels right when the weather turns cooler.

    And although steak and ale pie sounds unmistakably British, it’s surprisingly straightforward to make with ingredients from an American supermarket.

    The key is choosing the right beef, using an ale that adds flavour without overwhelming the gravy, and giving the filling enough time to cook slowly until the meat becomes beautifully tender.

    For this Brit & Skillet version, we’re using American chuck roast, a readily available substitute for the braising beef you’d commonly see in a British recipe, and finishing the pie with puff pastry for a wonderfully flaky golden top.

    What Is Steak and Ale Pie?

    Steak and ale pie is a traditional British savoury pie made with pieces of beef cooked slowly in a gravy flavoured with ale.

    Onions are almost always included, and recipes may also contain carrots, mushrooms or other vegetables.

    The cooked beef filling is placed in a pie dish and topped with pastry before being baked until crisp and golden.

    It’s a classic pub meal and is particularly good served with mashed potatoes, peas and extra gravy.

    Is Steak and Ale Pie the Same as Steak and Kidney Pie?

    No.

    The two pies are related, but steak and kidney pie includes pieces of kidney alongside the beef.

    Steak and ale pie gets much of its distinctive flavour from the ale in the gravy and doesn’t require kidney.

    That makes it particularly approachable for American cooks who want a classic British beef pie without having to source organ meat.

    What Beef Should I Use in America?

    Despite the word steak in the name, this isn’t the place for an expensive grilling steak.

    You want a cut that becomes tender during slow cooking.

    For American kitchens, chuck roast is ideal.

    Chuck contains enough fat and connective tissue to become wonderfully tender after a long, gentle braise.

    Look for a boneless chuck roast and cut it into approximately 1½-inch pieces.

    Pre-cut beef stew meat can also work, although the cuts included in packaged stew meat can vary.

    What Kind of Ale Should I Use?

    Choose a British-style brown ale, amber ale or another moderately flavoured ale that you’d be happy to drink.

    You want enough maltiness to add depth to the gravy without excessive bitterness.

    Avoid extremely hoppy IPAs. Their bitterness can become more pronounced as the liquid reduces.

    A brown ale is particularly good for a classic steak and ale pie.

    Can I Use Guinness?

    Yes, but technically you’ll be moving from an ale pie toward a steak and stout pie.

    Stout produces a darker gravy with deeper roasted and slightly bitter flavours.

    It’s delicious, but it tastes noticeably different from a pie made with brown or amber ale.

    If you’d like the classic steak-and-ale character, start with brown ale.

    British Beef Stock vs. American Beef Broth

    British recipes frequently call for beef stock, while American supermarkets commonly sell products labelled beef broth.

    For this recipe, a good-quality low-sodium beef broth works perfectly well.

    Using low-sodium broth gives you more control over the seasoning because Worcestershire sauce and the reduced cooking liquid also contribute salt.

    If you have homemade beef stock, that’s excellent too.

    Traditional British Steak and Ale Pie Recipe

    Prep Time: 30 minutes
    Filling Cook Time: 2 hours
    Bake Time: 30–35 minutes
    Serves: 6

    Equipment

    • Large Dutch oven or heavy pot
    • Approximately 2½- to 3-quart pie dish or baking dish
    • Wooden spoon
    • Rolling pin, if needed
    • Pastry brush

    Ingredients

    For the Steak and Ale Filling

    • 2 pounds (900 g) boneless chuck roast, cut into approximately 1½-inch pieces
    • 1 teaspoon fine salt
    • ½ teaspoon freshly ground black pepper
    • 3 tablespoons (24 g) all-purpose flour, divided
    • 1–2 tablespoons neutral oil
    • 2 large yellow onions, sliced
    • 2 medium carrots, sliced
    • 2 cloves garlic, minced
    • 1 tablespoon tomato paste
    • 1 tablespoon Worcestershire sauce
    • 12 fluid ounces (355 ml) brown or amber ale
    • 1½ cups (360 ml) low-sodium beef broth
    • 1 teaspoon dried thyme
    • 1 bay leaf
    • Salt and black pepper, to taste

    For the Pastry

    • Approximately 14–17 ounces (400–490 g) puff pastry, thawed according to package directions
    • 1 large egg
    • 1 tablespoon (15 ml) water

    Instructions

    1. Season the Beef

    Pat the beef dry with paper towels.

    Season with the salt and black pepper.

    Sprinkle with 2 tablespoons of the flour and toss until the pieces are lightly coated.

    2. Brown the Beef

    Heat 1 tablespoon of oil in a large Dutch oven over medium-high heat.

    Brown the beef in batches.

    Don’t crowd the pot.

    Let the pieces develop a good brown crust before turning them.

    Transfer each browned batch to a plate and continue until all the beef has been browned, adding the second tablespoon of oil if necessary.

    The beef doesn’t need to cook through at this stage.

    Brit & Skillet Tip

    Browning the beef is one of the most important flavour-building steps in this recipe.

    If you pile all the meat into the pot at once, it releases moisture and steams rather than browns.

    A few extra minutes spent working in batches makes a noticeable difference to the finished gravy.

    3. Cook the Onions and Carrots

    Reduce the heat to medium.

    Add the onions and carrots to the same pot.

    Cook for approximately 8–10 minutes, stirring occasionally, until the onions have softened and begun to colour.

    Add the garlic and cook for another 30 seconds.

    4. Add the Tomato Paste and Flour

    Stir in the tomato paste and cook for approximately 1 minute.

    Sprinkle over the remaining 1 tablespoon flour and stir well.

    Cook for another minute.

    This small amount of flour helps the gravy thicken as the filling cooks.

    5. Add the Ale

    Slowly pour in the ale while stirring and scraping the bottom of the pot.

    Those browned bits stuck to the bottom contain lots of flavour.

    Allow the ale to simmer for approximately 3–4 minutes.

    6. Build the Gravy

    Add the beef broth, Worcestershire sauce, thyme and bay leaf.

    Return the browned beef and any accumulated juices to the pot.

    Stir everything together.

    The liquid should come most of the way up the beef without necessarily covering it completely.

    Bring to a gentle simmer.

    7. Slowly Cook the Filling

    Reduce the heat to low.

    Cover the pot partially and simmer very gently for approximately 1½–2 hours, stirring occasionally.

    The beef is ready when it’s tender enough to cut easily with a fork.

    If the gravy becomes too thick before the beef is tender, add a small splash of beef broth.

    Brit & Skillet Tip

    Don’t rush chuck roast.

    If the beef still seems tough after 90 minutes, it usually needs more cooking, not less.

    The connective tissue gradually breaks down during slow cooking, turning a relatively tough cut into beautifully tender beef.

    8. Thicken the Gravy

    Once the beef is tender, remove the lid completely.

    Simmer for another 10–15 minutes, if necessary, until the gravy is rich and thick enough to coat the beef.

    It should look like pie filling rather than soup.

    Remove the bay leaf.

    Taste and adjust the salt and pepper.

    9. Cool the Filling

    Transfer the filling to your pie dish.

    Allow it to cool for at least 30–45 minutes before adding the pastry.

    For even better results, you can refrigerate the filling until completely cold.

    Brit & Skillet Tip

    This step matters.

    Putting puff pastry directly over steaming-hot filling begins melting the pastry’s butter before the pie reaches the oven.

    Cool filling helps the pastry stay flaky and rise properly.

    10. Preheat the Oven

    Preheat the oven to 400°F (200°C).

    If your puff pastry needs rolling, lightly flour the work surface and roll it until it’s large enough to cover your pie dish with a little overhang.

    11. Add the Pastry

    Beat the egg with the tablespoon of water to make an egg wash.

    Brush a little egg wash around the rim of the pie dish.

    Lay the puff pastry over the filling.

    Press it gently around the rim to seal.

    Trim away excessive overhang, leaving approximately ½ inch around the edge.

    You can crimp the edge with a fork or your fingers.

    Cut two or three small slits in the centre so steam can escape.

    12. Egg Wash

    Brush the pastry lightly with the remaining egg wash.

    Avoid allowing large amounts of egg wash to run down the cut edges of the puff pastry because it can interfere with the layers rising.

    13. Bake

    Place the pie dish on a baking sheet in case the filling bubbles over.

    Bake at 400°F (200°C) for approximately 30–35 minutes, until the pastry is puffed, crisp and deeply golden.

    The filling should be bubbling around the edges.

    14. Rest and Serve

    Let the pie stand for approximately 10 minutes before serving.

    Spoon generous portions onto warm plates.

    Does Steak and Ale Pie Have Pastry Underneath?

    It depends.

    You’ll find British steak and ale pies made both ways.

    Some are completely enclosed in pastry with a pastry base and lid.

    Others — particularly pub-style versions — place the cooked filling in a pie dish and cover only the top with pastry.

    This recipe uses a puff pastry lid because it’s easier, reliable and particularly well suited to American kitchens.

    You still get the essential combination of rich beef filling and crisp golden pastry without worrying about a soggy pastry base.

    Can I Use Shortcrust Pastry?

    Yes.

    Shortcrust pastry creates a firmer, more traditional pie crust rather than the light flaky layers of puff pastry.

    Either works.

    If you already make the homemade shortcrust pastry from our Traditional British Bakewell Tart or Traditional British Treacle Tart, you can use a savoury version without the sugar.

    Puff pastry is simply the easiest option for this recipe.

    Can I Add Mushrooms?

    Absolutely.

    Mushrooms are common in many versions of steak and ale pie.

    Add approximately 8 ounces (225 g) sliced mushrooms after the onions have softened.

    Cook until the mushrooms release their moisture and begin to brown before adding the garlic.

    They’ll add even more savoury depth to the filling.

    Can I Make Steak and Ale Pie Without Alcohol?

    Yes.

    Replace the ale with an equal amount of additional beef broth.

    For extra depth, add another teaspoon of Worcestershire sauce.

    The resulting pie won’t have the malty flavour of a traditional steak and ale pie, but you’ll still have a rich British-style beef pie.

    If avoiding alcohol for dietary, religious, medical or other reasons, remember that cooking with alcoholic beverages does not necessarily remove all of the alcohol.

    Does All the Alcohol Cook Out?

    No.

    It’s a common misconception that alcohol immediately disappears during cooking.

    The amount remaining depends on factors including cooking time, temperature, cooking vessel and method.

    If you need the dish to contain no alcohol, use the beef-broth substitution rather than relying on cooking to remove it.

    Why Is My Pie Filling Watery?

    The filling should be thick before the pastry goes on.

    Remember that the pastry only needs about 30 minutes in the oven, which isn’t enough time to substantially reduce a watery stew underneath.

    Once the beef is tender, remove the lid and simmer until the gravy coats the meat.

    Then cool the filling before assembling the pie.

    Why Is My Beef Tough?

    Chuck roast needs slow cooking.

    If the pieces remain chewy, continue simmering them gently.

    Don’t increase the heat dramatically in an attempt to speed things up.

    A low simmer and sufficient time produce the tender texture you’re looking for.

    Why Didn’t My Puff Pastry Rise?

    There are several common causes:

    • The filling was too hot when the pastry was added.
    • The pastry became too warm while being handled.
    • The oven wasn’t fully preheated.
    • Too much egg wash ran down the cut pastry edges.
    • The pastry was rolled excessively thin.

    Keep puff pastry cool until you’re ready to use it and place the assembled pie into a properly heated oven.

    What to Serve with Steak and Ale Pie

    This is pub food, so simple sides are exactly right.

    Try it with:

    • Creamy mashed potatoes
    • Garden peas
    • Buttered cabbage
    • Green beans
    • Roasted carrots
    • Extra gravy

    Yes, serving a pastry-topped pie with mashed potatoes is very British — and very good.

    For an especially comforting British dinner, add peas and plenty of gravy.

    Can I Make the Filling Ahead?

    Yes — and this is actually one of the best ways to make steak and ale pie.

    Prepare the entire beef filling a day ahead.

    Allow it to cool, cover and refrigerate overnight.

    The next day, transfer it to your pie dish if necessary, top with cold puff pastry and bake.

    Not only does this make dinner easier, but the cold filling is ideal for keeping the pastry flaky.

    Can I Assemble the Whole Pie Ahead?

    You can assemble it several hours ahead and refrigerate it before baking.

    Keep it cold until you’re ready to put it in the oven.

    For the best appearance, add the final egg wash shortly before baking.

    You may need to add several minutes to the baking time if the filling is refrigerator-cold.

    How to Store Leftover Steak and Ale Pie

    Allow leftovers to cool, then refrigerate them in an airtight container or cover the pie dish.

    Eat within approximately 3 days.

    For the best pastry texture, reheat the pie in a 350°F (175°C) oven until piping hot.

    The microwave works for individual portions, but the pastry will soften.

    Can You Freeze Steak and Ale Pie?

    Yes.

    The beef filling freezes particularly well.

    Prepare the filling, cool it completely and freeze it in an airtight container for up to 3 months.

    Thaw overnight in the refrigerator before transferring it to a pie dish and topping with fresh puff pastry.

    You can also freeze the cooked pie, although reheated puff pastry won’t be quite as crisp as freshly baked pastry.

    A Proper British Pub Classic

    There’s something wonderfully satisfying about breaking through a crisp pastry lid and finding tender beef in rich ale gravy underneath.

    Steak and ale pie isn’t complicated food. Its flavour comes from giving ordinary ingredients the time they need — properly browning the beef, slowly cooking the filling and reducing the gravy until it’s rich enough to belong inside a pie.

    Serve it with mashed potatoes and peas and you’ve got one of Britain’s great comfort-food dinners without needing anything particularly difficult to find in an American supermarket.

    If you enjoy hearty British dinners, try our Traditional Lancashire Hotpot, Traditional British Cottage Pie and Traditional British Toad in the Hole next.

    For something sweet afterward, our Traditional Sticky Toffee Pudding makes a rather convincing British pub-style finish.

    Or browse all of the Brit & Skillet Recipes for more British favourites made approachable for American kitchens.