Category: British recipes

  • Traditional British Prawn Cocktail: An Easy Classic for American Kitchens

    Traditional British Prawn Cocktail: An Easy Classic for American Kitchens

    There are few starters quite as unmistakably British as a prawn cocktail.

    Juicy prawns coated in creamy pink Marie Rose sauce, piled over crisp shredded lettuce and served with lemon might sound simple — because it is. But for decades, prawn cocktail has been a familiar sight at British dinner parties, restaurants, pubs and Christmas tables.

    It also carries a wonderful bit of retro charm.

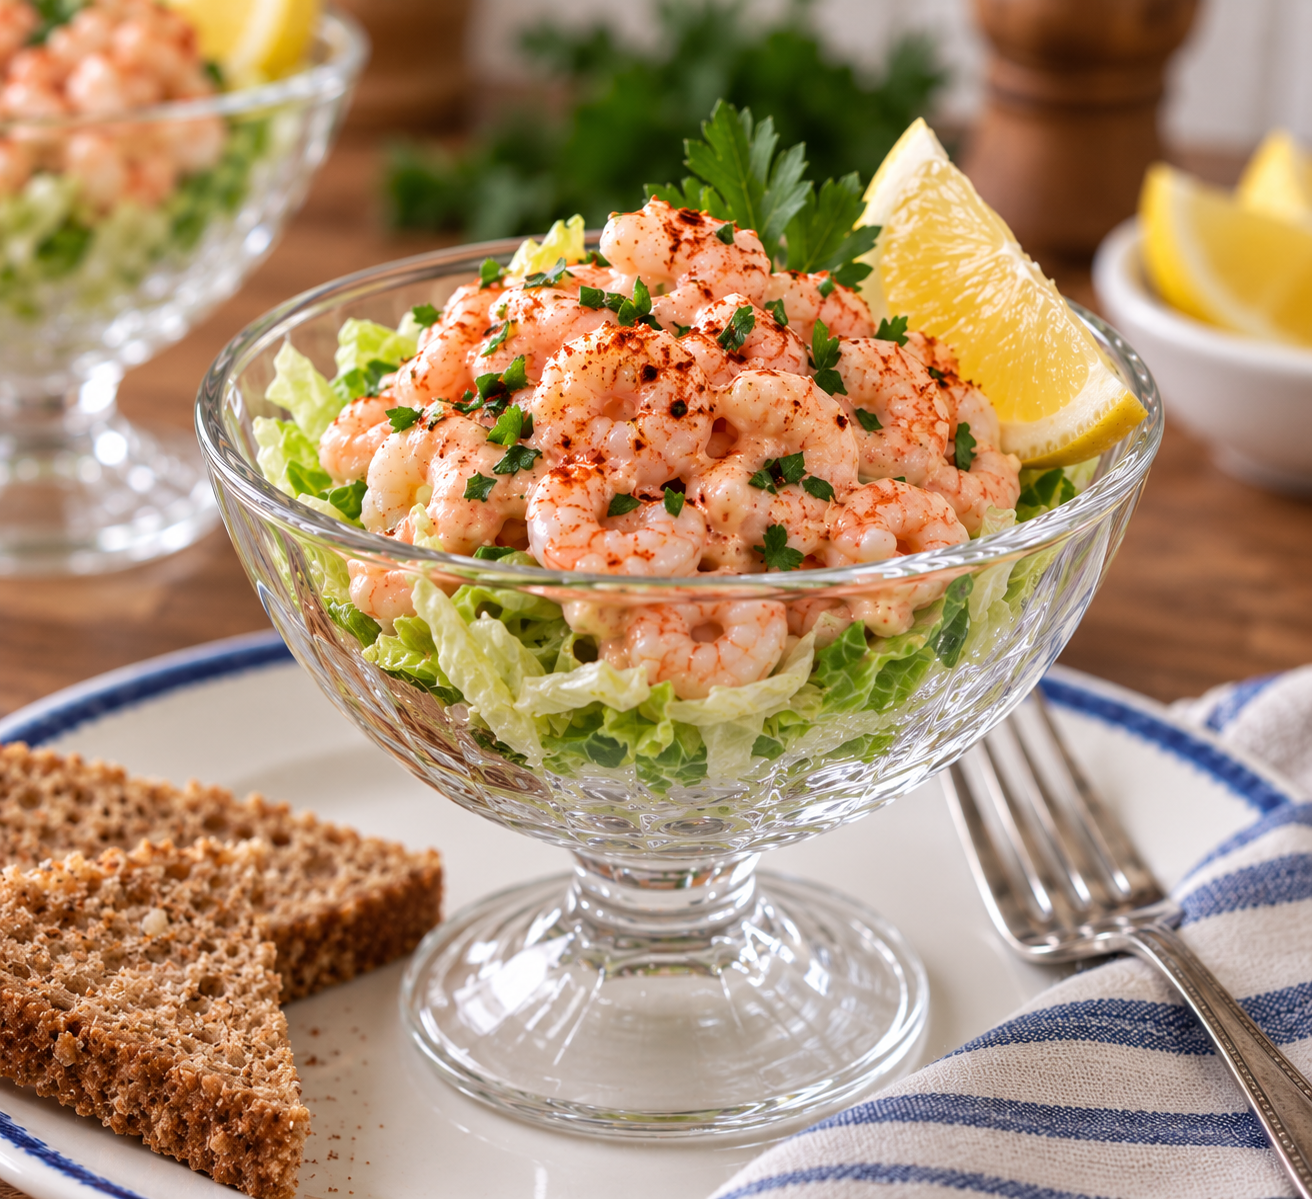
    If you picture prawn cocktail served in a little glass dish with lettuce spilling over the sides, a lemon wedge perched on the rim and perhaps a dusting of paprika on top, you’ve got exactly the right idea.

    For American cooks, there’s one important translation to make before we begin:

    British prawns are essentially what Americans generally call shrimp.

    So there’s no need to hunt down a mysterious British shellfish. Good cooked shrimp from an American supermarket will work beautifully.

    What Is a British Prawn Cocktail?

    A traditional British prawn cocktail consists of cooked prawns tossed in or topped with Marie Rose sauce and served over crisp lettuce.

    The sauce is usually made with mayonnaise and tomato ketchup, often with additions such as:

    • Worcestershire sauce
    • Lemon juice
    • Tabasco or another hot sauce
    • Paprika
    • Black pepper

    Recipes vary considerably.

    Some versions are very simple, while others add a splash of brandy or a little horseradish.

    The finished sauce should be creamy, slightly tangy and gently seasoned without overwhelming the delicate flavor of the prawns.

    Are Prawns and Shrimp the Same Thing?

    Not technically in every biological sense, but in everyday British and American cooking terminology, the distinction is much simpler.

    What British recipes commonly call prawns, American supermarkets will usually label shrimp.

    For this recipe, ordinary cooked shrimp are exactly what you need.

    Medium shrimp work particularly well because they’re large enough to have a satisfying texture but not so enormous that the cocktail becomes awkward to eat.

    Is Prawn Cocktail Really British?

    The broader idea of serving seafood with a cocktail-style sauce isn’t uniquely British, and shrimp cocktail has a long history elsewhere, including in the United States.

    However, the British version with Marie Rose sauce and shredded lettuce became particularly associated with British dining during the second half of the twentieth century.

    It became a dinner-party classic and remains a nostalgic favorite.

    The combination is different from the familiar American shrimp cocktail, where chilled shrimp are usually served around a bowl of tomato-based cocktail sauce.

    What Is Marie Rose Sauce?

    Marie Rose sauce is the creamy pink sauce traditionally associated with British prawn cocktail.

    At its simplest, it’s a mixture of mayonnaise and ketchup.

    But a few additional ingredients give it much more character.

    Our version includes Worcestershire sauce, fresh lemon juice and a small amount of hot sauce.

    The result should be creamy, tangy and lightly spiced rather than aggressively hot.


    Traditional British Prawn Cocktail Recipe

    Prep Time: 20 minutes
    Chilling Time: 20 minutes, optional
    Total Time: About 40 minutes
    Serves: 4 as a starter

    Ingredients

    For the Prawns

    • 1 lb (450g) cooked medium shrimp, peeled and deveined
    • 1 tablespoon fresh lemon juice
    • Freshly ground black pepper, to taste

    For the Marie Rose Sauce

    • 1/2 cup (120g) mayonnaise
    • 3 tablespoons (50g) tomato ketchup
    • 1 teaspoon Worcestershire sauce
    • 1 teaspoon fresh lemon juice
    • 1/2 teaspoon hot sauce, such as Tabasco, optional
    • Pinch of paprika
    • Freshly ground black pepper, to taste
    • Pinch of salt, if needed

    For Serving

    • 2–3 cups finely shredded iceberg or little gem lettuce
    • 1 lemon, cut into wedges
    • Paprika, for finishing
    • Fresh parsley or chives, optional
    • Thinly sliced cucumber, optional

    Instructions

    1. Prepare the Shrimp

    If you’re using frozen cooked shrimp, thaw them completely according to the package instructions.

    Pat them thoroughly dry with paper towels.

    This step is important because excess water can thin the Marie Rose sauce.

    Place the shrimp in a bowl and toss with 1 tablespoon fresh lemon juice and a little black pepper.

    2. Make the Marie Rose Sauce

    In a separate bowl, combine the mayonnaise and ketchup.

    Add the Worcestershire sauce, lemon juice, optional hot sauce, paprika and black pepper.

    Stir until smooth and evenly pink.

    Taste before adding salt because mayonnaise, ketchup and Worcestershire sauce already contain seasoning.

    Brit & Skillet Tip

    Marie Rose sauce should taste like more than mayonnaise and ketchup, but it shouldn’t overpower the prawns.

    Add Worcestershire, lemon and hot sauce gradually. You can always add more, but you can’t take it back out.

    3. Combine the Prawns and Sauce

    Add most of the Marie Rose sauce to the shrimp.

    Fold gently until the shrimp are lightly and evenly coated.

    You may not need every spoonful of sauce.

    The prawns should be coated rather than swimming in it.

    4. Chill

    For the best flavor, cover and refrigerate the prawn mixture for approximately 20 minutes.

    This step is optional if all your ingredients are already thoroughly chilled.

    5. Prepare the Lettuce

    Wash and thoroughly dry the lettuce.

    Finely shred it.

    Divide the lettuce between four small bowls, glasses or starter plates.

    6. Add the Prawn Cocktail

    Spoon the dressed prawns over the lettuce.

    Try to pile them naturally rather than arranging every shrimp in exactly the same direction.

    7. Finish

    Sprinkle very lightly with paprika.

    Add a lemon wedge and, if desired, a little chopped parsley or chives.

    Serve immediately while everything is cold and crisp.

    Brit & Skillet Tip

    Dry both the shrimp and lettuce properly.

    Watery prawns plus wet lettuce are the fastest route to a thin sauce and a soggy prawn cocktail.

    What Shrimp Should I Buy in America?

    You have several easy options.

    Frozen Cooked Shrimp

    Probably the simplest choice.

    Buy peeled and deveined cooked shrimp, thaw them completely and pat dry.

    Fresh Cooked Shrimp

    If your supermarket seafood counter sells good cooked shrimp, those work beautifully.

    Raw Shrimp

    You can cook your own.

    Poach peeled shrimp gently in lightly salted water until just pink and opaque, then transfer them to ice water to stop the cooking.

    Drain and dry thoroughly before assembling the cocktail.

    Avoid overcooking shrimp, which makes them rubbery.

    What Size Shrimp Should I Use?

    Medium shrimp are ideal.

    Very tiny shrimp can disappear into the sauce, while enormous jumbo shrimp make the starter feel more like an American shrimp cocktail.

    That said, there’s no strict rule.

    If you can only find larger shrimp, cut some of them into two naturally sized pieces while leaving a few whole.

    What Lettuce Is Traditional?

    Crisp lettuce is the classic choice.

    Iceberg works extremely well because it’s crunchy, refreshing and sturdy enough to sit beneath the creamy prawns.

    Little gem lettuce is another lovely option.

    Romaine can also work, although its flavor is slightly stronger.

    This is not really the place for delicate spring greens that wilt quickly beneath the sauce.

    Can I Make Marie Rose Sauce Ahead?

    Yes.

    Prepare the sauce up to 2 days in advance and keep it covered in the refrigerator.

    Give it a quick stir and taste before using it.

    You can also prepare the prawns several hours before serving, but don’t assemble them over the lettuce too early.

    The lettuce should remain crisp.

    Can I Add Brandy?

    Yes.

    Some British prawn cocktail recipes include a small splash of brandy or Cognac in the Marie Rose sauce.

    Try approximately 1 teaspoon to begin with.

    It should add background warmth rather than make the sauce taste strongly alcoholic.

    This is completely optional.

    Can I Add Horseradish?

    Absolutely.

    Stir approximately 1/2 teaspoon prepared horseradish into the sauce for a slightly sharper version.

    American cocktail sauce commonly contains horseradish, so this variation creates an interesting bridge between British prawn cocktail and American shrimp cocktail.

    British Prawn Cocktail vs. American Shrimp Cocktail

    Although they share the same basic seafood, they’re usually presented quite differently.

    British Prawn Cocktail

    Typically features:

    • Prawns or shrimp
    • Creamy Marie Rose sauce
    • Shredded lettuce
    • Lemon
    • Individual glasses or bowls

    American Shrimp Cocktail

    More commonly features:

    • Larger chilled shrimp
    • Tomato-based cocktail sauce
    • Horseradish
    • Lemon
    • Shrimp arranged around a serving dish

    Both are chilled seafood starters, but the eating experience is quite different.

    Prawn Cocktail Variations

    Avocado Prawn Cocktail

    Add diced or sliced avocado between the lettuce and prawns.

    The creamy avocado works beautifully with the tangy sauce.

    Spicy Prawn Cocktail

    Add additional Tabasco, cayenne pepper or another hot sauce to the Marie Rose sauce.

    Cucumber Prawn Cocktail

    Add finely diced cucumber for extra freshness and crunch.

    Prawn Cocktail Lettuce Cups

    Skip the glass and spoon the dressed prawns into crisp little gem lettuce leaves.

    These make excellent party appetizers.

    Prawn Cocktail Canapés

    Spoon small amounts onto cucumber rounds or crisp crackers for bite-size party food.

    Why Is My Marie Rose Sauce Runny?

    The most common culprit is water from the shrimp.

    Frozen shrimp can release quite a bit of moisture as they thaw.

    Drain and pat them dry thoroughly before adding the sauce.

    Wet lettuce can cause the same problem after the cocktail is assembled.

    Why Does My Sauce Taste Too Sweet?

    Ketchup brands vary considerably in sweetness.

    Add another squeeze of lemon juice or a little additional Worcestershire sauce to balance it.

    Don’t automatically add more mayonnaise, because that can simply dilute all the flavors.

    Can I Use Light Mayonnaise?

    Yes.

    Full-fat mayonnaise produces the richest sauce, but light mayonnaise works if that’s your preference.

    Avoid strongly flavored specialty mayonnaise unless you deliberately want to change the character of the dish.

    How Do You Serve Prawn Cocktail?

    The classic retro presentation is part of the fun.

    Try serving it in:

    • Small glass dessert dishes
    • Coupe glasses
    • Martini glasses
    • Small bowls
    • Individual plates lined with lettuce

    You don’t need special cocktail glasses.

    In fact, simple glass dessert dishes often look more authentically home-style.

    Serve with a lemon wedge and perhaps some buttered brown bread on the side.

    Is Prawn Cocktail a Christmas Food?

    It can be.

    Prawn cocktail isn’t exclusively a Christmas dish, but it has long appeared on British Christmas and celebration menus.

    Its great advantage is that it’s cold, quick to assemble and doesn’t occupy valuable oven space.

    That makes it particularly useful before a large Christmas dinner.

    It would make a very different opening course before seasonal favorites such as Traditional British Pigs in Blankets and Traditional British Mince Pies later in the meal.

    Can I Make Prawn Cocktail the Day Before?

    You can prepare most components ahead, but I wouldn’t fully assemble it.

    The Marie Rose sauce can be prepared the day before.

    The shrimp can be thawed, dried and refrigerated.

    The lettuce can be washed and thoroughly dried.

    Then combine and assemble everything shortly before serving.

    That gives you the convenience of advance preparation without sacrificing texture.

    How Long Does Prawn Cocktail Keep?

    Once the shrimp and sauce are combined, keep them refrigerated and use within 1 day for the best quality.

    Don’t leave prawn cocktail sitting at room temperature for extended periods.

    Seafood and mayonnaise-based dishes should remain properly chilled.

    Can You Freeze Prawn Cocktail?

    No.

    Freezing the fully assembled dish isn’t recommended.

    The mayonnaise-based sauce can separate, and both lettuce and cooked shrimp can suffer textural changes.

    If your shrimp were previously frozen, they also may not be suitable for refreezing depending on how they were handled.

    This is a dish best made fresh.

    What Else Can I Serve at a British Dinner Party?

    Prawn cocktail makes a particularly fun starting point for a retro British menu.

    You could follow it with Traditional British Steak and Ale Pie or Traditional British Bangers and Mash, then finish with something like Traditional British Banoffee Pie.

    That’s not exactly a light dinner, admittedly — but it would certainly be memorable.

    A Proper Retro British Classic

    Prawn cocktail has gone through periods of being fashionable, unfashionable and fashionable again.

    But that’s part of its charm.

    Underneath the retro presentation is a genuinely good combination: sweet prawns, crisp lettuce, creamy tangy sauce and fresh lemon.

    And because American shrimp work perfectly, it’s also one of the easiest British classics to recreate without hunting for specialty ingredients.

    Serve it cold, keep the lettuce crunchy and don’t drown the prawns in sauce.

    Sometimes the old favorites really do deserve to stick around.

    For more traditional British dishes adapted for an American kitchen, explore our British Recipes at Brit & Skillet.
  • Traditional British Banoffee Pie: An Easy Recipe for American Kitchens

    Traditional British Banoffee Pie: An Easy Recipe for American Kitchens

    Banoffee pie is one of those desserts that sounds almost too simple to be as good as it is.

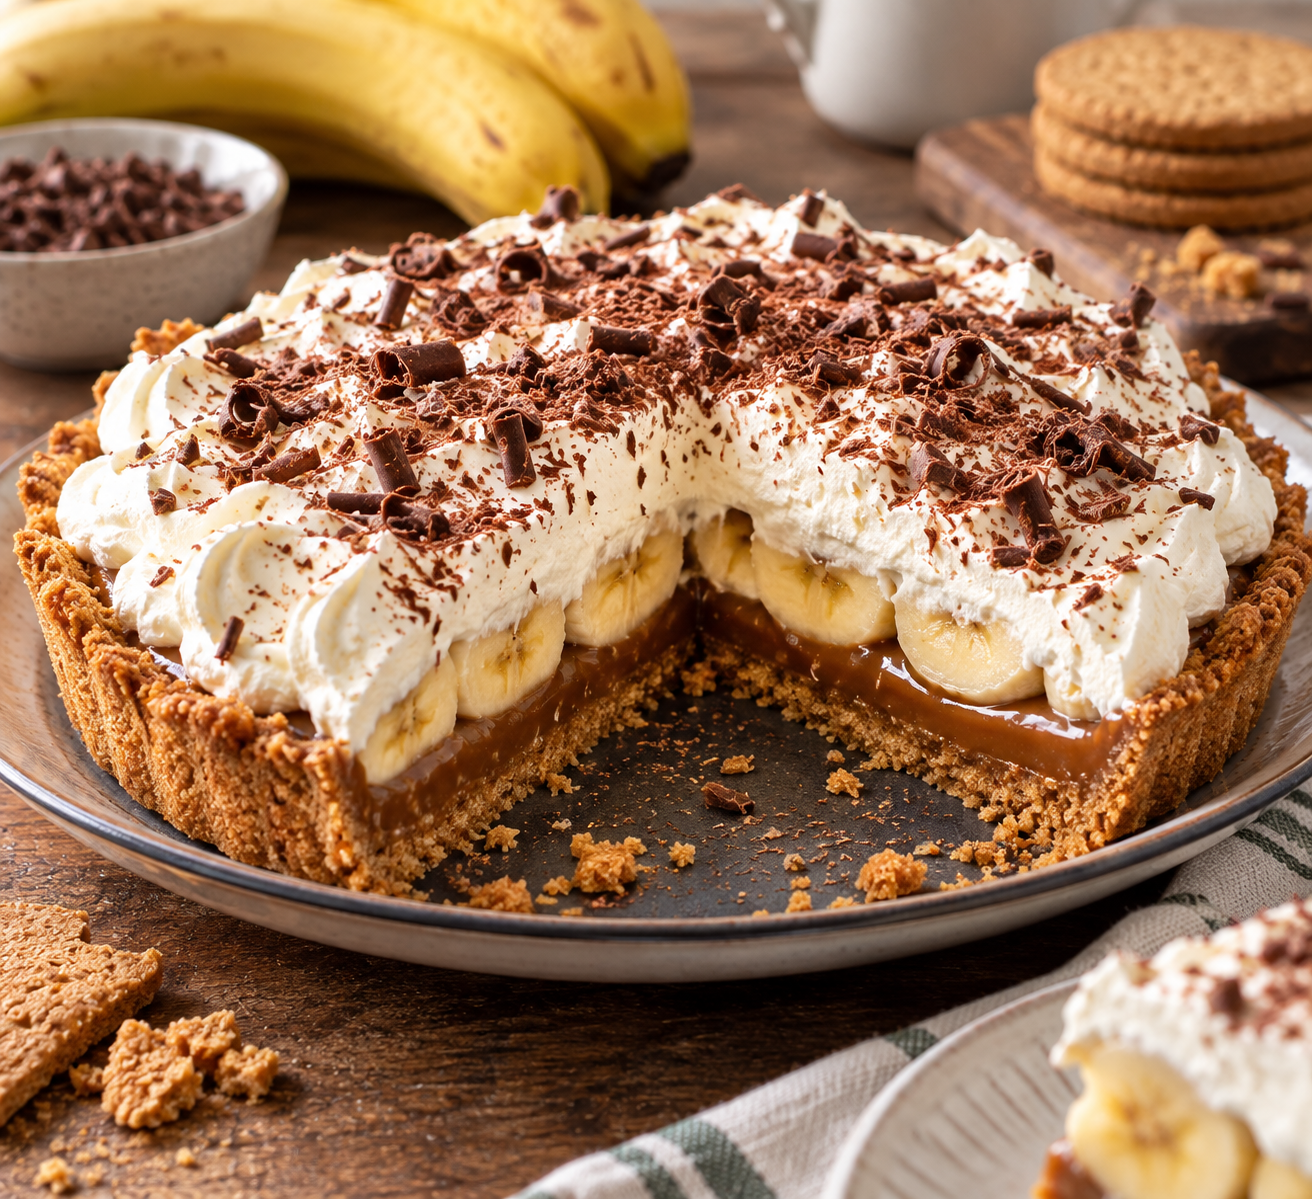
    A buttery biscuit crust is topped with a thick layer of rich toffee, fresh bananas and softly whipped cream. Add a little grated chocolate on top and you’ve got one of Britain’s most indulgent — and surprisingly modern — classic desserts.

    And yes, the name really does come from banana + toffee = banoffee.

    Unlike many traditional British puddings with centuries of history behind them, banoffee pie was created in England in the 1970s. It became enormously popular and is now firmly established as a British dessert favorite.

    For American cooks, there’s just one potential source of confusion: the biscuit base.

    British recipes usually call for digestive biscuits, while American kitchens are much more familiar with graham cracker crusts. Fortunately, either works beautifully.

    What Is Banoffee Pie?

    Banoffee pie is a British dessert traditionally made with four main layers:

    • A biscuit or pastry base
    • Thick caramel or toffee
    • Fresh bananas
    • Whipped cream

    It’s usually finished with grated chocolate, chocolate curls or a light dusting of cocoa powder.

    The combination is rich, creamy and sweet, but fresh bananas keep it from feeling like nothing but caramel and cream.

    Where Was Banoffee Pie Invented?

    Banoffee pie has a much more recent history than desserts such as Traditional British Custard Tart.

    The dessert is generally credited to Nigel Mackenzie and chef Ian Dowding at The Hungry Monk restaurant in Jevington, East Sussex, England, in the early 1970s.

    The original dessert was called Banoffi Pie.

    Its popularity spread far beyond the restaurant, and variations of the dessert eventually appeared throughout Britain and internationally.

    That makes banoffee pie an interesting reminder that a food doesn’t need to be hundreds of years old to become a British classic.

    Is Banoffee Pie the Same as Banana Cream Pie?

    No.

    American banana cream pie normally contains sliced bananas with a vanilla custard or pudding filling inside a pastry or crumb crust.

    Banoffee pie uses toffee or caramel instead of vanilla custard.

    The flavor is therefore considerably richer and more caramel-forward.

    Both are topped with cream, but they’re distinctly different desserts.

    Digestive Biscuits vs. Graham Crackers

    Modern British banoffee pies are frequently made with crushed digestive biscuits.

    Digestives are mildly sweet, wheaty biscuits with a crumbly texture.

    If you can find British digestive biscuits in the United States, they’re an excellent choice.

    But ordinary American graham crackers make a very good substitute and create a crust that will be familiar to American bakers.

    Our British Baking Ingredients Americans Need to Know guide explains several other British baking ingredients and their closest American equivalents.


    Traditional British Banoffee Pie Recipe

    Prep Time: 30 minutes
    Chilling Time: 4 hours
    Total Time: About 4 hours 30 minutes
    Serves: 8–10

    Ingredients

    For the Biscuit Base

    • 9 oz (250g) digestive biscuits
      or approximately 2 cups (200g) graham cracker crumbs
    • 7 tablespoons (100g) unsalted butter, melted

    For the Toffee Filling

    • 1/2 cup (113g) unsalted butter
    • 1/2 cup packed (100g) light brown sugar
    • 1 can (14 oz / 397g) sweetened condensed milk
    • 1 teaspoon vanilla extract
    • 1/4 teaspoon salt

    For the Banana Layer

    • 3–4 medium ripe bananas

    For the Whipped Cream

    • 1 1/2 cups (360ml) heavy whipping cream
    • 2 tablespoons (15g) powdered sugar
    • 1 teaspoon vanilla extract

    For Finishing

    • Finely grated semisweet or dark chocolate
    • Chocolate curls, optional
    • Light dusting of cocoa powder, optional

    Instructions

    1. Prepare the Pan

    Lightly grease a 9-inch (23cm) tart pan with a removable bottom or a 9-inch springform pan.

    A removable-bottom pan makes the finished pie considerably easier to serve.

    2. Crush the Biscuits

    Place the digestive biscuits in a food processor and pulse until they resemble fine crumbs.

    Alternatively, place them in a sturdy zip-top bag and crush them with a rolling pin.

    If you’re using prepared graham cracker crumbs, simply measure them into a bowl.

    3. Make the Crust

    Pour the melted butter over the crumbs.

    Mix until the crumbs are evenly moistened and resemble damp sand.

    Tip the mixture into the prepared pan.

    Press it firmly across the bottom and approximately 1 inch (2.5cm) up the sides.

    The bottom of a measuring cup works well for pressing the crust evenly without compacting it excessively.

    4. Chill the Crust

    Refrigerate the crust for at least 30 minutes while you prepare the toffee.

    Brit & Skillet Tip

    Don’t pulverize the biscuit base into an impossibly hard layer.

    Press it firmly enough to hold together, but don’t put your entire body weight behind the measuring cup. A good banoffee crust should remain slightly crumbly when you cut into it.

    5. Make the Toffee Filling

    Place the butter and brown sugar in a medium heavy-bottomed saucepan over medium-low heat.

    Cook gently, stirring, until the butter has melted and the sugar has mostly dissolved.

    Add the sweetened condensed milk.

    Bring the mixture to a gentle boil, stirring continuously.

    Once bubbling, cook for approximately 2–3 minutes, continuing to stir constantly.

    The mixture should become slightly darker and noticeably thicker.

    Remove from the heat and stir in the vanilla and salt.

    6. Fill the Crust

    Allow the toffee to cool for approximately 5 minutes.

    Pour it into the chilled biscuit crust and spread it into an even layer.

    Refrigerate for at least 3 hours, or until the toffee is completely chilled and firm.

    7. Add the Bananas

    Shortly before serving, peel the bananas.

    Slice them into rounds approximately 1/4 inch (6mm) thick.

    Arrange the banana slices over the chilled toffee.

    They don’t need to form perfect concentric circles. A slightly casual layer looks much more like a homemade pie.

    8. Whip the Cream

    Pour the cold heavy whipping cream into a large bowl.

    Add the powdered sugar and vanilla.

    Whip until soft to medium peaks form.

    Don’t continue whipping until the cream becomes stiff and grainy.

    9. Top the Pie

    Spoon the whipped cream over the bananas.

    Spread it gently with the back of a spoon, leaving natural swirls and peaks rather than creating a perfectly smooth surface.

    10. Finish

    Grate a little chocolate over the cream.

    Alternatively, decorate with chocolate curls or a very light dusting of cocoa powder.

    Keep refrigerated until ready to serve.

    Brit & Skillet Tip

    Add the bananas relatively close to serving time.

    The toffee and crust can be prepared well ahead, but freshly sliced bananas have the best appearance and texture.

    Can I Use Dulce de Leche?

    Yes.

    Prepared dulce de leche is an excellent shortcut and is readily available in many American supermarkets.

    You’ll need approximately 1 1/2 cups (about 400g).

    Spread it directly over the chilled crust and continue with the recipe.

    The flavor won’t be exactly identical to every traditional British banoffee filling, but it makes an extremely good pie and eliminates the stovetop toffee step.

    Can I Boil a Can of Condensed Milk?

    Older banoffee recipes sometimes instruct cooks to boil an unopened can of sweetened condensed milk for several hours to create caramel.

    I don’t recommend doing that.

    Heating a sealed can creates unnecessary risk if it’s allowed to boil dry or handled incorrectly.

    Making the toffee in an open saucepan — or simply using prepared dulce de leche — is easier and safer.

    Why Is My Toffee Runny?

    The filling probably wasn’t cooked long enough.

    Once the condensed milk is added, the mixture needs to reach a gentle bubbling boil and cook for a couple of minutes while being stirred constantly.

    It will also become considerably firmer as it chills.

    Don’t judge the final consistency while the toffee is still hot.

    Why Is My Toffee Grainy?

    Brown sugar that hasn’t properly dissolved can sometimes create a grainy texture.

    Heat the butter and sugar gently at the beginning and stir until they’re well combined before adding the condensed milk.

    Avoid extremely high heat, which can scorch the sugar or milk.

    British Double Cream vs. American Heavy Cream

    British banoffee recipes commonly use double cream.

    American heavy whipping cream is an excellent substitute.

    British double cream contains more fat, so it whips particularly thickly, but American cream containing around 36% milk fat works beautifully.

    Don’t use half-and-half because it won’t whip.

    This is the same substitution we use in our Traditional British Lemon Posset, where the fat content of the cream is especially important.

    How Ripe Should the Bananas Be?

    Use bananas that are ripe and sweet but still firm.

    A few small brown spots on the peel are fine.

    Avoid extremely overripe bananas that have become very soft. They’re excellent for banana bread but can turn mushy inside banoffee pie.

    You want clean slices that still have some texture.

    How Do I Stop the Bananas Turning Brown?

    The easiest solution is to assemble the banana layer reasonably close to serving time.

    If you need to prepare it a little earlier, you can brush the slices very lightly with lemon juice.

    Don’t use too much, because you don’t want the lemon flavor competing with the caramel.

    Once covered with whipped cream, the bananas are also somewhat protected from the air.

    Can I Make Banoffee Pie Without Digestive Biscuits?

    Absolutely.

    Use:

    • Graham crackers
    • Vanilla wafers
    • Shortbread cookies
    • Another mildly sweet, crisp biscuit

    Graham crackers are the simplest American substitution.

    The flavor is slightly different, but the basic crumb-crust principle is exactly the same.

    Can I Use a Pastry Crust?

    Yes.

    Earlier versions of banoffee pie used pastry, and you can absolutely make the dessert inside a baked shortcrust pastry shell.

    A biscuit crumb base is simply easier and has become extremely common.

    If you enjoy making pastry from scratch, the shortcrust technique used for our Traditional British Mince Pies is a good starting point.

    Banoffee Pie Variations

    Chocolate Banoffee Pie

    Spread a thin layer of melted chocolate over the chilled biscuit crust before adding the toffee.

    Allow it to set before continuing.

    Salted Caramel Banoffee Pie

    Add a little extra flaky sea salt to the caramel layer.

    Don’t overdo it — you still want the banana and cream to come through.

    Mini Banoffee Pies

    Make individual pies in small tart pans, dessert glasses or sturdy cupcake liners.

    These are particularly useful for parties.

    Banoffee Cups

    Skip the pan entirely.

    Layer biscuit crumbs, toffee, bananas and whipped cream in individual dessert glasses.

    This is also a great option if you’re worried about getting perfectly neat slices.

    Chocolate-Banana Banoffee

    Add finely grated dark chocolate between the banana and whipped cream layers as well as over the top.

    Can I Make Banoffee Pie Ahead?

    Most of it, yes.

    The biscuit crust and toffee layer can be assembled the day before serving.

    Cover and refrigerate overnight.

    For the best result, add the bananas and whipped cream on the day you’re serving the pie.

    This makes banoffee pie a convenient dessert for entertaining because the time-consuming portion is already finished.

    How Long Does Banoffee Pie Keep?

    Keep the pie covered in the refrigerator.

    It’s best within 1–2 days once the bananas have been added.

    The bananas gradually soften and darken, so this isn’t a dessert that improves after several days.

    Can You Freeze Banoffee Pie?

    I don’t recommend freezing the fully assembled pie.

    Bananas can become watery or mushy after freezing, and whipped cream may lose its texture.

    However, you can freeze the biscuit crust and toffee layer without the bananas and cream.

    Wrap it carefully and freeze for up to 1 month.

    Thaw overnight in the refrigerator before finishing the pie.

    How Do You Get Clean Slices?

    Banoffee pie is naturally a little messy, and that’s part of its charm.

    But for cleaner slices:

    • Chill the toffee thoroughly.
    • Use firm-ripe rather than very soft bananas.
    • Don’t overwhip the cream.
    • Use a sharp knife.
    • Wipe the blade between cuts.

    Even then, don’t expect every slice to look geometrically perfect.

    A little caramel escaping around the edges is a feature, not a disaster.

    What Do You Serve With Banoffee Pie?

    Honestly, very little.

    It already contains biscuit, caramel, fruit and cream.

    A cup of strong tea or coffee alongside it is more than enough.

    If you’re creating a larger British dessert table, something lighter such as Traditional Eton Mess provides a nice contrast to the rich caramel flavors.

    Is Banoffee Pie Good for Christmas?

    It isn’t specifically a Christmas dessert, but it’s an excellent holiday option.

    Because the crust and toffee can be prepared ahead, it works well when the oven is already occupied with other dishes.

    It also gives guests an alternative to dried-fruit-heavy Christmas desserts.

    That’s particularly useful alongside more traditional seasonal treats such as Traditional British Mince Pies and Traditional British Rum Truffles.

    A Modern British Classic

    Banoffee pie may not have the centuries of history associated with some British puddings, but it hardly needs them.

    Biscuit, toffee, bananas and cream are a combination that simply works.

    It’s indulgent without being complicated, impressive without requiring advanced baking skills, and incredibly easy to adapt to ingredients found in an American supermarket.

    And if you’ve never made one before, there’s something very satisfying about cutting through that fluffy cream and fresh banana into the thick caramel layer underneath.

    For more traditional and modern British dishes adapted for an American kitchen, explore our British Recipes at Brit & Skillet.
  • Traditional British Chocolate Cornflake Cakes: An Easy No-Bake Treat

    Traditional British Chocolate Cornflake Cakes: An Easy No-Bake Treat

    Chocolate cornflake cakes are one of those British treats that barely need a recipe — yet almost everyone who grew up with them remembers making them.

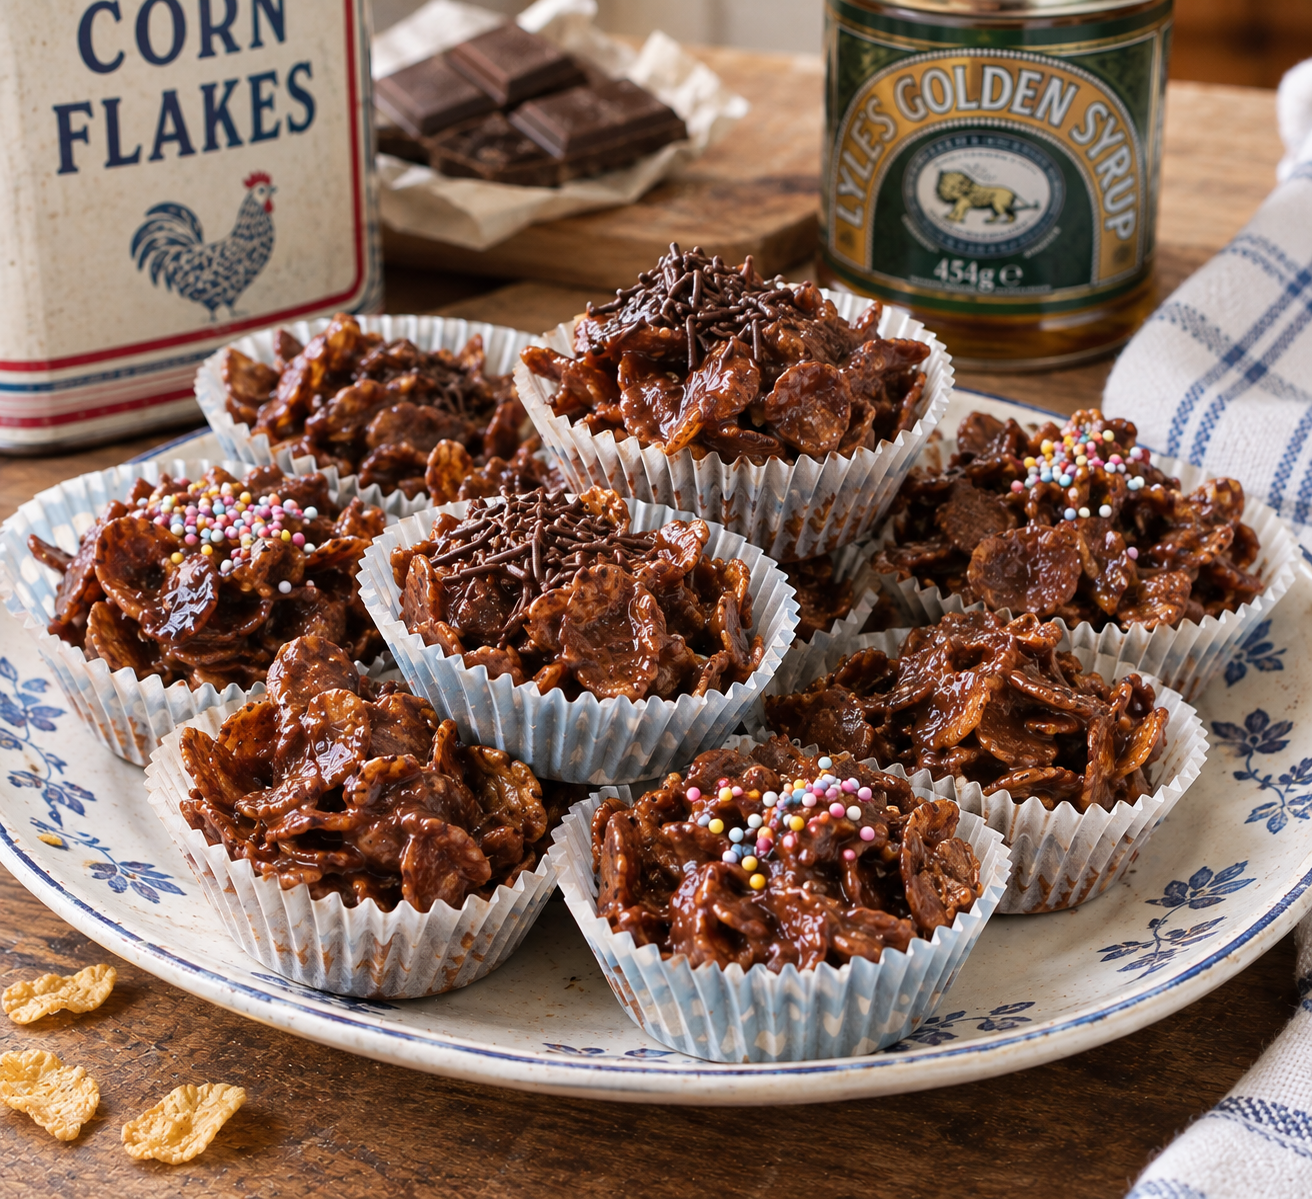
    Crunchy cornflakes coated in melted chocolate and spooned into little paper cases are a fixture of British childhood. They’re the sort of thing you make at home with children, find at school bake sales and birthday parties, or suddenly decide to make because there’s a box of cornflakes sitting in the cupboard.

    Despite the name, there’s no actual cake involved.

    There’s no flour, no oven and no decorating skills required. At their simplest, chocolate cornflake cakes need only chocolate and cornflakes.

    Some traditional home recipes add butter and golden syrup to make the chocolate coating softer and slightly fudgier. That’s the version we’re making here.

    For American cooks, they’re incredibly easy to recreate because ordinary American cornflakes work perfectly. And if you’ve never encountered the British tradition of calling these little chocolate clusters “cakes,” you’re about to discover one of the easiest British treats you can make.

    What Are British Chocolate Cornflake Cakes?

    Chocolate cornflake cakes are small no-bake treats made by coating cornflakes in melted chocolate and spooning the mixture into paper cupcake cases.

    Once chilled, the chocolate sets and holds the cereal together in crunchy little clusters.

    They’re particularly associated with children’s baking in Britain because there’s no oven involved once the chocolate has been melted.

    You’ll also sometimes hear them called:

    • Chocolate cornflake nests
    • Cornflake cakes
    • Chocolate nests
    • Easter nests

    At Easter, they’re commonly shaped into little nests and topped with candy-coated chocolate eggs.

    Why Are They Called Cakes?

    That’s a fair question, because they’re definitely not cakes in the American sense.

    There’s no sponge, flour, eggs or baking.

    “Cornflake cakes” is simply the familiar British name for these individual chocolate cereal treats.

    Think of the word cake here as describing the little individual portion rather than the baking method.

    Are Chocolate Cornflake Cakes British?

    Chocolate-coated cereal treats exist in different forms elsewhere, but chocolate cornflake cakes have been a particularly familiar part of British home baking and childhood celebrations for generations.

    They’re less about sophisticated baking and more about nostalgia.

    If you grew up in Britain, there’s a good chance you made something similar at some point as a child.

    They’re in the same wonderfully uncomplicated category of nostalgic British treats as Traditional British Butterfly Cakes — although cornflake cakes are considerably harder to get wrong.


    Traditional British Chocolate Cornflake Cakes Recipe

    Prep Time: 15 minutes
    Chilling Time: 45–60 minutes
    Total Time: About 1 hour
    Makes: Approximately 12

    Ingredients

    • 7 oz (200g) milk chocolate or semisweet chocolate, broken into pieces
    • 2 tablespoons (28g) unsalted butter
    • 2 tablespoons (40g) golden syrup
    • 4 cups (approximately 120g) cornflakes

    Optional Decorations

    • Chocolate sprinkles
    • Rainbow sprinkles
    • Mini chocolate candies
    • Candy-coated chocolate eggs for Easter
    • A small drizzle of melted white chocolate

    Instructions

    1. Prepare the Pan

    Place approximately 12 paper cupcake liners in a standard muffin pan or arrange sturdy paper cases on a baking sheet.

    The muffin pan simply helps the paper cases hold their shape while you fill them.

    2. Melt the Chocolate

    Place the chocolate, butter and golden syrup in a heatproof bowl.

    Set the bowl over a saucepan containing a small amount of gently simmering water.

    Make sure the bottom of the bowl doesn’t touch the water.

    Stir occasionally until the chocolate, butter and golden syrup have melted into a smooth mixture.

    Alternatively, melt everything carefully in the microwave in short 15–20 second intervals, stirring thoroughly between each interval.

    3. Cool Briefly

    Remove the chocolate mixture from the heat and let it stand for approximately 2–3 minutes.

    You don’t want it to begin setting, but allowing it to cool slightly helps prevent the cornflakes from becoming unnecessarily soft.

    4. Add the Cornflakes

    Place the cornflakes in a large mixing bowl.

    Pour the melted chocolate mixture over them.

    Using a large spoon or silicone spatula, gently fold everything together until the cornflakes are coated.

    Try not to crush the cereal excessively.

    A few broken flakes are completely normal — you just don’t want to turn the mixture into crumbs.

    5. Fill the Cases

    Spoon the chocolate cornflake mixture into the prepared paper cases.

    Pile it loosely rather than pressing it down into perfectly smooth shapes.

    Chocolate cornflake cakes should look a little irregular and craggy.

    6. Decorate

    If you’re adding sprinkles or other decorations, scatter them over the cakes while the chocolate is still soft.

    7. Chill

    Place the cornflake cakes in the refrigerator for approximately 45–60 minutes, or until the chocolate has set.

    8. Serve

    Once firm, remove them from the refrigerator and enjoy.

    For the best texture, let very cold cornflake cakes stand at room temperature for a few minutes before eating.

    Brit & Skillet Tip

    Don’t crush the cornflakes while mixing.

    Fold them gently through the chocolate rather than stirring aggressively. Those big, irregular crunchy flakes are exactly what give a proper cornflake cake its texture.

    What Is Golden Syrup?

    Golden syrup is a thick amber-colored sugar syrup that’s extremely common in British baking.

    It has a distinctive buttery, caramel-like flavor and isn’t quite the same as corn syrup, honey or maple syrup.

    Lyle’s Golden Syrup is probably the best-known British brand.

    If you’re shopping in the United States, our Golden Syrup in America: What to Buy and Where to Find It guide explains what to look for and where you’re most likely to find it.

    Our Treacle vs. Molasses vs. Golden Syrup guide also explains why these similar-looking ingredients aren’t interchangeable in every British recipe.

    Do I Have to Use Golden Syrup?

    No.

    You can make very simple cornflake cakes using nothing more than melted chocolate and cornflakes.

    The butter and golden syrup make the coating a little softer, richer and more reminiscent of the homemade version many British families make.

    If you can’t find golden syrup, you can leave it out and add a little additional chocolate.

    Light corn syrup can provide some of the same texture, although it doesn’t have the characteristic flavor of golden syrup.

    Honey can also work in a pinch, but you’ll be able to taste it.

    What Chocolate Should I Use?

    This depends largely on how you remember them — or how sweet you’d like them.

    Milk Chocolate

    Milk chocolate makes a sweet, creamy cornflake cake and is particularly popular when making them for children.

    Semisweet Chocolate

    Semisweet chocolate provides a deeper chocolate flavor and keeps the finished cakes from becoming excessively sweet.

    Dark Chocolate

    Dark chocolate works too, although it creates a more grown-up version than the classic children’s treat.

    A Mixture

    Try half milk chocolate and half semisweet chocolate for a nice balance.

    Use chocolate you enjoy eating on its own. With such a short ingredient list, its flavor matters.

    Can I Use American Corn Flakes?

    Absolutely.

    Standard plain cornflakes sold in American supermarkets are exactly what you need.

    Avoid frosted flakes because the additional sugar makes the finished treats much sweeter.

    You also don’t need an imported British cereal brand.

    That’s one reason this recipe is particularly easy to make in an American kitchen.

    Why Are My Cornflake Cakes Soggy?

    Cornflake cakes should remain pleasantly crunchy beneath the chocolate.

    If they’re soft, there are a few possible reasons.

    The Cereal Sat in Hot Chocolate Too Long

    Allow the melted chocolate mixture to cool very briefly before adding it.

    Too Much Liquid Was Added

    Avoid adding milk or cream to thin the chocolate. Even a small amount can change the texture considerably.

    They Were Stored Somewhere Humid

    Cornflakes absorb moisture from the air.

    Keep the finished cakes in an airtight container.

    Why Isn’t the Chocolate Setting?

    If you used the quantities in the recipe, refrigeration should firm the cakes.

    Warm room temperatures can keep chocolate surprisingly soft, particularly when butter and syrup have been added.

    Give them at least 45–60 minutes in the refrigerator.

    Remember that this version intentionally has a slightly softer bite than cornflakes coated in plain chocolate alone.

    Chocolate Cornflake Cake Variations

    Easter Chocolate Nests

    This may be the most famous variation.

    Make a small hollow in the center of each cornflake cake before chilling, then add a few candy-coated mini chocolate eggs.

    Suddenly you’ve got Easter nests.

    White Chocolate Cornflake Cakes

    Use white chocolate instead of milk or semisweet chocolate.

    Because white chocolate is sweeter, you may want to reduce or omit the golden syrup.

    Chocolate Orange Cornflake Cakes

    Add a small amount of finely grated orange zest to the melted chocolate.

    Rocky Road Cornflake Cakes

    Add a small handful of mini marshmallows after the chocolate mixture has cooled slightly.

    Sprinkle Cornflake Cakes

    Add colorful sprinkles before the chocolate sets for a classic children’s birthday-party version.

    Can Children Make Chocolate Cornflake Cakes?

    They’re a fantastic recipe for children, but an adult should handle or closely supervise the melting chocolate.

    Once the chocolate mixture is ready, children can help:

    • Measure the cornflakes
    • Fold everything together
    • Spoon the mixture into cases
    • Add decorations

    And because the cakes aren’t supposed to look perfectly uniform, enthusiastic spooning is absolutely fine.

    Brit & Skillet Tip

    This is one recipe where perfection actually makes the finished result look less authentic.

    Don’t shape twelve identical little domes.

    Spoon the mixture casually into the cases and leave the flakes sticking out at different angles. Homemade British cornflake cakes are supposed to look a little chaotic.

    Do Chocolate Cornflake Cakes Need to Be Refrigerated?

    They don’t necessarily need constant refrigeration once set if your kitchen is cool.

    However, because this recipe contains butter and the chocolate softens when warm, storing them in the refrigerator is the safest option in a warm kitchen.

    Take them out a few minutes before serving for a better texture.

    How to Store Chocolate Cornflake Cakes

    Keep them in an airtight container for approximately 4–5 days.

    Place parchment paper between layers if you need to stack them.

    They’re at their crunchiest during the first few days.

    Can You Freeze Chocolate Cornflake Cakes?

    Technically yes, but I don’t recommend it.

    Freezing and thawing can introduce moisture that softens the cornflakes and affects the surface of the chocolate.

    They’re so quick to make that a fresh batch is usually the better option.

    Are Cornflake Cakes Just for Children?

    Definitely not.

    They may have a strong association with childhood, but that’s part of their charm.

    Put a plate of chocolate cornflake cakes in front of a group of British adults and you may be surprised how quickly they disappear.

    For a more grown-up presentation, use good dark chocolate, skip the colorful sprinkles and finish them with a little finely grated orange zest or a drizzle of white chocolate.

    A Proper British Childhood Treat

    Chocolate cornflake cakes aren’t impressive because they’re technically difficult.

    They’re wonderful because they’re the opposite.

    A box of cornflakes, a bar of chocolate and a few minutes in the kitchen create one of those little treats that can immediately transport someone back to childhood.

    They’re inexpensive, forgiving and easy enough to make on a rainy afternoon — and they provide a fun introduction to the less formal side of British baking.

    If you’re building an afternoon spread, add Classic British Scones and Traditional British Jam Tarts for a mixture of nostalgic British favorites.

    And for more traditional dishes adapted for an American kitchen, explore our British Recipes at Brit & Skillet.

  • Traditional British Bangers and Mash: An Easy Recipe for American Kitchens

    Traditional British Bangers and Mash: An Easy Recipe for American Kitchens

    Few British dinners are more comforting than a plate of bangers and mash.

    Juicy pork sausages, creamy mashed potatoes and rich onion gravy come together in a meal that’s simple, filling and exactly the sort of thing you want on a cold evening.

    It’s a familiar sight in British pubs and home kitchens, but if you’re making it in the United States, one ingredient deserves a little extra attention: the sausages.

    British pork sausages aren’t quite the same as most American breakfast or Italian sausages. Fortunately, you don’t need to import sausages from Britain to make a very good bangers and mash at home.

    With the right American substitute — and a proper homemade onion gravy — you can get remarkably close.

    What Are Bangers and Mash?

    Bangers and mash is a traditional British dish consisting of:

    • Pork sausages
    • Mashed potatoes
    • Onion gravy

    Peas are a particularly common accompaniment, although you’ll also see other vegetables served alongside.

    The dish is inexpensive, hearty and uncomplicated, which helped make it a long-standing favorite in British home cooking as well as pub food.

    For another wonderfully traditional British sausage dinner, try Toad in the Hole, where sausages are baked inside crisp Yorkshire pudding batter.

    Why Are British Sausages Called Bangers?

    The nickname “bangers” is commonly associated with British sausages, particularly from around the time of the First World War and later periods when meat shortages meant sausages could contain higher amounts of water and other fillers.

    When cooked over high heat, those sausages had a tendency to split or pop.

    Hence: bangers.

    Today, the name has stuck even though a good-quality British sausage shouldn’t explode in your frying pan!

    What Kind of Sausages Are Used for Bangers and Mash?

    A classic version usually uses mild British pork sausages.

    Popular British styles include Cumberland and Lincolnshire sausages, although ordinary good-quality pork sausages work perfectly well.

    British sausages often contain breadcrumbs or rusk along with pork and seasonings. This gives them a softer texture than many American sausages.

    What Sausages Should I Buy in America?

    Look for fresh uncooked pork sausages with fairly mild seasoning.

    Avoid strongly flavored Italian sausage if possible because fennel and Italian herbs change the character of the finished dish considerably.

    American breakfast sausage links can work, but they’re usually smaller and may contain sage, maple or sweeter seasonings.

    If you can find British-style, Cumberland-style or Irish pork sausages locally, those are excellent choices.

    Otherwise, choose a good-quality mild pork sausage and let the onion gravy provide most of the flavor.

    For another recipe where American sausage selection matters, our Traditional British Pigs in Blankets guide explains how to choose sausages for that Christmas favorite.


    Traditional British Bangers and Mash Recipe

    Prep Time: 20 minutes
    Cook Time: 35–40 minutes
    Total Time: About 1 hour
    Serves: 4

    Ingredients

    For the Sausages

    • 8 fresh pork sausages, approximately 1 1/2–2 lb (680–900g) total
    • 1 tablespoon (15ml) vegetable or olive oil

    For the Mashed Potatoes

    • 2 lb (900g) Yukon Gold or russet potatoes
    • 4 tablespoons (57g) unsalted butter
    • 1/2 cup (120ml) whole milk, warmed
    • 1/4 cup (60ml) heavy cream, optional
    • 1 teaspoon salt, or to taste
    • Freshly ground black pepper, to taste

    For the Onion Gravy

    • 2 tablespoons (28g) butter
    • 2 medium yellow onions, thinly sliced
    • 1 teaspoon brown sugar, optional
    • 2 tablespoons (16g) all-purpose flour
    • 2 cups (480ml) beef broth or stock
    • 1 teaspoon Worcestershire sauce
    • 1 teaspoon Dijon or English mustard, optional
    • 1/2 teaspoon dried thyme or 1 teaspoon fresh thyme leaves
    • Salt and freshly ground black pepper, to taste

    For Serving

    • Cooked peas, optional
    • Fresh parsley or thyme, optional

    Instructions

    1. Prepare the Potatoes

    Peel the potatoes and cut them into irregular chunks of roughly similar size.

    Place them in a large saucepan and cover with cold water.

    Add a generous pinch of salt.

    Bring to a boil, then reduce the heat and simmer for approximately 15–20 minutes, or until the potatoes are completely tender when pierced with a knife.

    2. Cook the Sausages

    While the potatoes cook, heat the oil in a large skillet over medium heat.

    Add the sausages.

    Cook for approximately 15–20 minutes, turning regularly, until evenly browned and cooked through.

    Pork sausages should reach an internal temperature of 160°F (71°C).

    Avoid cooking them over extremely high heat. Moderate heat allows the centers to cook before the outsides become overly dark.

    Transfer the cooked sausages to a plate and keep warm.

    3. Start the Onion Gravy

    Reduce the skillet to medium-low heat.

    Add the butter and sliced onions.

    Cook the onions for approximately 10–15 minutes, stirring occasionally, until soft and golden.

    If you’d like slightly sweeter, more deeply caramelized onions, stir in the optional brown sugar.

    Brit & Skillet Tip

    Give the onions time.

    Trying to rush onion gravy over high heat can leave you with browned edges but crunchy onions. Gentle cooking develops the sweet, savory flavor that makes the gravy so good.

    4. Add the Flour

    Sprinkle the flour over the softened onions.

    Stir well and cook for approximately 1 minute.

    This removes the raw flour taste and creates the base that will thicken the gravy.

    5. Add the Stock

    Slowly pour in the beef broth while stirring.

    Add the Worcestershire sauce, optional mustard and thyme.

    Bring the mixture to a gentle simmer.

    Cook for approximately 5–8 minutes, stirring occasionally, until the gravy has thickened.

    Taste and season with salt and black pepper.

    Remember that sausages, stock and Worcestershire sauce can all contain salt, so taste before adding too much.

    6. Finish the Mashed Potatoes

    When the potatoes are tender, drain them thoroughly.

    Return them to the hot saucepan for about 1 minute over very low heat, gently shaking the pan.

    This helps evaporate excess moisture.

    Remove from the heat.

    Add the butter and mash until smooth.

    Gradually add the warm milk and optional cream until the potatoes reach your preferred consistency.

    Season with salt and black pepper.

    7. Return the Sausages to the Gravy

    Place the cooked sausages into the onion gravy.

    Simmer gently for another 2–3 minutes, turning them so they’re coated in the gravy.

    8. Serve

    Spoon a generous mound of mashed potatoes onto each plate.

    Add two sausages and plenty of onion gravy.

    Serve with peas or another green vegetable.

    Brit & Skillet Tip

    Warm the milk before adding it to your potatoes.

    Cold milk cools the potatoes quickly and can make it harder to achieve that warm, creamy mash you want underneath the sausages and gravy.

    Which Potatoes Are Best for British Mash?

    In Britain, floury potato varieties such as Maris Piper or King Edward are popular for mashed potatoes.

    They’re not always easy to find in American supermarkets.

    Russet Potatoes

    Russets produce particularly fluffy mash and are widely available in the United States.

    Yukon Gold Potatoes

    Yukon Golds produce a slightly richer, naturally buttery mash with a creamier texture.

    Either works beautifully.

    You can also use a combination of the two.

    Should I Peel the Potatoes?

    For traditional smooth pub-style mash, peel them.

    If you prefer a more rustic mashed potato, leaving some skin on Yukon Gold potatoes is perfectly fine, but it changes the texture and appearance slightly.

    How Do I Make Really Creamy Mashed Potatoes?

    A few small details make a big difference.

    Drain the potatoes thoroughly so they aren’t watery.

    Allow excess steam to escape before mashing.

    Use warm rather than cold milk.

    Add butter generously.

    And most importantly, don’t overwork the potatoes.

    A potato masher or ricer is ideal. A food processor or blender can quickly turn potatoes gluey because it releases too much starch.

    Can I Use Chicken Broth Instead of Beef Broth?

    Yes.

    Beef broth produces the darker, richer gravy most associated with pub-style bangers and mash, but chicken broth works.

    You can also use vegetable broth if that’s what you have.

    The Worcestershire sauce, onions and herbs will still provide plenty of flavor.

    Can I Add Ale to the Onion Gravy?

    Absolutely.

    For an ale gravy, replace approximately 1/2 cup (120ml) of the beef broth with a British-style brown ale or another moderately flavored beer.

    Let the ale simmer briefly after adding it so the flavors mellow.

    If you enjoy cooking with British-style ale, our Traditional British Beef and Ale Stew uses it to create another rich cold-weather dinner.

    Why Is My Onion Gravy Too Thin?

    Allow it to simmer for a few more minutes.

    The flour should gradually thicken the liquid as it cooks.

    If the gravy is still much too thin, mix 1 teaspoon cornstarch with 1 tablespoon cold water and stir a small amount into the simmering gravy.

    Don’t add dry cornstarch directly to the pan because it can form lumps.

    Why Is My Gravy Too Thick?

    Simply add a splash of additional broth or water and stir.

    Remember that gravy will thicken slightly as it cools, so it should be reasonably pourable when you take it off the heat.

    Can I Make Bangers and Mash Without Onion Gravy?

    You can, but the onion gravy is a major part of the dish.

    Plain brown gravy is an alternative if someone in your household doesn’t like onions.

    You could also strain the finished onion gravy if someone enjoys the flavor but dislikes the texture of sliced onions.

    Bangers and Mash Variations

    Cumberland-Style Bangers and Mash

    Use Cumberland-style pork sausages if you can find them.

    They’re traditionally seasoned with herbs and pepper and work beautifully with onion gravy.

    Mustard Mash

    Stir 1–2 teaspoons Dijon or English mustard into the finished mashed potatoes.

    Cheesy Mash

    Add a handful of grated mature Cheddar — or American extra-sharp Cheddar — to the potatoes.

    Our Traditional Welsh Rarebit has more guidance on choosing an American equivalent for British mature Cheddar.

    Ale and Onion Gravy

    Replace part of the beef broth with ale for a deeper pub-style flavor.

    Caramelized Onion Gravy

    Cook the onions slowly for closer to 20–25 minutes before adding the flour for an even sweeter, richer gravy.

    What Do You Serve With Bangers and Mash?

    Peas are probably the most familiar accompaniment.

    Other good choices include:

    • Buttered green beans
    • Roasted carrots
    • Cabbage
    • Broccoli
    • Braised red cabbage

    You don’t need many additional side dishes because the sausages, potatoes and gravy already make this a substantial meal.

    Can I Make Bangers and Mash Ahead?

    Parts of it can be prepared ahead.

    The onion gravy can be made up to 2 days in advance and refrigerated.

    The mashed potatoes can also be prepared earlier in the day, although they’re best freshly made.

    Sausages are at their best when cooked shortly before serving.

    If you’re meal prepping, you can cook the entire dish and portion it into containers for reheating.

    How to Store Leftovers

    Store sausages, mashed potatoes and onion gravy in airtight containers in the refrigerator for up to 3 days.

    Keeping the gravy separate from the potatoes makes reheating easier.

    How to Reheat Bangers and Mash

    Reheat the sausages and gravy gently in a covered skillet or saucepan until piping hot.

    Reheat mashed potatoes over low heat with an extra splash of milk and a small piece of butter.

    You can also microwave individual portions, stirring the potatoes partway through reheating.

    Can You Freeze Bangers and Mash?

    The cooked sausages and onion gravy freeze well.

    Allow them to cool completely and freeze in an airtight container for up to 2 months.

    Mashed potatoes can also be frozen, although their texture may change slightly. Potatoes made with plenty of butter and dairy generally freeze better than very lean mash.

    Thaw overnight in the refrigerator before reheating.

    Is Bangers and Mash Pub Food?

    Very much so.

    It’s one of the dishes most strongly associated with traditional British pub menus.

    That doesn’t mean it’s complicated restaurant food, though.

    At heart, bangers and mash is simple home cooking: sausages, potatoes, onions and gravy turned into something much more satisfying than the ingredient list suggests.

    It’s in the same comforting family as Traditional British Cottage Pie — straightforward ingredients, generous portions and absolutely no need for fancy presentation.

    Brit & Skillet Tip

    When serving bangers and mash, make a little hollow in the center of the mashed potatoes with the back of your spoon.

    That’s where the onion gravy goes.

    This isn’t essential culinary technique, obviously — it’s simply an excellent way to make sure gravy reaches as much potato as possible!

    Proper British Comfort Food

    Bangers and mash isn’t delicate or elaborate, and it isn’t supposed to be.

    It’s a plate of juicy sausages, buttery mashed potatoes and savory onion gravy designed to leave you warm and satisfied.

    And that’s exactly why it has endured as one of Britain’s most recognizable comfort foods.

    With good American pork sausages and a few familiar supermarket ingredients, it’s also incredibly easy to recreate without needing a British grocery store.

    Serve it with peas, spoon over far too much gravy and you’ve got a proper pub-style dinner at home.

    For more traditional dishes adapted for an American kitchen, explore our British Recipes at Brit & Skillet.

  • Traditional British Lemon Posset: An Easy 3-Ingredient Dessert for American Kitchens

    Traditional British Lemon Posset: An Easy 3-Ingredient Dessert for American Kitchens

    Lemon posset is one of those wonderfully simple British desserts that feels far more elegant than the effort required to make it.

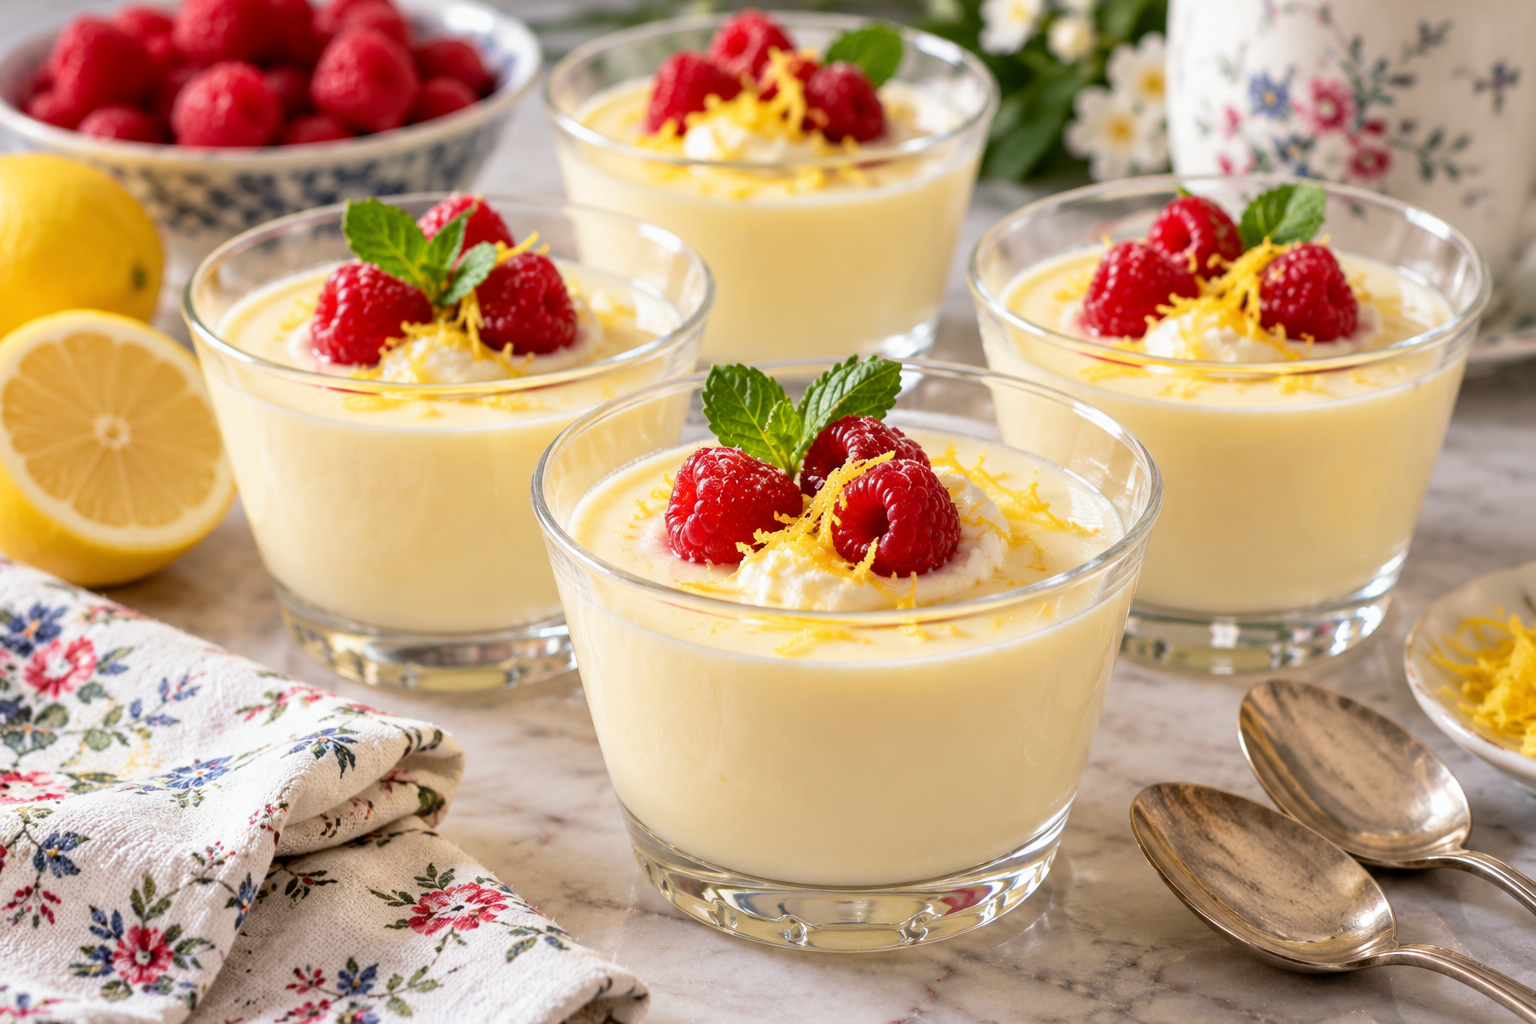
    Made with just cream, sugar and fresh lemon, a traditional lemon posset is silky, rich and intensely lemony, with a texture somewhere between a delicate custard and a luxurious pudding.

    There are no eggs, no gelatin and no cornstarch. You don’t even need to bake it.

    The surprising part is that the lemon juice itself causes the sweetened cream to thicken and set as it chills.

    That makes lemon posset a brilliant dessert for entertaining. You can prepare it the day before, refrigerate it overnight and bring it to the table in individual glasses or ramekins when you’re ready to serve.

    For American cooks looking for a genuinely British dessert that doesn’t require any unusual equipment or difficult-to-find ingredients, this may be one of the easiest places to start.

    What Is Lemon Posset?

    Modern British lemon posset is a chilled dessert made by heating cream and sugar before adding fresh lemon juice.

    The mixture is poured into small serving dishes and refrigerated until softly set.

    The result is beautifully smooth and creamy but with enough fresh lemon acidity to keep the dessert from feeling overly heavy.

    Posset also has a much longer history than the modern dessert might suggest.

    Earlier versions of posset were warm drinks made from milk or cream curdled with wine or ale and were popular in Britain for centuries. Over time, the name evolved to describe the smooth chilled cream dessert we recognize today.

    How Does Lemon Posset Set Without Gelatin?

    It seems slightly magical the first time you make it.

    Cream contains milk proteins called casein. When acidic lemon juice is added to the heated cream mixture, the acidity causes those proteins to thicken.

    The high fat content of the cream helps produce a smooth texture rather than something resembling curdled milk.

    After several hours in the refrigerator, the mixture becomes softly set and spoonable.

    That’s why using the correct type of cream is particularly important.

    British Double Cream vs. American Heavy Cream

    Traditional British recipes often call for double cream.

    British double cream has a higher fat content than the heavy cream typically sold in American supermarkets, but American heavy cream or heavy whipping cream still works very well for lemon posset.

    Look for cream containing approximately 36% milk fat or higher.

    Avoid half-and-half, light cream or milk. They don’t contain enough fat to produce the same reliable result.

    If you’ve encountered other confusing British ingredient names, our British Baking Ingredients Americans Need to Know guide explains many of the common differences between British and American kitchens.


    Traditional British Lemon Posset Recipe

    Prep Time: 10 minutes
    Cook Time: 5 minutes
    Chilling Time: At least 4 hours
    Total Time: About 4 hours 15 minutes
    Serves: 6

    Ingredients

    • 2 cups (480ml) heavy cream or heavy whipping cream
    • 2/3 cup (135g) granulated sugar
    • 1/3 cup (80ml) freshly squeezed lemon juice, approximately 2–3 large lemons
    • 1 tablespoon finely grated lemon zest, optional

    Optional for Serving

    • Fresh raspberries
    • Fresh strawberries
    • Blueberries
    • Extra lemon zest
    • Shortbread biscuits
    • Whipped cream

    Instructions

    1. Prepare the Lemons

    Finely grate the zest from one lemon if you’re using it.

    Juice the lemons and measure 1/3 cup (80ml) fresh lemon juice.

    Strain out any seeds.

    Freshly squeezed lemon juice gives the posset the cleanest flavor and is strongly recommended.

    2. Heat the Cream and Sugar

    Pour the heavy cream into a medium saucepan.

    Add the sugar and optional lemon zest.

    Place over medium heat and stir gently until the sugar has completely dissolved.

    3. Bring to a Gentle Boil

    Allow the cream mixture to come to a gentle boil.

    Once boiling, reduce the heat slightly and cook for approximately 3 minutes, stirring occasionally.

    Watch the pan carefully because cream can rise very quickly once it begins boiling.

    4. Remove From the Heat

    Take the saucepan off the heat.

    Allow the cream to stand for approximately 1 minute.

    5. Add the Lemon Juice

    Slowly stir in the freshly squeezed lemon juice.

    The mixture may begin to thicken slightly almost immediately.

    Stir just until everything is evenly combined.

    Don’t vigorously whisk the mixture because you don’t want to introduce lots of air bubbles.

    6. Pour Into Serving Dishes

    Divide the mixture between six small glasses, ramekins or dessert dishes.

    For a particularly smooth presentation, pour the mixture through a fine-mesh strainer before dividing it between the dishes.

    7. Chill

    Allow the possets to cool briefly, then cover and refrigerate for at least 4 hours.

    For the best texture, refrigerate them overnight.

    The finished posset should be softly set but still wonderfully creamy.

    8. Serve

    Remove the possets from the refrigerator shortly before serving.

    Top with a few fresh berries, a little lemon zest or both.

    Serve chilled.

    Brit & Skillet Tip

    Don’t judge the consistency while the mixture is still warm.

    Lemon posset does most of its setting in the refrigerator. The warm mixture will still look quite pourable when it goes into the serving glasses.

    Give it at least four hours before deciding whether it has set properly.

    Why Didn’t My Lemon Posset Set?

    A properly made posset should become thick enough to hold its shape on a spoon while remaining creamy.

    If yours remains liquid, there are several likely causes.

    The Cream Was Too Low in Fat

    Use American heavy cream or heavy whipping cream rather than half-and-half or light cream.

    There Wasn’t Enough Lemon Juice

    The acidity of the lemon is what helps the cream set.

    Measure the juice rather than estimating it.

    The Cream Wasn’t Heated Long Enough

    Bringing the cream and sugar mixture to a gentle boil and allowing it to cook briefly helps create the correct final consistency.

    It Hasn’t Chilled Long Enough

    Four hours is the minimum.

    Overnight chilling is even better.

    Can I Use Bottled Lemon Juice?

    Fresh lemon juice is strongly recommended.

    Because lemon is the dominant flavor in this dessert, bottled juice can taste noticeably harsher or flatter.

    You’ll also want fresh lemons if you’re adding zest.

    With only three primary ingredients, their quality makes a real difference.

    Is Lemon Posset the Same as Lemon Curd?

    No.

    Lemon curd is usually made with eggs, sugar, lemon and butter and has a much more intense, spreadable consistency.

    Lemon posset contains cream rather than eggs and has a softer, more delicate texture.

    It’s served as a dessert on its own rather than used primarily as a filling or spread.

    Is Lemon Posset a Custard?

    Not technically.

    Custards are normally thickened with eggs or starch.

    Lemon posset sets through the interaction between the acidic lemon juice and the proteins in the cream.

    However, the finished texture can certainly remind you of custard.

    If you love creamy traditional British desserts, our Traditional British Custard Tart is another lovely example, although its baked egg custard is made using an entirely different method.

    Can I Make Posset With Other Citrus Fruits?

    Yes, although lemons are the classic choice because their acidity helps the dessert set reliably.

    Lime Posset

    Fresh lime juice produces a wonderfully sharp variation.

    Lemon and Lime Posset

    Use a mixture of fresh lemon and lime juice.

    Orange Posset

    Orange juice alone generally isn’t acidic enough to set the cream as reliably as lemon juice.

    For an orange version, it’s better to use orange zest for flavor while retaining some lemon juice for acidity.

    Lemon Posset Variations

    Lemon and Raspberry Posset

    Top each serving with fresh raspberries just before serving.

    The sharp berries work beautifully with the rich cream.

    Lemon and Strawberry Posset

    Add sliced fresh strawberries for an easy summer dessert.

    Lemon and Shortbread Posset

    Serve each posset with a buttery shortbread biscuit alongside it.

    The crisp biscuit contrasts beautifully with the creamy dessert.

    Lemon and Ginger Posset

    Serve with a thin ginger biscuit or add a small amount of finely grated fresh ginger to the cream while it heats.

    Christmas Lemon Posset

    Although posset isn’t specifically a Christmas dessert, it can be useful after a heavy holiday meal because its lemon flavor feels much lighter than many traditional Christmas puddings.

    Top it with raspberries and a little finely grated lemon zest for a simple festive presentation.

    How Do You Serve Lemon Posset?

    Because posset is rich, small portions are ideal.

    You don’t need a large dessert bowl.

    Small ramekins, teacups, dessert glasses or even little jars all work beautifully.

    Try serving it with:

    • Fresh berries
    • Shortbread
    • Fresh lemon zest
    • Thin almond biscuits
    • Whipped cream
    • A small spoonful of berry compote

    For an afternoon-tea-style dessert table, serve the possets alongside Classic British Scones or Traditional British Butterfly Cakes.

    Can I Make Lemon Posset Ahead of Time?

    Absolutely.

    In fact, lemon posset is better suited to making ahead than many desserts because it needs several hours in the refrigerator anyway.

    Prepare the possets the evening before you need them and refrigerate overnight.

    Wait until shortly before serving to add fresh berries or decorative toppings.

    This makes them particularly useful for dinner parties and holidays when you don’t want to prepare dessert at the last minute.

    How Long Does Lemon Posset Keep?

    Keep the possets covered in the refrigerator.

    They’re best eaten within 2–3 days.

    Fresh fruit toppings should ideally be added shortly before serving rather than stored on top of the posset for several days.

    Can You Freeze Lemon Posset?

    Freezing isn’t recommended.

    The cream can separate slightly during freezing and thawing, which may spoil the beautifully smooth texture.

    Fortunately, because posset is so easy to prepare ahead and keeps for several days in the refrigerator, freezing usually isn’t necessary.

    Can I Double the Recipe?

    Yes.

    The recipe can easily be doubled for a larger gathering.

    Use a sufficiently large saucepan because cream rises considerably when it reaches a boil.

    You can also make smaller portions in shot glasses or tiny dessert cups if you’re serving several desserts at a party.

    Brit & Skillet Tip

    If you’re serving posset after a large meal, resist the temptation to use oversized glasses.

    It’s deceptively rich.

    A small serving topped with a few tart berries feels luxurious without becoming too heavy.

    An Effortless British Dessert

    Lemon posset is a perfect example of how wonderfully uncomplicated British desserts can be.

    Three basic ingredients somehow become something smooth, elegant and dinner-party worthy — without eggs, gelatin, baking or complicated equipment.

    It’s also a lovely contrast to richer traditional puddings such as Sticky Toffee Pudding or a warm Traditional British Apple Crumble.

    Whether you serve it at a summer dinner, afternoon tea or after a big Christmas meal, it’s an easy recipe worth having tucked away.

    For more traditional dishes adapted for an American kitchen, explore our British Recipes at Brit & Skillet.

  • Traditional British Mince Pies: An Easy Christmas Recipe for American Bakers

    Traditional British Mince Pies: An Easy Christmas Recipe for American Bakers

    Few foods say British Christmas quite like a plate of warm mince pies.

    These small, buttery pastry pies filled with rich, spiced mincemeat begin appearing in British shops and kitchens long before Christmas Day. They’re served at holiday parties, eaten with cups of tea, offered to visitors and traditionally left out for Father Christmas on Christmas Eve.

    But the name can be confusing if you didn’t grow up in Britain.

    Despite being called mince pies, the sweet Christmas versions you’ll find in Britain today don’t normally contain minced meat. Instead, they’re filled with mincemeat — a sweet mixture of dried fruit, citrus, spices and often brandy.

    For American bakers, they’re also surprisingly easy to recreate. You can make your own mincemeat or use a good-quality prepared version, tuck it inside buttery shortcrust pastry and finish the little pies with pastry lids or festive stars.

    What Are British Mince Pies?

    Modern British mince pies are small sweet pastries traditionally eaten during the Christmas season.

    They consist of shortcrust pastry filled with mincemeat, a mixture that commonly contains ingredients such as:

    • Raisins
    • Currants
    • Sultanas or golden raisins
    • Candied citrus peel
    • Apples
    • Sugar
    • Spices
    • Suet or butter
    • Brandy or another spirit

    Recipes vary enormously from family to family and between commercial brands.

    The filling is rich, fruity and warmly spiced rather than overwhelmingly sweet.

    Do Mince Pies Contain Meat?

    Usually, no.

    Historically, mincemeat really did contain meat. Medieval versions combined minced meat with dried fruit, spices and fat.

    Over centuries, the recipe evolved, and modern British Christmas mincemeat is generally a sweet fruit filling.

    Some traditional mincemeat recipes still contain suet, but this is fat rather than minced meat. Vegetarian mincemeat made with vegetable suet or butter is also widely available.

    So if you’re an American seeing a mince pie for the first time, don’t expect a little meat pie!

    For an actual savory British pastry filled with meat, our Traditional Cornish Pasties are a much better example.

    What Is Mincemeat?

    Mincemeat is the intensely flavored fruit filling inside a mince pie.

    Although you can make it from scratch, prepared mincemeat is extremely common in Britain and is perfectly acceptable for homemade mince pies.

    In the United States, imported British mincemeat sometimes appears in international sections, specialty food stores or online, particularly during the holiday season.

    Check the label carefully if you’re vegetarian, because recipes differ.

    What Can I Use in America?

    If you can find a jar of British-style mincemeat, that’s the easiest option.

    Look for a thick fruit mixture rather than anything resembling ground beef.

    If imported mincemeat isn’t available, homemade mincemeat is straightforward and can be prepared ahead of time.

    Our British Baking Ingredients Americans Need to Know guide is also useful when British recipe terminology doesn’t quite match what you see on American supermarket shelves.


    Traditional British Mince Pies Recipe

    Prep Time: 30 minutes
    Chilling Time: 30 minutes
    Bake Time: 18–22 minutes
    Total Time: About 1 hour 20 minutes
    Makes: Approximately 12 mince pies

    Ingredients

    For the Shortcrust Pastry

    • 2 cups (250g) all-purpose flour
    • 3 tablespoons (38g) granulated sugar
    • 1/4 teaspoon salt
    • 3/4 cup (170g) cold unsalted butter, cut into small cubes
    • 1 large egg yolk
    • 3–5 tablespoons (45–75ml) ice-cold water

    For the Filling

    • 1 1/4 cups (approximately 350g) prepared British-style mincemeat
    • 1 tablespoon brandy or dark rum, optional
    • Finely grated zest of 1/2 orange, optional

    For Finishing

    • 1 egg beaten with 1 teaspoon water, for egg wash
    • Powdered sugar, for dusting

    Instructions

    1. Make the Pastry

    Place the flour, sugar and salt in a large mixing bowl.

    Add the cold cubed butter.

    Using your fingertips or a pastry cutter, rub the butter into the flour until the mixture resembles coarse breadcrumbs with a few slightly larger pieces remaining.

    Add the egg yolk and 3 tablespoons of ice water.

    Mix gently until the pastry begins to come together, adding additional cold water 1 tablespoon at a time only if needed.

    Avoid overworking the dough.

    2. Chill the Dough

    Shape the pastry into a flat disc, wrap it and refrigerate for 30 minutes.

    Chilling makes the pastry easier to roll and helps prevent it from shrinking during baking.

    3. Prepare the Filling

    Place the mincemeat in a small bowl.

    If desired, stir in the brandy or dark rum and orange zest.

    This is optional, particularly if your prepared mincemeat is already strongly flavored.

    Brit & Skillet Tip

    Taste your prepared mincemeat before adding anything to it.

    Some brands are already quite boozy and heavily spiced, while others are milder. There’s no reason to add extra alcohol or spice simply because a recipe says you can.

    4. Preheat the Oven

    Preheat the oven to 375°F (190°C).

    Lightly grease a standard 12-cup muffin pan.

    A shallower tart or bun tin is more traditional if you have one, but an American muffin pan works perfectly well.

    5. Roll the Pastry

    Lightly flour your work surface.

    Roll approximately two-thirds of the chilled pastry to about 1/8 inch (3mm) thick.

    Using a round cutter approximately 3 1/2–4 inches (9–10cm) across, cut 12 pastry circles.

    The exact size you need will depend on your pan.

    6. Line the Pan

    Gently press one pastry circle into each muffin cup.

    Don’t stretch the pastry.

    If necessary, reroll the scraps once to make enough circles.

    7. Add the Mincemeat

    Place approximately 1 generous tablespoon of mincemeat into each pastry case.

    Do not overfill them.

    The mincemeat becomes hot and bubbly during baking and can overflow if the cases are packed too full.

    8. Make the Tops

    Roll out the remaining pastry.

    For classic closed mince pies, cut smaller circles to create lids.

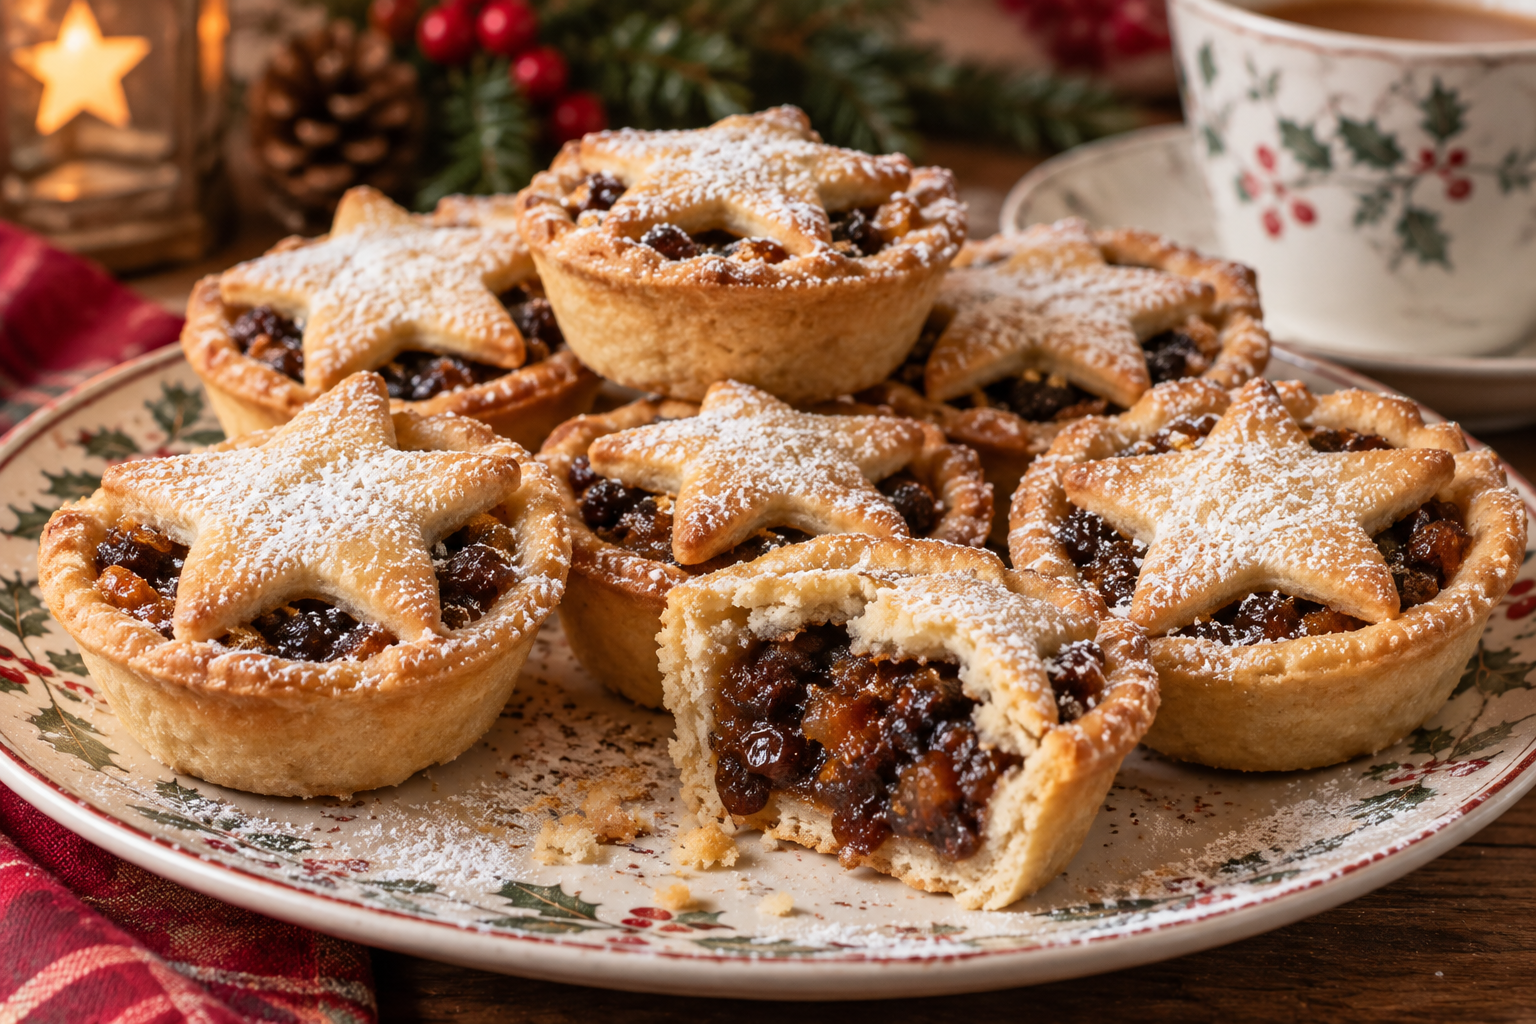
    For a particularly festive appearance, use a star-shaped cookie cutter instead.

    Place a pastry star on top of each pie, allowing some of the mincemeat to remain visible around it.

    9. Add Egg Wash

    Brush the exposed pastry lightly with the beaten egg wash.

    If you’re using full pastry lids, cut a tiny slit in the center of each to allow steam to escape.

    10. Bake

    Bake for 18–22 minutes, or until the pastry is golden brown.

    The mincemeat may bubble slightly around the edges.

    11. Cool

    Leave the pies in the pan for approximately 5–10 minutes.

    Carefully loosen them and transfer to a wire rack.

    Be cautious — hot mincemeat contains a lot of sugar and can be extremely hot straight from the oven.

    12. Finish

    Once slightly cooled, dust lightly with powdered sugar.

    Serve warm or at room temperature.

    What Pan Should I Use?

    Traditional British mince pies are often made in a shallow bun tin rather than the deeper muffin pans common in American kitchens.

    But you absolutely don’t need to buy a special pan.

    A standard American 12-cup muffin pan works well. Simply press the pastry into the bottom and partway up the sides rather than trying to create a very deep pie.

    If you already enjoy making traditional British pastry recipes such as Traditional British Custard Tart, you’ll find the basic shortcrust technique very familiar.

    Can I Use Store-Bought Pie Crust?

    Yes.

    Homemade shortcrust gives the pies a particularly buttery texture, but refrigerated American pie dough is a perfectly reasonable shortcut during the busy Christmas season.

    Avoid sweet cookie-style crusts. You want something closer to a standard flaky pie pastry.

    Can I Use Puff Pastry?

    You can, although shortcrust pastry is more traditional.

    Puff pastry creates a lighter, flakier mince pie and works particularly well for the tops.

    Some bakers even use shortcrust for the bases and puff pastry for the lids.

    How Much Mincemeat Goes in Each Pie?

    Less than you might think.

    About one generous tablespoon is usually enough for a standard muffin-pan mince pie.

    Overfilling is one of the easiest ways to end up with sticky mincemeat bubbling over the pastry and onto the pan.

    Why Did My Mince Pies Stick to the Pan?

    Escaping mincemeat is usually responsible.

    Because the filling contains a lot of sugar, it becomes extremely sticky when baked.

    Lightly greasing the pan helps, but the best prevention is simply not overfilling the pies.

    If some filling does escape, loosen the pies while they’re still slightly warm rather than waiting until the sugar has completely hardened.

    Can I Make Homemade Mincemeat?

    Absolutely.

    A simple homemade version can be made with chopped apples, raisins, currants, golden raisins, candied citrus peel, brown sugar, butter, orange and lemon zest, warm spices and optional brandy.

    Homemade mincemeat is especially useful if you’d like greater control over the amount of dried fruit, sweetness or alcohol.

    It can also be made well before Christmas, making the actual pie-making day much quicker.

    Can I Make Mince Pies Without Alcohol?

    Yes.

    Many prepared mincemeats contain alcohol, so check the label if you need an alcohol-free version.

    For homemade mincemeat, orange juice or apple juice can provide additional moisture and flavor instead.

    Mince Pie Variations

    Star-Topped Mince Pies

    Instead of covering the filling completely, place a pastry star over each pie.

    They’re festive, simple and probably my favorite way to make them.

    Orange Mince Pies

    Add finely grated orange zest to the mincemeat or pastry.

    Almond Mince Pies

    Sprinkle a few sliced almonds over the filling before adding the pastry top.

    Rum Mince Pies

    Stir a small splash of dark rum into the mincemeat.

    If you’ve already made our Traditional British Rum Truffles, this is another easy way to bring that warm rum flavor into your Christmas baking.

    Mini Mince Pies

    Use a mini muffin pan and smaller pastry cutters to make bite-size pies for a Christmas party.

    Begin checking them earlier because smaller pies will bake more quickly.

    Brit & Skillet Tip

    Don’t try to make every pastry star or edge look absolutely identical.

    Slightly uneven edges and differently shaped pastry tops are part of what makes a tray of homemade mince pies look inviting rather than factory-made.

    What Do You Serve With Mince Pies?

    Mince pies are usually served on their own with tea or coffee, but warm pies are also delicious with:

    • Whipped cream
    • Pouring cream
    • Brandy butter
    • Vanilla ice cream
    • Clotted cream

    At Christmas parties, simply arrange them on a platter and dust them with powdered sugar.

    They also work beautifully alongside Traditional British Trifle when you want several British desserts on a holiday table.

    Why Do British People Leave Mince Pies for Father Christmas?

    On Christmas Eve, many British children traditionally leave a mince pie and a drink for Father Christmas.

    A carrot is often left for the reindeer too.

    The drink varies from household to household — you may see milk, sherry, whisky or another festive tipple depending on family tradition.

    It’s one of those small traditions that makes mince pies particularly tied to British Christmas memories.

    Can I Make Mince Pies Ahead?

    Yes — and they’re an excellent make-ahead Christmas bake.

    Bake the pies, allow them to cool completely and store them in an airtight container.

    They can be refreshed briefly in a warm oven before serving.

    You can also prepare the pastry ahead and refrigerate it for up to 2 days.

    How to Store Mince Pies

    Once completely cool, keep mince pies in an airtight container.

    They’ll generally keep for about 3–4 days at room temperature, depending on the mincemeat used.

    For longer storage, refrigerate them and warm them slightly before serving.

    Can You Freeze Mince Pies?

    Yes.

    Mince pies freeze extremely well.

    Freezing Baked Mince Pies

    Cool them completely and place them in a freezer-safe container with parchment between layers.

    Freeze for up to 3 months.

    Thaw at room temperature and warm briefly in a 325°F (165°C) oven.

    Dust with fresh powdered sugar before serving.

    Freezing Unbaked Mince Pies

    Assemble the pies in a freezer-safe pan and freeze until firm.

    Transfer them carefully to a freezer container.

    They can then be returned to the pan and baked after thawing in the refrigerator.

    A Proper Taste of British Christmas

    Mince pies are one of those recipes that make much more sense once you’ve actually eaten one.

    The name may sound strange to American ears, but beneath that confusing name is simply a little buttery pastry filled with rich, fragrant Christmas fruit.

    Make a batch alongside our Traditional British Pigs in Blankets, and you’ve already got two of the foods most strongly associated with a British Christmas table.

    Add a few Rum Truffles, put the kettle on and suddenly Christmas feels rather British indeed.

    For more traditional dishes adapted for an American kitchen, explore our British Recipes at Brit & Skillet.
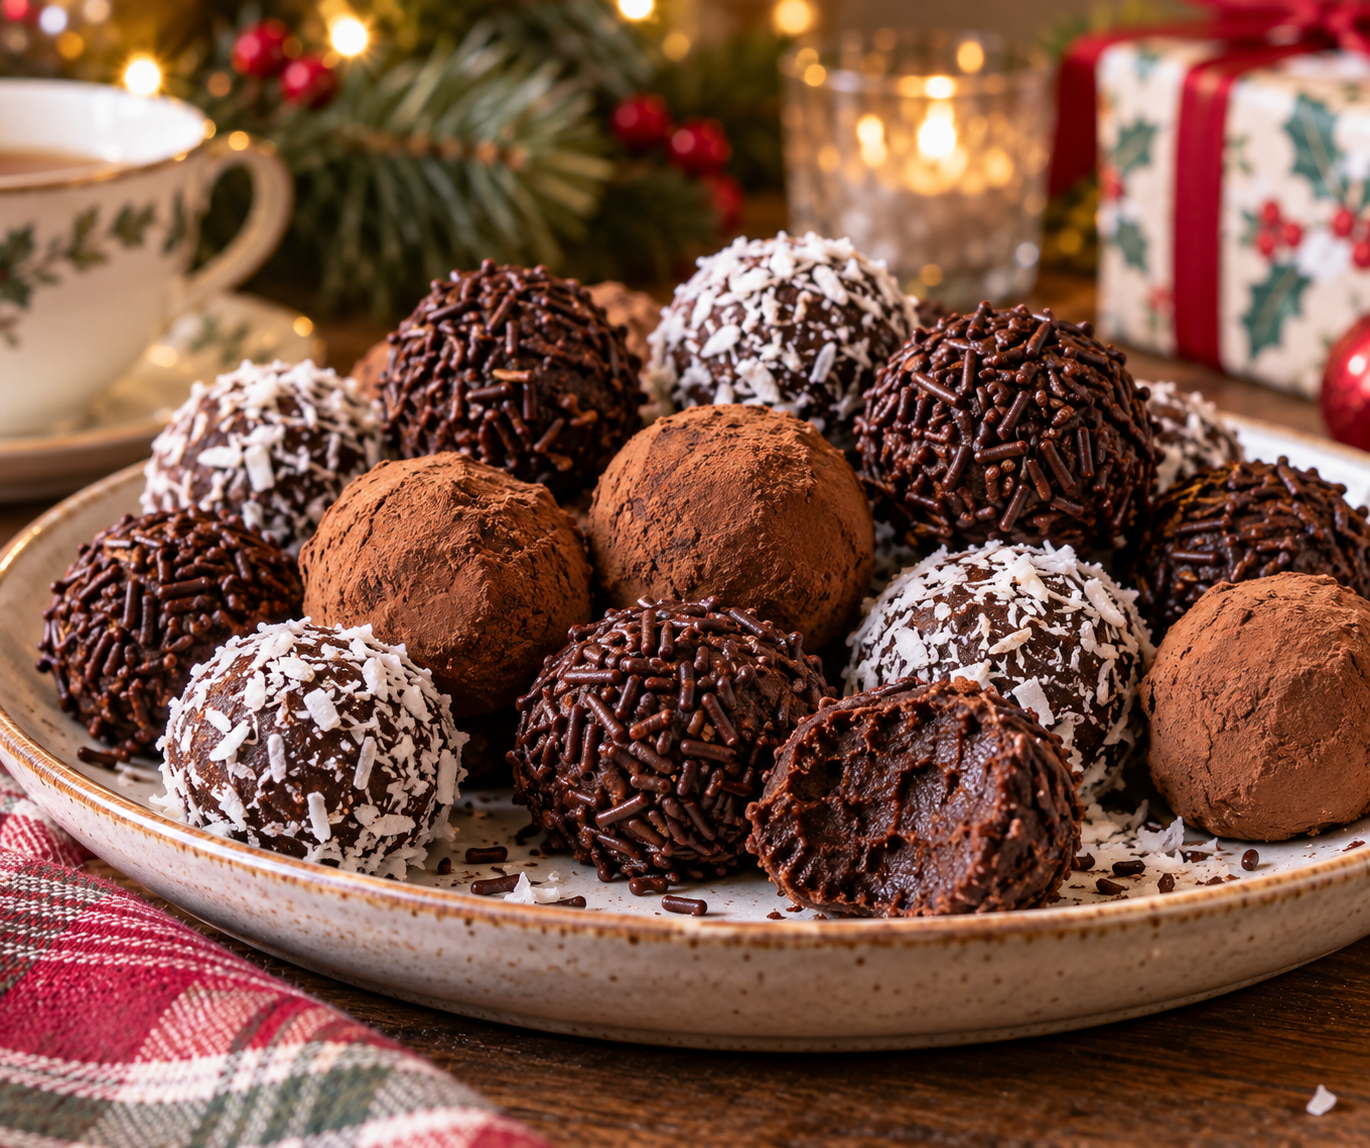

  • Traditional British Apple Crumble: An Easy Recipe for American Bakers

    Traditional British Apple Crumble: An Easy Recipe for American Bakers

    Few British desserts are as comforting as a warm apple crumble. Soft, slightly tart apples bubble beneath a buttery golden topping, filling the kitchen with the smell of baked fruit, brown sugar and cinnamon.

    It’s the sort of pudding that appears on British family tables throughout autumn and winter, and it’s wonderfully uncomplicated. There’s no pastry to roll, no complicated decorating and no unusual ingredients to hunt down.

    Serve it warm with vanilla ice cream, pouring cream or — for the full British experience — plenty of hot custard.

    If you’re baking in the United States, this recipe uses familiar American ingredients while keeping the character of a traditional British apple crumble.

    What Is a British Apple Crumble?

    A traditional apple crumble consists of cooked or baked apples covered with a crumbly mixture of flour, butter and sugar.

    As it bakes, the fruit becomes tender and juicy while the topping turns golden and crisp around the edges.

    British crumbles became particularly popular during the Second World War, when rationing made traditional pastry pies more difficult to prepare. A simple flour, fat and sugar topping required fewer ingredients than a full pastry crust.

    Today, crumble remains one of Britain’s best-loved home desserts.

    British Apple Crumble vs. American Apple Crisp

    The two desserts are very similar, but there is a traditional difference.

    A classic British crumble topping is usually based on:

    • Flour
    • Butter
    • Sugar

    American apple crisp often includes rolled oats and sometimes nuts in the topping.

    Modern recipes blur that distinction considerably, and you’ll find British crumbles containing oats too. But for this recipe, we’re keeping the topping simple and traditional.

    If you’d like to explore another classic British dessert built around a buttery flour mixture, Traditional Treacle Tart is another wonderfully old-fashioned option.


    Traditional British Apple Crumble Recipe

    Prep Time: 20 minutes
    Bake Time: 40–45 minutes
    Total Time: About 1 hour
    Serves: 6–8

    Ingredients

    For the Apple Filling

    • 2 lb (900g) apples, about 5–6 medium apples
    • 2 tablespoons (30ml) fresh lemon juice
    • 1/3 cup (65g) granulated sugar
    • 1 tablespoon (15g) light brown sugar
    • 1 tablespoon (8g) all-purpose flour
    • 1/2 teaspoon ground cinnamon
    • 1/8 teaspoon ground nutmeg, optional
    • Pinch of salt
    • 1 teaspoon vanilla extract

    For the Crumble Topping

    • 1 1/2 cups (190g) all-purpose flour
    • 1/2 cup (100g) light brown sugar
    • 2 tablespoons (25g) granulated sugar
    • Pinch of salt
    • 1/2 cup (113g) cold unsalted butter, cut into small pieces

    Instructions

    1. Preheat the Oven

    Preheat the oven to 375°F (190°C).

    Lightly butter an approximately 8 x 8-inch (20 x 20cm) baking dish or a similar 2-quart baking dish.

    2. Prepare the Apples

    Peel and core the apples.

    Cut them into irregular slices or chunks approximately 1/2 inch (1–1.5cm) thick.

    Don’t worry about making every piece identical. A little variation gives the finished crumble a much more natural homemade texture.

    Place the apples in a large mixing bowl.

    3. Season the Filling

    Add the lemon juice, granulated sugar, brown sugar, flour, cinnamon, optional nutmeg, salt and vanilla.

    Toss gently until the apples are evenly coated.

    Transfer the apple mixture to the prepared baking dish and spread it into an even layer.

    4. Make the Crumble Topping

    Place the flour, brown sugar, granulated sugar and salt in a large bowl.

    Add the cold butter.

    Using your fingertips, rub the butter into the flour mixture until you have a mixture resembling coarse breadcrumbs with some larger buttery pieces remaining.

    Don’t work it until completely uniform. Those irregular pieces create the lovely crumbly texture we’re looking for.

    5. Add the Topping

    Scatter the crumble mixture loosely over the apples.

    Avoid pressing it down firmly. A loose topping allows the surface to become crisper and more textured as it bakes.

    It’s perfectly fine if a few small patches of apple remain visible.

    6. Bake

    Bake for 40–45 minutes, or until the crumble topping is golden brown and the apple juices are bubbling around the edges.

    If the topping is browning too quickly, loosely cover the dish with foil during the final part of baking.

    7. Rest

    Allow the crumble to rest for about 10–15 minutes before serving.

    This gives the bubbling apple juices a chance to thicken slightly.

    Serve warm.

    Brit & Skillet Tip

    Keep the butter cold when making the crumble topping.

    If the butter becomes too warm and is completely blended into the flour, the topping can become dense rather than beautifully crumbly.

    You want a mixture of fine crumbs and slightly larger pieces.

    Which Apples Are Best for Apple Crumble?

    In Britain, Bramley apples are the classic choice for cooking.

    Bramleys are large, sharply flavored cooking apples that soften beautifully when baked. Unfortunately, they’re much harder to find in ordinary American supermarkets.

    Fortunately, several American apple varieties work very well.

    Granny Smith

    Granny Smith apples are probably the easiest substitute. They’re tart, widely available and hold enough structure during baking.

    Braeburn

    Braeburn apples have a nice balance of sweetness and acidity and make an excellent crumble.

    Pink Lady

    Pink Lady apples hold their shape well and have a pleasant sweet-tart flavor.

    Honeycrisp

    Honeycrisp apples are sweeter but still work well, particularly when combined with a more tart variety.

    For the best flavor, try combining two different varieties.

    If British ingredient names ever leave you wondering what to buy at an American supermarket, our British Baking Ingredients Americans Need to Know guide explains many of the common differences.

    Should I Peel the Apples?

    For a traditional smooth apple filling, yes.

    Leaving the peel on isn’t necessarily wrong, but the texture is noticeably different.

    For this recipe, peeling the apples gives the soft, comforting filling most associated with traditional British crumble.

    Do I Need to Cook the Apples First?

    No.

    Cutting the apples into moderately thin pieces allows them to cook completely during the 40–45 minute baking time.

    Some traditional recipes cook the fruit briefly before adding the topping, particularly when using very firm cooking apples.

    If your apples are unusually hard, you can cook them gently in a saucepan with the sugar and a splash of water for about 5 minutes before assembling the crumble.

    Why Is My Apple Crumble Watery?

    Apples naturally release liquid as they bake.

    The small amount of flour in the filling helps thicken those juices.

    Allowing the finished crumble to rest for 10–15 minutes is also important. The filling will look much more liquid immediately after coming out of the oven.

    If you’re using particularly juicy apples, you can add another teaspoon or two of flour to the filling.

    Why Isn’t My Crumble Topping Crispy?

    There are a few possible reasons.

    The Butter Was Too Warm

    Cold butter creates a better crumbly texture.

    The Topping Was Packed Down

    Scatter the topping over the fruit rather than pressing it into a solid layer.

    The Dish Was Too Deep

    A very deep, narrow dish creates more steam and less exposed topping.

    A moderately shallow baking dish gives you more golden crumble surface.

    Can I Add Oats?

    Absolutely.

    Although a simple flour, butter and sugar topping is particularly traditional, adding oats is a popular variation.

    Replace approximately 1/2 cup (45g) of the flour with old-fashioned rolled oats.

    Avoid instant oatmeal, which doesn’t provide the same texture.

    Apple Crumble Variations

    Once you know the basic method, crumble is wonderfully adaptable.

    Apple and Blackberry Crumble

    Add about 1 1/2 cups (200g) blackberries to the apples.

    Apple and blackberry is an especially traditional British combination.

    Apple and Pear Crumble

    Replace approximately one-third of the apples with ripe but firm pears.

    Apple and Raspberry Crumble

    Add fresh or frozen raspberries for a slightly sharper, brighter filling.

    Cinnamon Apple Crumble

    Increase the cinnamon to 1 teaspoon if you prefer a stronger spice flavor.

    British apple crumble is often less heavily spiced than American apple desserts, so the amount is entirely a matter of preference.

    What Should I Serve With Apple Crumble?

    Warm apple crumble is wonderful with vanilla ice cream, but traditional British accompaniments include:

    • Hot custard
    • Pouring cream
    • Whipped cream
    • Clotted cream

    If you enjoyed the baked custard in our Traditional British Custard Tart, you’ll understand why warm custard and apple crumble are such a comforting combination.

    For me, a bowl of hot apple crumble with custard running down into the fruit is very difficult to beat.

    Can I Make Apple Crumble Ahead of Time?

    Yes.

    You can assemble the crumble several hours before baking and keep it covered in the refrigerator.

    For longer preparation, it’s better to keep the apple filling and crumble topping separate. Refrigerate both, then assemble shortly before baking.

    The topping can also be made a day or two in advance and stored in an airtight container in the refrigerator.

    How to Store Apple Crumble

    Allow leftover crumble to cool completely.

    Cover the baking dish or transfer leftovers to an airtight container and refrigerate for up to 4 days.

    How to Reheat Apple Crumble

    For the best texture, reheat apple crumble in a 350°F (175°C) oven for approximately 15–20 minutes, or until hot.

    The microwave is faster, but the crumble topping will become softer.

    Can You Freeze Apple Crumble?

    Yes.

    Apple crumble can be frozen either before or after baking.

    Freezing Unbaked Crumble

    Assemble the crumble in a freezer-safe baking dish, wrap it thoroughly and freeze for up to 3 months.

    Thaw overnight in the refrigerator before baking.

    Freezing Baked Crumble

    Cool completely before wrapping or transferring to a freezer-safe container.

    Freeze for up to 3 months.

    Thaw in the refrigerator and reheat in the oven until piping hot.

    Brit & Skillet Tip

    Apple crumble is a perfect recipe for using apples that aren’t quite attractive enough for a fruit bowl.

    A bruise or oddly shaped apple doesn’t matter once it’s peeled and baked beneath that golden topping.

    Just cut away any genuinely damaged portions before using it.

    A Proper British Comfort Pudding

    Apple crumble isn’t elaborate, and that’s precisely why it has remained such a favorite.

    Tender apples, buttery crumbs and a generous helping of custard create the kind of simple pudding that feels right on a cold evening.

    It’s also an excellent starting point if you’re new to British baking because the recipe is forgiving, inexpensive and made almost entirely from ingredients already familiar to American cooks.

    For another warm British pudding that’s particularly good during the colder months, try Sticky Toffee Pudding.

    And if you’re building a British Christmas menu, our Traditional British Rum Truffles make an easy make-ahead treat alongside more traditional baked puddings.

    For plenty more traditional dishes adapted for an American kitchen, explore our British Recipes at Brit & Skillet.

  • Traditional British Pigs in Blankets: An Easy Christmas Recipe for American Kitchens

    Traditional British Pigs in Blankets: An Easy Christmas Recipe for American Kitchens

    If you grew up in Britain, pigs in blankets are one of those foods that instantly make you think of Christmas dinner. Little sausages wrapped in smoky bacon and roasted until the bacon is crisp and the sausages are beautifully browned are almost as important to a British Christmas plate as the roast potatoes and gravy.

    But if you’re American, the name can cause a little confusion. In the United States, “pigs in a blanket” usually means small sausages wrapped in pastry. British pigs in blankets are completely different — there’s no pastry involved. Instead, they’re simply small pork sausages wrapped in bacon, and they’re incredibly easy to make.

    They’re traditionally served alongside roast turkey or chicken at Christmas, but they’re also wonderful with a Sunday roast, as part of a holiday buffet, or even as a savory party appetizer.

    What Are British Pigs in Blankets?

    Traditional British pigs in blankets are small pork sausages wrapped in thin strips of bacon and roasted until golden.

    In Britain, they’re usually made with cocktail-sized pork sausages and streaky bacon, which is the British term for the fatty, striped bacon most Americans simply call bacon.

    That makes this one British Christmas dish that translates particularly easily to an American kitchen.

    And unlike Sausage Rolls, which wrap seasoned sausage meat in flaky puff pastry, pigs in blankets rely on just two basic ingredients: sausage and bacon.

    British Pigs in Blankets vs. American Pigs in a Blanket

    Despite the nearly identical names, these are two different dishes.

    British pigs in blankets: pork sausages wrapped in bacon.

    American pigs in a blanket: small sausages or hot dogs wrapped in pastry or crescent-roll dough.

    So if a British person tells you pigs in blankets are essential at Christmas dinner, they probably aren’t suggesting you put crescent rolls next to the turkey!

    What Kind of Sausages Should I Use?

    Traditional British versions use small pork cocktail sausages.

    These can sometimes be difficult to find in American supermarkets, so there are several good alternatives.

    Look for small uncooked pork breakfast sausages that aren’t strongly flavored with maple syrup or other sweet seasonings.

    You can also use good-quality regular pork sausages and cut them into shorter pieces before wrapping them.

    If you have access to British-style pork sausages, they’re ideal.

    For another classic British sausage dish, try Toad in the Hole, where sausages are baked inside a crisp, golden Yorkshire pudding batter.

    What Kind of Bacon Should I Use?

    American bacon works beautifully.

    Choose regular-cut rather than very thick-cut bacon. Thick bacon can take too long to crisp and may overwhelm the small sausages.

    In Britain, the bacon traditionally used for pigs in blankets is streaky bacon, which is essentially the same cut Americans usually think of when they hear the word bacon.

    Avoid very heavily maple-flavored bacon unless you deliberately want a sweeter version.


    Traditional British Pigs in Blankets Recipe

    Prep Time: 15 minutes
    Cook Time: 25–30 minutes
    Total Time: 40–45 minutes
    Serves: 6–8 as a side dish
    Makes: Approximately 18–24 pigs in blankets

    Ingredients

    • 18–24 small uncooked pork sausages or cocktail sausages
    • 9–12 slices regular-cut bacon
    • Freshly ground black pepper, optional
    • 1 tablespoon maple syrup or honey, optional for a glazed variation
    • A few fresh thyme or rosemary sprigs, optional

    Instructions

    1. Preheat the Oven

    Preheat the oven to 400°F (200°C).

    Line a large rimmed baking sheet with parchment paper or foil, or lightly grease a roasting pan.

    2. Prepare the Bacon

    Cut each slice of bacon in half crosswise.

    If your sausages are particularly small, you may be able to cut the bacon into thirds instead.

    You want enough bacon to wrap around each sausage once, with a slight overlap.

    3. Wrap the Sausages

    Wrap one piece of bacon snugly around each sausage.

    Place the wrapped sausages on the prepared baking sheet with the bacon seam facing downward.

    This usually keeps the bacon in place without needing toothpicks.

    4. Season

    Add a little freshly ground black pepper if desired.

    Scatter a few sprigs of rosemary or thyme around the pan for a subtle festive flavor.

    There’s usually no need to add salt because both the bacon and sausages are already well seasoned.

    5. Roast

    Bake for 25–30 minutes, turning once about halfway through cooking.

    The bacon should be browned and beginning to crisp, and the sausages should be completely cooked through.

    For food safety, pork sausage should reach an internal temperature of 160°F (71°C).

    6. Optional Glaze

    For slightly sweeter pigs in blankets, brush them very lightly with maple syrup or honey during the final 5–8 minutes of cooking.

    Keep an eye on them because the sugars can brown quickly.

    7. Serve

    Serve immediately while the bacon is crisp and the sausages are hot.

    Brit & Skillet Tip

    Don’t crowd the baking sheet. Leaving a little space between each sausage allows hot air to circulate and helps the bacon roast rather than steam.

    If you’re cooking a large batch for Christmas dinner, divide them between two baking sheets rather than squeezing everything onto one.

    Can I Make British Pigs in Blankets in an Air Fryer?

    Yes.

    Arrange them in a single layer in the air-fryer basket and cook at approximately 375°F (190°C) for 12–16 minutes, turning halfway through.

    Exact cooking time will depend on the size of the sausages and your air fryer, so make sure the centers reach 160°F (71°C).

    Can I Prepare Them Ahead of Time?

    Absolutely, and this is particularly useful at Christmas.

    Wrap the uncooked sausages in bacon, arrange them in a covered container or on a covered baking sheet, and refrigerate them for up to 24 hours before roasting.

    That means one less job to do while you’re juggling the rest of Christmas dinner.

    If you’re planning a full British-style holiday spread, Traditional British Trifle is another excellent make-ahead recipe because it actually benefits from time in the refrigerator.

    Can I Freeze Pigs in Blankets?

    Yes.

    Freezing Before Cooking

    Wrap the sausages in bacon, arrange them on a baking sheet and freeze until firm. Transfer them to a freezer-safe container or bag.

    Freeze for up to 2 months.

    Thaw overnight in the refrigerator before cooking.

    Freezing After Cooking

    Cooked pigs in blankets can also be frozen, although the bacon is usually crispest when they’re freshly roasted.

    Cool completely before freezing and reheat thoroughly before serving.

    Variations

    Honey-Mustard Pigs in Blankets

    Mix a little honey with Dijon or English mustard and brush it lightly over the sausages toward the end of roasting.

    Maple Pigs in Blankets

    Brush with a small amount of maple syrup during the last few minutes of cooking.

    This isn’t the most traditional British version, but the salty-sweet combination works particularly well for holiday parties.

    Herb Pigs in Blankets

    Tuck a tiny rosemary or thyme leaf beneath the bacon before wrapping.

    Don’t use too much rosemary — its flavor can quickly dominate the sausage.

    Larger Pigs in Blankets

    You can use full-size pork sausages instead of cocktail sausages.

    Wrap each sausage with one or two strips of bacon and increase the cooking time as necessary until the sausages reach 160°F (71°C).

    How Do I Get the Bacon Crispy?

    The biggest mistake is overcrowding the pan.

    If the sausages are packed tightly together, the moisture they release can cause the bacon to steam.

    Use a large baking sheet and leave space between them.

    Regular-cut bacon also crisps more easily than very thick-cut bacon.

    If the sausages are cooked but you’d like the bacon a little crispier, place them briefly under the broiler at the end. Watch them closely — bacon can go from browned to burned surprisingly quickly.

    What Do You Serve With British Pigs in Blankets?

    At Christmas, they’re traditionally served as part of a full roast dinner alongside turkey, roast potatoes, vegetables, stuffing and plenty of gravy.

    They would also be right at home beside Yorkshire Puddings, particularly if you’re making a roast beef dinner rather than turkey.

    For a less formal meal, serve them with mashed potatoes and vegetables, or put out a platter with mustard for dipping at a Christmas party.

    They also work brilliantly as part of a Boxing Day buffet using leftovers from Christmas dinner.

    Are Pigs in Blankets Only for Christmas?

    Not at all — although that’s when they’re most strongly associated with British food.

    You can serve them with any roast dinner, make them for parties, or use them as an easy savory appetizer.

    But there is something particularly British about seeing a pile of bacon-wrapped sausages arriving at the Christmas table.

    Pair them with something sweet afterward, such as our Traditional British Rum Truffles, and you’ve got two wonderfully nostalgic British Christmas favorites that are surprisingly simple to make in an American kitchen.

    Brit & Skillet Tip

    If you’re making these for Americans who haven’t had British pigs in blankets before, tell them what they are before serving them.

    Otherwise, someone may spend the first few minutes wondering where the pastry went!

    Storage and Reheating

    Store leftover cooked pigs in blankets in an airtight container in the refrigerator for up to 3 days.

    Reheat them in a 375°F (190°C) oven until piping hot.

    An air fryer also works particularly well for leftovers because it helps the bacon crisp again.

    The microwave will heat them, but the bacon will be softer.

    A British Christmas Classic

    British pigs in blankets prove that some of the best holiday foods don’t need complicated ingredients. Pork sausage, smoky bacon and a hot oven are enough to make one of Britain’s most loved Christmas side dishes.

    They’re easy to prepare ahead, simple to scale for a crowd and especially useful for American cooks who want to add a genuinely British touch to Christmas dinner without hunting down difficult-to-find ingredients.

    For more traditional dishes adapted for an American kitchen, explore the rest of our British Recipes at Brit & Skillet.


  • Traditional British Rum Truffles: An Easy Christmas Treat

    Traditional British Rum Truffles: An Easy Christmas Treat

    There are certain treats that instantly bring back memories of a British Christmas, and for many people, rum truffles are one of them.

    Rich, chocolatey and just a little boozy, these bite-sized treats were a familiar sight in sweet shops, bakeries and homemade Christmas boxes. Rolled in chocolate sprinkles, cocoa powder or coconut, they look festive without requiring hours of decorating — and best of all, there’s no baking involved.

    Rum truffles are also wonderfully easy to make ahead, which makes them ideal for Christmas entertaining or homemade gifts.

    This version uses ingredients that are easy to find in American supermarkets while keeping the rich chocolate-and-rum flavor that makes these old-fashioned treats so nostalgic.

    What Are British Rum Truffles?

    British rum truffles are small chocolate treats made from a rich mixture that is rolled into balls and coated with chocolate sprinkles, cocoa powder, coconut or other toppings.

    There are several traditional styles.

    Some confectionery-style rum truffles are made primarily with chocolate and cream, while many old-fashioned British bakery and homemade versions use crushed cake or biscuit crumbs to create the center.

    This recipe uses cake crumbs, giving the truffles a soft, fudgy texture and making them particularly useful when you have leftover chocolate or plain sponge cake.

    Despite their fancy appearance, they’re remarkably simple.

    Ingredients

    For the Rum Truffles

    • 10 oz (285g) chocolate cake or plain sponge cake, crumbled
    • 4 oz (115g) semisweet or dark chocolate, finely chopped
    • 1/3 cup (80ml) heavy cream
    • 2 tablespoons (28g) unsalted butter
    • 2–3 tablespoons (30–45ml) dark rum
    • 2 tablespoons (25g) granulated sugar, optional depending on the sweetness of your cake
    • 1 teaspoon vanilla extract
    • Pinch of salt

    For Coating

    Choose one or several:

    • Chocolate sprinkles
    • Unsweetened cocoa powder
    • Finely shredded coconut
    • Finely chopped toasted nuts
    • Chocolate curls

    What Kind of Cake Should I Use?

    Almost any fairly plain cake will work.

    Chocolate sponge creates the richest chocolate flavor, but vanilla or plain sponge works beautifully too.

    This is also an excellent way to use cake that is a day or two old.

    Avoid cake with large amounts of frosting or filling attached. A little isn’t disastrous, but too much can make the truffle mixture overly sweet and sticky.

    Brit & Skillet Tip

    Don’t worry about getting the cake crumbs perfectly uniform. A mixture of fine crumbs and a few slightly larger pieces gives homemade rum truffles a more natural texture.

    What Kind of Chocolate Should I Use?

    Semisweet or dark chocolate works best.

    If you’re shopping in an American supermarket, chocolate somewhere around 55–70% cocoa gives the truffles plenty of chocolate flavor without becoming excessively bitter.

    Milk chocolate can be used, but the finished truffles will be considerably sweeter.

    Chocolate bars generally melt more smoothly than chocolate chips, although good-quality semisweet chips will work if that’s what you have.

    What Kind of Rum Is Best for Rum Truffles?

    Dark rum is my first choice.

    It has a deeper caramel and molasses character that works particularly well with chocolate.

    You don’t need an expensive bottle. A standard dark rum suitable for mixed drinks is perfectly adequate.

    Spiced rum can also be used if you enjoy its warmer Christmas spices, although it will produce a slightly different flavor.

    How Much Rum Should I Add?

    Start with 2 tablespoons.

    Once the mixture is combined, you can taste it and decide whether you’d like a stronger rum flavor.

    Add the third tablespoon gradually.

    Remember that these truffles aren’t baked, so the alcohol isn’t cooked away.

    You want to taste the rum without completely overwhelming the chocolate.

    Make the Chocolate Mixture

    Place the chopped chocolate in a heatproof bowl.

    Heat the cream and butter in a small saucepan over medium-low heat until the butter has melted and the cream is steaming.

    Do not let it boil vigorously.

    Pour the hot cream mixture over the chopped chocolate.

    Leave it undisturbed for about 2 minutes.

    Stir gently until the chocolate is completely melted and the mixture is smooth and glossy.

    Stir in the rum, vanilla and salt.

    Add the Cake Crumbs

    Place the cake crumbs in a large mixing bowl.

    Pour the warm chocolate mixture over them.

    Stir until thoroughly combined.

    The mixture should resemble a thick, moist chocolate dough.

    Taste a small amount.

    If your cake wasn’t particularly sweet, add some or all of the optional sugar.

    If you’d like a stronger rum flavor, add a little more rum now.

    Brit & Skillet Tip

    The mixture should be moist enough to hold together when squeezed but not wet enough to stick heavily to your hands. Different cakes absorb liquid differently, so use the texture rather than exact appearance as your guide.

    Chill the Mixture

    Cover the bowl and refrigerate for approximately 1 hour.

    Chilling firms the chocolate and butter, making the mixture much easier to roll.

    If it’s still very soft after an hour, give it another 20–30 minutes.

    Shape the Rum Truffles

    Line a baking sheet or large plate with parchment paper.

    Scoop approximately 1 tablespoon of mixture for each truffle.

    Roll it gently between your palms into a ball approximately 1 inch (2.5cm) across.

    They don’t need to be perfectly identical.

    In fact, a little variation makes homemade Christmas truffles look much more inviting.

    You should get approximately 22–26 truffles, depending on their size.

    Coat the Truffles

    Place your chosen coatings in separate shallow bowls.

    Roll each truffle gently through the coating until covered.

    Chocolate sprinkles are particularly nostalgic and give the truffles that classic British sweet-shop appearance.

    Cocoa powder creates a more elegant finish, while coconut gives them an old-fashioned homemade look.

    Using two or three different coatings makes a Christmas box of truffles especially attractive.

    Can I Make Rum Truffles Without Alcohol?

    Yes.

    For alcohol-free chocolate truffles, replace the rum with approximately 1–2 tablespoons of orange juice or additional heavy cream.

    A small amount of rum extract can also provide rum flavor without using the same quantity of alcoholic rum, although extracts vary, so follow the manufacturer’s guidance and add it cautiously.

    For a Christmas version, orange zest is lovely with the chocolate.

    Add approximately 1 teaspoon finely grated orange zest to the mixture.

    Can Children Eat Rum Truffles?

    Truffles made with actual rum contain alcohol, and because they aren’t baked, that alcohol remains in the finished sweets.

    For children, make a separate alcohol-free batch using orange juice, cream or another suitable substitute.

    It’s a good idea to decorate the alcohol-free batch differently so there’s no confusion when serving them.

    Can I Use Cookies Instead of Cake?

    Yes.

    Crushed digestive biscuits are used in some homemade truffle recipes and create a firmer texture.

    In the United States, graham crackers can work as an alternative, although they have a slightly different flavor.

    Start with a little less crumb than the cake version because dry biscuits absorb moisture differently, then add more until the mixture is firm enough to roll.

    For another example of adapting a distinctly British ingredient for an American kitchen, my British Baking Ingredients Americans Need to Know guide covers several useful substitutions.

    Christmas Rum Truffle Variations

    Once you have the basic recipe, there are plenty of ways to make it your own.

    Chocolate Orange Rum Truffles

    Add 1 teaspoon finely grated orange zest to the chocolate mixture.

    Chocolate and orange are particularly good with dark rum.

    Coconut Rum Truffles

    Roll the finished truffles generously in finely shredded coconut.

    Nutty Rum Truffles

    Add 1/3 cup (40g) finely chopped toasted walnuts or pecans to the truffle mixture.

    Roll the finished truffles in additional chopped nuts.

    Extra-Chocolate Rum Truffles

    Roll the truffles in chocolate sprinkles or finely grated dark chocolate.

    Christmas-Spiced Rum Truffles

    Add a small pinch of cinnamon and nutmeg to the mixture.

    Keep the spices subtle so the chocolate and rum remain the dominant flavors.

    Why Are My Rum Truffles Too Soft?

    If the mixture is difficult to roll, it probably needs more chilling time.

    Refrigerate it for another 20–30 minutes and try again.

    If it’s still extremely soft, mix in a small amount of additional cake crumbs.

    Don’t add a large quantity at once or the truffles can become dry.

    Why Are My Rum Truffles Too Dry?

    Your cake may have been particularly dry or you may have added too many crumbs.

    Mix in a teaspoon of cream at a time until the mixture holds together comfortably.

    A tiny splash of additional rum can also be used for an adult batch.

    How to Make Rum Truffles Look Homemade — Not Messy

    Rum truffles don’t need to look perfectly manufactured.

    Aim for roughly similar sizes, but don’t worry about making every ball precisely round.

    Use plenty of coating so the surfaces look generous and textured.

    For Christmas gifts, placing each truffle in a small paper candy cup instantly makes them look polished while keeping that homemade character.

    Can I Make Rum Truffles Ahead for Christmas?

    Absolutely.

    In fact, they’re an excellent make-ahead Christmas treat.

    Prepare the truffles several days before you need them and keep them refrigerated in an airtight container.

    The flavor develops nicely as they sit.

    They’re particularly useful during Christmas week because you can have a homemade sweet ready to serve without needing to turn on the oven.

    If you’re planning a larger British Christmas dessert table, my Traditional British Trifle is another dessert that benefits from being prepared ahead.

    How to Store Rum Truffles

    Store the finished truffles in an airtight container in the refrigerator.

    Place parchment paper between layers if you need to stack them.

    They will keep well for approximately 5–7 days.

    For the best texture, remove them from the refrigerator around 15–20 minutes before serving.

    Can You Freeze Rum Truffles?

    Yes.

    Place the finished truffles in a freezer-safe airtight container with parchment between the layers.

    Freeze for up to 2 months.

    Thaw them overnight in the refrigerator.

    Cocoa-coated truffles may need a fresh dusting after thawing, while sprinkle- or coconut-coated truffles generally hold their appearance well.

    Rum Truffles as Homemade Christmas Gifts

    Rum truffles are ideal for homemade Christmas gift boxes.

    Arrange them in small paper candy cups and place them in a decorative tin or food-safe gift box.

    If you’re giving them as gifts, clearly label truffles containing alcohol.

    You could make several varieties from one batch — chocolate sprinkles, coconut, cocoa and chopped nuts — so the finished box looks colorful and abundant.

    Brit & Skillet Tip

    For gifting, keep the truffles refrigerated until shortly before you deliver them. Because they contain cream, they shouldn’t spend long periods sitting somewhere warm.

    A Little British Christmas Nostalgia

    Not every British Christmas recipe has to be an enormous pudding or an elaborate centerpiece.

    Sometimes it’s the little things — a chocolate truffle from a bakery box, a sweet passed around after dinner or something homemade alongside a cup of tea — that become part of the Christmas tradition.

    That’s what I love about recipes like these.

    They’re simple enough to make without turning Christmas into another job, but special enough that you probably wouldn’t make them on an ordinary Tuesday afternoon.

    And alongside bigger celebration desserts like Traditional British Trifle, these little chocolate treats help make a Christmas table feel abundant without requiring another complicated bake.

    Traditional British Rum Truffles

    Prep time: 25 minutes
    Chilling time: 1 hour
    Makes: Approximately 22–26 truffles

    Rich chocolate, soft cake crumbs and dark rum make these old-fashioned British rum truffles an easy addition to a Christmas sweet tray.

    Roll them in chocolate sprinkles for the nostalgic version, or make a mixture of cocoa, coconut and chocolate coatings for a beautiful homemade gift box.

    For more British bakes, puddings, savory favorites and seasonal recipes, explore all of my British Recipes made approachable for American kitchens.


  • British Chicken Tikka Masala: An Easy Recipe for American Kitchens

    British Chicken Tikka Masala: An Easy Recipe for American Kitchens

    Chicken tikka masala may look quite different from steak and ale pie or a Sunday roast, but it has become one of the most recognizable dishes in modern British food culture.

    Tender pieces of spiced yogurt-marinated chicken are cooked until lightly charred, then folded into a rich tomato sauce flavored with garlic, ginger, warming spices and cream. Served with basmati rice or naan, it’s the sort of comforting curry that has become a fixture of British curry houses and home kitchens alike.

    The precise origins of chicken tikka masala are debated, with several stories surrounding its creation and development in Britain. What isn’t disputed is the enormous influence South Asian cooking — and particularly Britain’s Indian, Pakistani and Bangladeshi communities — has had on modern British food.

    This version is designed specifically for an American home kitchen. You don’t need a tandoor, unusual equipment or difficult-to-find ingredients to get wonderfully flavorful chicken with a creamy, deeply spiced sauce.

    What Is Chicken Tikka Masala?

    Chicken tikka masala consists of two main components.

    First comes chicken tikka: pieces of chicken marinated with yogurt and spices and traditionally cooked at very high heat.

    The cooked chicken is then served in a tomato-based masala sauce.

    The sauce varies considerably between cooks and restaurants, but commonly includes tomatoes, onion, garlic, ginger, garam masala and cream.

    The finished curry is generally creamy and aromatic with a gentle sweetness and as much — or as little — chilli heat as you prefer.

    Is Chicken Tikka Masala British or Indian?

    It’s best described as a dish shaped by both South Asian and British food culture.

    Its exact origin is disputed, and there are competing stories about where and by whom the finished dish was first created.

    Chicken tikka itself has South Asian roots, while the saucier dish known as chicken tikka masala became particularly associated with Britain’s curry-house culture.

    Rather than trying to assign the dish to a single moment or person, it’s more useful to recognize it as part of the long culinary exchange between Britain and South Asia.

    Today, it is firmly established as a familiar part of modern British eating.

    Ingredients

    For the Chicken Tikka

    • 1 1/2 lb (680g) boneless, skinless chicken thighs
    • 1/2 cup (120g) plain whole-milk Greek yogurt
    • 1 tablespoon (15ml) fresh lemon juice
    • 3 cloves garlic, finely grated or minced
    • 1 tablespoon freshly grated ginger
    • 2 teaspoons garam masala
    • 1 teaspoon ground cumin
    • 1 teaspoon ground coriander
    • 1 teaspoon paprika
    • 1/2 teaspoon ground turmeric
    • 1/4–1/2 teaspoon cayenne pepper, optional
    • 1 teaspoon kosher salt
    • 1 tablespoon (15ml) neutral oil

    For the Masala Sauce

    • 2 tablespoons (28g) unsalted butter
    • 1 tablespoon (15ml) neutral oil
    • 1 medium yellow onion, finely diced
    • 3 cloves garlic, finely grated or minced
    • 1 tablespoon freshly grated ginger
    • 2 teaspoons garam masala
    • 1 teaspoon ground cumin
    • 1 teaspoon ground coriander
    • 1 teaspoon paprika
    • 1/2 teaspoon ground turmeric
    • 1/4 teaspoon cayenne pepper, optional
    • 2 tablespoons (30g) tomato paste
    • 1 can (14–15 oz / 400g) crushed tomatoes or tomato puree
    • 1/2 cup (120ml) water
    • 3/4 cup (180ml) heavy cream
    • 1 teaspoon granulated sugar, optional
    • 3/4 teaspoon kosher salt, plus more to taste
    • 1 tablespoon fresh lemon juice
    • Fresh cilantro, for serving

    To Serve

    • Cooked basmati rice
    • Warm naan, optional
    • Fresh cilantro
    • Lemon wedges, optional

    Chicken Thighs or Chicken Breasts?

    I prefer boneless, skinless chicken thighs for chicken tikka masala.

    They’re flavorful and remain juicy when exposed to the high heat we need to create those lightly charred edges.

    Chicken breasts work too, but they cook more quickly and can become dry if left under the broiler too long.

    Whichever you choose, cut the chicken into irregular bite-size pieces rather than perfectly identical cubes. Besides looking more natural, slight variation gives you more edges and surfaces to brown.

    Brit & Skillet Tip

    Don’t worry about making every piece of chicken identical. Chicken tikka should look like food cooked over intense heat, not perfectly manufactured cubes. Aim for roughly similar sizes so they cook evenly, while keeping the pieces naturally irregular.

    Make the Yogurt Marinade

    Place the yogurt, lemon juice, garlic, ginger, garam masala, cumin, coriander, paprika, turmeric, cayenne, salt and oil in a large bowl.

    Stir until thoroughly combined.

    Add the chicken and turn the pieces until completely coated.

    Cover and refrigerate for at least 1 hour.

    For even better flavor, marinate it for 4–8 hours.

    Avoid leaving it much longer than overnight because the acidic marinade can eventually affect the chicken’s texture.

    What Is Garam Masala?

    Garam masala is a fragrant spice blend used throughout South Asian cooking.

    The exact mixture varies considerably, but it commonly contains warming spices such as cumin, coriander, cardamom, cinnamon, cloves and black pepper.

    You’ll now find garam masala in the spice section of many American supermarkets, so there is no need to make your own unless you want to.

    It provides much of the distinctive warm aroma in this dish.

    How to Cook Chicken Tikka Without a Tandoor

    A traditional tandoor reaches temperatures far beyond those of an ordinary home oven.

    We can imitate some of that intense heat with an American oven broiler.

    Line a rimmed baking sheet with foil and place a wire rack over it if you have one.

    Arrange the marinated chicken in a single layer, leaving a little room between the pieces.

    Position the oven rack approximately 6 inches from the broiler.

    Broil the chicken for approximately 5–7 minutes.

    Turn the pieces and broil for another 4–6 minutes, until cooked through with browned and lightly charred patches.

    Chicken should reach an internal temperature of 165°F (74°C).

    Exact broiling time will depend on the size of the pieces and the strength of your broiler.

    Don’t worry if some edges become quite dark. Those charred areas add tremendous flavor to the finished curry.

    Can I Cook the Chicken on the Grill?

    Yes — and it’s excellent.

    Thread the marinated chicken loosely onto skewers or place the pieces directly onto a well-oiled grill grate.

    Cook over medium-high to high heat until nicely charred and the chicken reaches 165°F (74°C) internally.

    A grill gives you some of the smoky character associated with traditional high-heat cooking.

    Make the Masala Sauce

    While the chicken cooks, heat the butter and oil in a large skillet or Dutch oven over medium heat.

    Add the onion.

    Cook for approximately 8–10 minutes, stirring occasionally, until very soft and beginning to turn golden.

    Don’t rush this stage. Properly softened onion gives the sauce much more depth.

    Add the garlic and ginger and cook for another 1 minute.

    Add the garam masala, cumin, coriander, paprika, turmeric and optional cayenne.

    Stir constantly for about 30 seconds, just until fragrant.

    Add the tomato paste and cook for another 1–2 minutes.

    Pour in the crushed tomatoes and water.

    Stir well, scraping up anything stuck to the bottom of the pan.

    Simmer the Sauce

    Bring the sauce to a gentle simmer.

    Reduce the heat and cook uncovered for approximately 15–20 minutes, stirring occasionally.

    The tomatoes should lose their raw flavor and the sauce should thicken slightly.

    If it becomes too thick, add a small splash of water.

    Make It Creamy

    Reduce the heat to low.

    Stir in the heavy cream.

    Add the optional teaspoon of sugar and the salt.

    The sugar isn’t intended to make the curry sweet. It can simply balance particularly acidic canned tomatoes, so taste the sauce before deciding whether you need it.

    Simmer gently for another 3–5 minutes.

    Do not allow the cream sauce to boil aggressively.

    Add the Chicken

    Add the cooked chicken and any flavorful juices from the baking sheet to the sauce.

    Stir gently until the chicken is coated.

    Simmer over low heat for approximately 5 minutes, allowing the chicken and sauce flavors to come together.

    Stir in the lemon juice.

    Taste and adjust the salt, chilli or lemon as needed.

    Finish with fresh cilantro.

    Brit & Skillet Tip

    Add the chicken after the sauce is nearly finished. Simmering already-cooked chicken in the sauce for a long time can make it dry and eliminates some of the contrast between those charred edges and the creamy masala sauce.

    How Spicy Is Chicken Tikka Masala?

    Chicken tikka masala is generally more aromatic than fiercely hot.

    The cayenne in this recipe is deliberately adjustable.

    For a mild curry, omit it entirely.

    For medium heat, use approximately 1/4 teaspoon in both the marinade and sauce.

    For something hotter, increase it according to your preference.

    Remember that garam masala contributes warmth and fragrance rather than the direct chilli heat you get from cayenne.

    Can I Use Curry Powder Instead of Garam Masala?

    I don’t recommend making a straight substitution.

    “Curry powder” is a broad Western term for many different spice blends, and its flavor can vary significantly between brands.

    Garam masala has a particular aromatic character that’s important to this recipe.

    Fortunately, it has become quite easy to find in American supermarkets.

    Heavy Cream vs British Double Cream

    British recipes frequently call for double cream, which has a higher fat content than standard American heavy cream.

    For this recipe, American heavy cream or heavy whipping cream works perfectly well.

    You don’t need to search for imported double cream.

    I’ve covered several other common ingredient translations in my British Baking Ingredients Americans Need to Know guide.

    Can I Make Chicken Tikka Masala Without Cream?

    Yes.

    Full-fat coconut milk can be used for a dairy-free variation, although it will change the flavor.

    You can also use half-and-half for a lighter sauce, but it won’t be quite as rich and should be heated gently to reduce the chance of splitting.

    If you’re avoiding dairy completely, remember that you’ll also need to replace the yogurt in the marinade with an appropriate unsweetened dairy-free yogurt.

    Why Does My Tikka Masala Taste Too Tomatoey?

    The sauce probably needs more cooking time.

    Canned tomatoes can taste sharp and raw when they first go into the pan.

    Allowing the sauce to simmer for 15–20 minutes before adding the cream mellows that acidity considerably.

    A small amount of sugar can also help if your particular tomatoes are especially acidic.

    Don’t add lots of sugar — the finished curry shouldn’t taste sweet.

    Why Is My Chicken Dry?

    The most common causes are:

    • Cutting the chicken too small
    • Using chicken breast and overcooking it
    • Broiling for too long
    • Simmering the cooked chicken in the sauce for too long

    Chicken thighs give you a little more margin for error.

    The chicken only needs a brief final simmer once it has been added to the sauce.

    Why Doesn’t My Chicken Have Charred Edges?

    High heat and space are essential.

    If the chicken pieces are packed tightly together, they release moisture and begin steaming instead of browning.

    Arrange them in a single layer with gaps between the pieces and get them relatively close to the broiler.

    A wire rack can also help hot air circulate around the chicken.

    Can I Make Chicken Tikka Masala Ahead?

    Absolutely.

    Like many curries and stews, the flavors can be even better the following day.

    Prepare the entire dish, allow it to cool and refrigerate it in an airtight container for up to 3 days.

    Reheat gently over medium-low heat, adding a splash of water if the sauce has thickened considerably.

    If you enjoy make-ahead British comfort food, my Traditional British Beef and Ale Stew is another excellent option.

    Can I Freeze Chicken Tikka Masala?

    Yes.

    Allow it to cool completely and transfer it to a freezer-safe container.

    Freeze for up to 3 months.

    Thaw overnight in the refrigerator and reheat gently on the stovetop.

    Cream sauces can occasionally look slightly separated after freezing, but gentle reheating and stirring will usually bring everything back together.

    What to Serve with Chicken Tikka Masala

    Serve it with:

    • Steamed basmati rice
    • Warm naan
    • Cucumber salad
    • Chutney
    • Plain yogurt
    • Lemon wedges
    • Fresh cilantro

    A bowl of fluffy basmati rice is really all you need to turn it into a satisfying dinner.

    Chicken Tikka Masala and Modern British Food

    Brit & Skillet has plenty of older British favorites — from Traditional Welsh Rarebit to pies, puddings and cakes — but British food hasn’t stood still.

    Migration and cultural exchange have profoundly influenced what people across Britain cook and eat.

    South Asian restaurants and communities have been an especially important part of that story, and curry-house dishes have become deeply woven into Britain’s modern food landscape.

    Chicken tikka masala is therefore a useful reminder that “British food” doesn’t refer only to recipes that have existed unchanged for centuries.

    It continues to evolve.

    British Chicken Tikka Masala

    Prep time: 25 minutes
    Marinating time: At least 1 hour
    Cook time: 40 minutes
    Serves: 4–6

    Creamy, aromatic and full of warming spices, chicken tikka masala represents a very different side of British cooking from the traditional pies and bakes for which the country is often known.

    With a yogurt marinade, an ordinary American broiler and supermarket spices, you can make a wonderfully satisfying version at home without specialized equipment.

    For more traditional and modern favorites, explore all of my British Recipes made approachable for American kitchens.