Tag: chocolate

  • Best Rolling Pins for British Baking: What American Bakers Should Buy

    Best Rolling Pins for British Baking: What American Bakers Should Buy

    A rolling pin might be one of the simplest tools in the kitchen, but walk into the baking aisle and suddenly you’re choosing between handled pins, straight wooden dowels, tapered French pins, silicone rollers, stainless steel, marble, and adjustable designs with removable rings.

    That’s rather a lot of engineering for something whose basic job is to make dough flatter.

    For American bakers exploring British recipes, however, a good rolling pin earns its place in the kitchen.

    If you’re building your baking kit from scratch, our 10 Essential Kitchen Tools for British Baking in America covers the other basics worth having on hand.

    You’ll use one for everything from pastry and biscuits to sausage rolls, mince pies, shortcrust pastry, Eccles cakes, and plenty of other recipes where an evenly rolled piece of dough makes the rest of the job considerably easier.

    The good news is that you don’t need a special “British” rolling pin.

    What matters is choosing a design that gives you good control, even pressure, enough working length, and a surface that handles pastry well.

    Different styles do have their strengths. In comparative testing, King Arthur Baking found a straight wooden rolling pin particularly versatile across pie dough, cookie dough, and puff pastry, while a tapered French-style pin provided excellent maneuverability when shaping pastry into a circle.

    There are also adjustable rolling pins that use removable rings to control dough thickness—handy for recipes where consistency matters. Current models such as the Joseph Joseph PrecisionPin, for example, provide several thickness settings from approximately 2 mm to 10 mm.

    So which style actually makes sense for British baking in an American kitchen?

    In this guide, we’ll explain the major types of rolling pins, what materials and features are worth considering, and which current options we’d choose for different kinds of bakers.

    Our recommendations are based on current manufacturer specifications, independent baking tests, and suitability for the job rather than personal testing by Brit & Skillet.

    Because after nineteen articles explaining British baking to Americans, we’ve finally reached a piece of equipment whose operating instructions are essentially:

    Push. Roll. Try not to drop it on your foot.

    Progress. 😂

    Affiliate disclosure: Brit & Skillet may earn a commission from qualifying purchases made through links on this page, at no additional cost to you.

    What Type of Rolling Pin Is Best for British Baking?

    For most British baking, you don’t need a specialized rolling pin. What you want is a pin that can comfortably handle shortcrust pastry, scones, biscuits, sausage rolls, mince pies, tarts, and other rolled doughs.

    There are three main styles worth considering.

    Straight or Dowel Rolling Pins

    A straight rolling pin is essentially one long cylinder without handles.

    The simple shape allows you to place your hands directly on the pin, making it easier to feel how much pressure you’re applying to the dough. It’s particularly useful when you want an even thickness across a larger piece of pastry.

    In King Arthur Baking’s comparison, its 19-inch straight wooden pin performed especially well with cookie dough and puff pastry and was rated as the most versatile style they tested.

    Best for:
    Pastry, biscuits, cookies, puff pastry, sausage rolls, and general-purpose baking.

    Advantages:

    • Excellent control over pressure
    • Easy to roll dough evenly
    • Large working surface
    • No handles or bearings to worry about
    • Simple wooden designs can last for years

    For an American baker who wants one rolling pin to handle almost everything, this is probably our favorite style.

    French-Style Tapered Rolling Pins

    A French rolling pin is also handle-free, but it becomes narrower toward each end.

    That taper makes the pin particularly maneuverable. By changing the pressure from one hand to the other, you can steer the dough while you’re rolling it.

    That’s especially useful when you’re trying to turn pastry into a neat circle for something like a tart or pie.

    King Arthur’s testing found the tapered French pin produced the neatest circle of pie dough, while pastry expert Erin Jeanne McDowell also favors the style because it makes manipulating dough in different directions easier.

    Best for:
    Pie crusts, tart pastry, mince pies and bakers who like greater contact with the dough.

    Advantages:

    • Very responsive
    • Excellent maneuverability
    • Easy to change direction while rolling
    • Lightweight and simple
    • Particularly good for circular pastry

    The only downside is that it can take a little practice to produce perfectly even thickness compared with a straight dowel.

    Traditional Handled Rolling Pins

    This is probably the rolling pin most Americans picture first: a central roller with a handle at either end.

    There’s absolutely nothing wrong with this design.

    In fact, if you’ve spent years using one and find it comfortable, there’s little reason to abandon it simply because you’ve started making British recipes. King Arthur’s handled maple pin performed well across pie dough, cookie dough, and puff pastry in its testing, although it required somewhat more effort when rolling back and forth.

    Best for:
    Beginners, everyday baking and anyone who simply prefers holding handles rather than the rolling surface.

    Advantages:

    • Familiar design
    • Comfortable hand position
    • Easy for beginners to understand
    • Available almost everywhere

    Ultimately, technique matters more than whether your rolling pin has handles.

    Our Pick for Most American Bakers

    If you’re buying one rolling pin specifically to build a versatile British baking kitchen, we’d choose a:

    Long, straight wooden rolling pin.

    It gives you plenty of working area, excellent control over dough thickness and enough versatility for nearly everything from shortcrust pastry to biscuits and sausage rolls.

    A tapered French pin would be our second choice — and could easily become your favorite if you make lots of pies and tarts.

    And if you already own Grandma’s handled wooden rolling pin?

    Keep it.

    Britain will allow it. 🇬🇧😂

    The Best Rolling Pins for British Baking

    You don’t need an expensive rolling pin to make excellent British pastry. For most home bakers, a well-made wooden pin is more than enough.

    Based on current manufacturer specifications, independent baking tests, and suitability for common British baking tasks, these are the three styles we’d consider first.

    Best Overall: King Arthur Straight Rolling Pin

    For an American baker who wants one rolling pin capable of handling almost everything, the King Arthur Straight Rolling Pin is our best overall choice.

    This 19-inch dowel-style pin has a lightly textured hardwood surface designed to hold a small amount of flour, helping prevent dough from sticking. Its straight shape also makes it easier to apply even pressure across pastry. King Arthur Baking Shop

    King Arthur’s comparative testing found this style especially strong with cookie dough and puff pastry while still performing very well with pie dough. Their tester ultimately considered the straight pin the most versatile of the designs tested.

    Why we like it for British baking:

    • 19-inch working length
    • Straight surface helps maintain even thickness
    • Wooden surface holds a light dusting of flour
    • Excellent for larger pieces of pastry
    • Useful for shortcrust, biscuits, sausage rolls and puff pastry
    • Simple construction without handles or complicated moving parts

    Best for: The baker who wants one dependable, all-purpose rolling pin.

    For most Brit & Skillet readers, this would be our first choice.

    Best French-Style Pin: JK Adams French Tapered Rolling Pin

    If you prefer greater maneuverability, the JK Adams French Tapered Rolling Pin is an excellent alternative.

    It’s made in the USA from North American hardwood and measures 20½ inches long. The tapered design allows you to adjust pressure from side to side, which can make shaping circular pieces of pastry easier.

    That makes this style particularly appealing for tarts, pies and individual pastry cases, including the sort you might use for mince pies.

    JK Adams also uses a slightly textured wooden surface intended to retain a light dusting of flour rather than being completely slick.

    Why we like it:

    • Excellent control and maneuverability
    • Long 20½-inch design
    • Hardwood construction
    • Lightweight French-style shape
    • Particularly useful for circular pastry

    Best for: Bakers who make lots of pies and tarts or prefer being able to feel and steer the dough while rolling.

    Best for Consistent Thickness: Joseph Joseph PrecisionPin

    Sometimes a British recipe tells you to roll pastry to a particular thickness and you find yourself staring at the dough thinking:

    Does that look like 4 mm?

    Unless your eyes came from the factory with built-in calipers, it’s not always obvious. 😂

    The Joseph Joseph PrecisionPin solves that problem with removable guide rings.

    Its beechwood pin includes five sets of rings that produce approximate dough thicknesses of 2, 4, 6, 8 or 10 mm. Remove the rings completely and it can also be used as a conventional rolling pin.

    That feature can be particularly useful for biscuits, pastry and other recipes where consistent thickness helps everything bake evenly.

    Why we like it:

    • Five selectable thickness settings
    • Beechwood construction
    • Can be used with or without the rings
    • Helpful for newer bakers
    • Removes much of the guesswork from rolling evenly

    One consideration is its length: at about 16½ inches, it’s shorter than the straight and French-style pins above, so we’d favor one of those longer pins for particularly large sheets of dough.

    Best for: Beginners and anyone who regularly struggles to judge pastry thickness.

    Which One Would We Buy?

    For the typical American home baker learning British baking:

    King Arthur Straight Rolling Pin — Best Overall

    It offers the simplest combination of versatility, working length and control.

    Choose the JK Adams French Tapered Rolling Pin instead if you particularly enjoy making pies and tarts and want greater maneuverability.

    Choose the Joseph Joseph PrecisionPin if getting dough to an even specified thickness is usually the part that drives you round the bend.

    And importantly, none of these recommendations requires pretending Brit & Skillet has personally tested a cupboard full of rolling pins. Our recommendations are based on published testing, manufacturer specifications and how well each design suits the British baking tasks discussed in this guide.

    Wood vs. Marble vs. Stainless Steel vs. Silicone

    The shape of a rolling pin matters, but so does the material.

    For most home bakers, wood remains our preferred all-purpose choice. Independent testing has repeatedly favored wooden pins for their combination of control, durability and versatility. A lightly textured wooden surface can also hold a small dusting of flour, which helps prevent pastry from sticking.

    Wood

    Wood is the classic choice, and for British baking it’s difficult to beat.

    It’s relatively lightweight, gives you good feedback from the dough and works well for everything from shortcrust pastry to biscuits and sausage rolls.

    Best for: General British baking.

    One thing to remember: wooden rolling pins normally require hand washing rather than soaking or putting them in the dishwasher.

    Marble

    Marble rolling pins are heavy and can be chilled, which makes them useful when working with buttery doughs that need to remain cool.

    That can be helpful for puff pastry and other temperature-sensitive pastry. The trade-off is weight: marble can be considerably heavier and more cumbersome than wood, and it’s vulnerable to damage if dropped.

    Best for: Bakers who frequently work with buttery pastry and don’t mind a heavier pin.

    For most beginners, though, we wouldn’t consider marble necessary.

    Stainless Steel

    Stainless steel provides another smooth surface that can be chilled before rolling pastry.

    It’s durable and easy to clean, although the slick surface doesn’t hold flour in quite the same way as lightly textured wood. Some bakers also prefer the warmer, more tactile feel of a wooden pin.

    Best for: Bakers who value easy cleaning or frequently work with chilled pastry.

    Silicone

    Silicone rolling pins are generally marketed for their low-stick surface and easy cleanup.

    They can be convenient, particularly with sticky doughs, but they’re not automatically superior to wood. Testing and expert opinions on their nonstick performance are somewhat mixed, and wooden pins continue to perform extremely well as versatile everyday tools.

    Best for: Bakers who prioritize easy cleanup and prefer a smoother rolling surface.

    Our Material Recommendation

    For a first rolling pin:

    Choose wood.

    It’s affordable, versatile and suitable for virtually everything we’re likely to make in a British home-baking kitchen.

    You can always add a marble or stainless-steel pin later if you become the sort of person who makes puff pastry on a Tuesday afternoon for relaxation.

    At which point, frankly, you’ve graduated beyond this guide. 😂

    What Size Rolling Pin Should You Buy?

    Rolling pins come in plenty of sizes, but for an all-purpose baking kitchen, around 18 to 20 inches long is an excellent range.

    That gives you enough length to roll a reasonably large sheet of pastry without constantly repositioning the pin. Straight dowel pins are commonly around 17 to 19 inches, while tapered pins are often around 19 inches.

    For British baking, that extra working length is particularly useful when you’re making things such as sausage rolls, tart pastry or a larger sheet of shortcrust.

    For Most Bakers: 18–20 Inches

    This is the range we’d choose for a general-purpose rolling pin.

    It provides enough working surface for larger pieces of dough while still being manageable in an ordinary home kitchen.

    Our best-overall King Arthur Straight Rolling Pin, for example, measures 19 inches long and was particularly effective in testing when rolling a large rectangle of puff pastry.

    What About Shorter Rolling Pins?

    A shorter pin can certainly work, especially if you have limited counter space or mostly make smaller batches.

    But if you’re buying your main rolling pin, we’d rather have a little extra length than discover halfway through rolling pastry that the dough is wider than the pin.

    That’s how baking equipment ends up being called names that weren’t included in the manufacturer’s instructions.

    Does Diameter Matter?

    Not nearly as much as overall comfort and control.

    A thicker straight pin generally has more weight behind it, which can help flatten dough with less downward pressure. A slimmer tapered pin feels lighter and makes changing direction easier.

    There’s no single perfect measurement for everybody.

    If the pin feels comfortable in your hands, covers the width of dough you normally make and allows you to maintain even pressure, you’ve got the important bits covered.

    The Bottom Line

    You don’t need a drawer full of rolling pins to make British recipes successfully in an American kitchen.

    For most bakers, we’d choose a long wooden rolling pin around 18 to 20 inches, with a straight dowel design getting our overall vote for versatility.

    Our three recommendations serve slightly different bakers:

    King Arthur Straight Rolling Pin — our best overall choice for versatility.

    JK Adams French Tapered Rolling Pin — best for maneuverability and shaping pies and tarts.

    Joseph Joseph PrecisionPin — best for bakers who want help achieving a consistent dough thickness.

    But if you already own a perfectly functional wooden rolling pin, don’t feel compelled to replace it. The best rolling pin is ultimately one that lets you comfortably produce evenly rolled dough.

    British baking doesn’t require a collection of mysterious specialist equipment. A dependable rolling pin, a good set of baking tins, a kitchen scale and a few other basics will take you remarkably far.

    For a complete rundown, see our British Baking Equipment Guide: Everything an American Kitchen Needs.
  • Caster Sugar vs. Granulated Sugar: A Guide for American Bakers.

    Caster Sugar vs. Granulated Sugar: A Guide for American Bakers.

    You’ve found a British cake recipe, checked the tin size, and set out your ingredients. Then you spot “caster sugar” on the list.

    Is that the granulated sugar already in your cupboard? Is it powdered sugar? Or do you need to find an imported bag before you can start?

    Caster sugar is finely granulated sugar, commonly called superfine sugar in the United States. Its smaller crystals are the key difference—and the reason a recipe may ask for it.

    In this guide, we’ll explain how caster sugar compares with ordinary granulated sugar and powdered sugar, what to look for when shopping, and why the best substitution depends on what you’re baking.

    Affiliate disclosure: Brit & Skillet may earn a commission from qualifying purchases made through links on this page, at no additional cost to you.

    What Is Caster Sugar?

    Caster sugar is white sugar with crystals finer than ordinary granulated sugar, but larger than the particles in powdered sugar.

    Those smaller crystals dissolve more readily, which can be useful when making cakes, meringues, and other mixtures where the sugar needs to blend smoothly.

    What Is It Called in America?

    In American stores, look for superfine sugar. Some products use the name “baker’s sugar,” but check the package description to confirm that it’s finely granulated sugar.

    You don’t need a British brand simply because your recipe is British.

    Is It the Same as Powdered Sugar?

    No. Powdered sugar—also called confectioners’ sugar or icing sugar—has been ground into a powder and commonly contains an anti-caking ingredient such as starch.

    Caster sugar still has visible crystals. Swapping powdered sugar for caster sugar can change how a recipe behaves, so don’t treat them as interchangeable.

    What About Golden Caster Sugar?

    Golden caster sugar is a fine sugar with a pale golden colour and a slightly different flavour from white caster sugar.

    It isn’t the same as moist brown sugar. If your recipe specifies golden caster sugar, check its substitution notes before choosing an alternative.

    Read the Description, Not Just the Name

    Sugar labels can vary between brands. The useful detail is the texture: you’re looking for fine granulated crystals, rather than ordinary coarse granules or a powder.

    Once you know that, the mysterious British ingredient becomes a much more familiar shopping task.

    Caster Sugar vs. Granulated Sugar: What’s the Difference?

    White caster sugar and ordinary white granulated sugar are both forms of sucrose. The main difference is the size of their crystals.

    Caster sugar has finer crystals, while granulated sugar has larger ones.

    Why Crystal Size Matters

    Smaller crystals dissolve more readily. That can make caster sugar useful in mixtures where undissolved sugar would leave an unwanted grainy texture.

    However, sugar does more than dissolve. During creaming, its crystals help incorporate air into softened butter. Changing the sugar can therefore affect the mixing process as well as the texture of the finished bake.

    Is Caster Sugar Sweeter?

    Caster sugar isn’t a more concentrated form of sugar. By weight, white caster sugar and ordinary white granulated sugar provide essentially the same sweetness.

    Measuring by volume can complicate the comparison because different crystal sizes can pack differently into a cup. For a British recipe written in grams, keep using the stated weight.

    Will Granulated Sugar Ruin a British Recipe?

    Not automatically. Some recipes work well with ordinary granulated sugar, while others benefit more from finer crystals.

    The important questions are how the sugar is incorporated and what texture the recipe needs. A recipe that dissolves sugar in warm liquid presents a different situation from one that asks you to whisk it into egg whites.

    Before substituting, look for guidance from the recipe’s author. “Both are sugar” is a useful starting point, but it doesn’t tell the whole baking story.

    Can You Substitute Granulated Sugar for Caster Sugar?

    Sometimes, yes—but the result depends on the recipe.

    Ordinary granulated sugar can work in many everyday bakes. Its larger crystals may take longer to dissolve, however, and the finished texture may differ from a version made with caster sugar.

    Keep the Measurement in Grams

    If the recipe author permits the substitution, use the same weight unless their instructions say otherwise.

    For example, replacing 200 grams of caster sugar means weighing out 200 grams of granulated sugar. Don’t convert the amount into cups unnecessarily.

    Consider the Mixing Method

    When sugar dissolves in a liquid during preparation, crystal size may be less important than in a mixture where the sugar has limited opportunity to dissolve.

    For delicate meringues or recipes that specifically depend on fine sugar, follow the ingredient list closely or use an alternative tested by the recipe author.

    Don’t Compensate by Beating Indefinitely

    Longer mixing isn’t a universal solution for larger sugar crystals. Depending on the stage of the recipe, excessive beating can warm the butter, alter the mixture, or overwork flour.

    Follow the recipe’s method and texture cues rather than trying to eliminate every grain of sugar.

    Choose the Most Reliable Option for the Occasion

    For a casual bake, you may be comfortable trying a substitution and noting the result.

    For a special-occasion cake or a recipe you’ve never made before, using the specified sugar removes one variable.

    There’s nothing wrong with experimenting. It just helps to know when you’re experimenting.

    Can You Make Caster Sugar at Home?

    You can make a finer sugar at home by briefly processing ordinary white granulated sugar.

    The result may not have the same uniform crystal size as commercially produced caster sugar, but it can be a practical option when your recipe allows it.

    Check Your Equipment First

    Use a food processor or blender that its manufacturer identifies as suitable for processing dry sugar.

    Start with clean, completely dry equipment. Moisture can make the sugar clump.

    Process in Short Bursts

    Pulse the sugar briefly, checking the texture between bursts.

    You’re aiming for smaller crystals—not powdered sugar. Stop while the sugar still has a fine, granular appearance.

    There isn’t one processing time that suits every machine or batch size, so judge the texture rather than relying on a fixed number of seconds.

    Let the Dust Settle

    After processing, leave the lid closed briefly so the sugar dust can settle before opening it.

    Then weigh the amount your recipe requires. Some sugar may remain in the machine, so measuring afterward helps you avoid adding less than intended.

    Label Any Leftovers

    Store leftover sugar in a dry, airtight container and label it clearly.

    “Fine granulated sugar” is a more useful label than leaving a mysterious white ingredient in the cupboard and trusting your future self to remember.

    Where to Find Caster Sugar in the United States

    When shopping in the United States, start by looking for superfine sugar rather than limiting your search to “caster sugar.”

    A convenient option for American bakers: King Arthur Baker’s Special Sugar is a superfine sugar that works well when a British recipe calls for caster sugar. Its finer crystals make it a closer match than ordinary American granulated sugar.

    The wording on the bag may be different, but the product description should identify it as finely granulated sugar.

    Check the Baking Aisle

    Look near ordinary granulated sugar and other baking sugars. If you don’t see it, check the store’s product listings or ask whether it carries superfine sugar.

    Availability varies, so check before making a special trip.

    Read Online Listings Carefully

    Useful search phrases include “superfine sugar” and “caster sugar.”

    Before ordering, check the package description, bag size, and total price including delivery. A British recipe doesn’t automatically require an imported brand.

    Watch for Similar-Sounding Products

    Don’t choose powdered or confectioners’ sugar simply because it looks finer.

    Also check whether a product is white caster sugar, golden caster sugar, or a sugar substitute. Those distinctions can matter to the recipe.

    Buy an Amount You’ll Use

    If you’re trying one recipe, a smaller package may be enough. If British cakes and meringues become regular projects, you can decide whether keeping superfine sugar in the cupboard makes sense.

    The aim is to find the right ingredient—not to pay extra for a familiar British word on the label.

    Quick Guide to Common Baking Sugars

    These sugars may sit beside each other in the baking aisle, but they don’t all do the same job.

    SugarTextureWhat to know
    White caster or superfine sugarFine crystalsCommon in British cakes and meringues; dissolves more readily than ordinary granulated sugar
    White granulated sugarLarger crystalsAn everyday baking sugar; suitability as a caster-sugar substitute depends on the recipe
    Icing, powdered, or confectioners’ sugarPowderyCommon in icings and dusting; often contains starch and isn’t a direct caster-sugar substitute
    Golden caster sugarFine, pale golden crystalsDifferent in colour and flavour from white caster sugar; check the recipe’s substitution guidance
    Light or dark brown sugarTypically moist and clumpyContains molasses; can change flavour, moisture, and texture when substituted

    Follow the Recipe Before the Label Shortcut

    “Fine” doesn’t mean “powdered,” and “golden” doesn’t mean “brown sugar.”

    When choosing a substitute, consider the sugar’s crystal size, moisture, and flavour—not just its colour or how sweet it tastes.

    For more ingredient translations and explanations of recipe instructions, see British Baking Terms Explained: A Guide for American Bakers.

    Which Sugar Should You Use?

    If a British recipe asks for caster sugar, white superfine sugar is the American product to look for.

    Ordinary granulated sugar may work when the recipe allows it, but don’t assume every bake will turn out identically. Powdered sugar is a different ingredient and shouldn’t be used as a direct replacement.

    Keep measurements in grams where the recipe provides them, and let its mixing instructions and texture cues guide you.

    For help with weights and volumes, read How to Convert British Baking Measurements for American Recipes.

    Once you know what to look for, caster sugar stops being a mysterious imported necessity and becomes one more familiar ingredient in your baking cupboard.

    British food. American kitchens. One less sugar-related mystery.


  • Best Pudding Basins for Traditional British Desserts: A Guide for American Bakers

    Best Pudding Basins for Traditional British Desserts: A Guide for American Bakers

    If you’re an American baker exploring traditional British desserts, sooner or later you’re likely to encounter a piece of equipment that doesn’t appear in many American kitchens: the pudding basin.

    Despite the name, a pudding basin isn’t designed for the creamy custard-style dessert Americans usually associate with the word pudding. In British cooking, pudding can describe a much broader range of sweet—and sometimes savory—dishes.

    Traditional steamed puddings such as Christmas pudding, treacle sponge, and steamed fruit or sponge puddings are commonly cooked inside a deep, rounded basin. The mixture is placed inside, the top is covered securely, and the basin is then steamed gently until the pudding is cooked through.

    The shape isn’t merely decorative. Traditional pudding basins have deep sides and a pronounced rim that makes it easier to secure parchment, foil, or cloth around the top while the pudding steams. Some traditional designs also incorporate features that help the basin sit securely during steaming. CooksInfo

    For American bakers, the confusing part is often figuring out which pudding basin to buy.

    You’ll encounter ceramic, earthenware, plastic, and other heat-safe options, along with capacities described in milliliters, liters, cups, or British pints. And although a tiny individual basin might be perfect for one dessert, it won’t necessarily work for a full-size Christmas pudding.

    In this guide, we’ll explain what a pudding basin is, what size is most useful, which materials and features to consider, and which options make sense for an American kitchen.

    Our product recommendations will be based on current manufacturer information, recipe requirements, and independent research rather than personal testing by Brit & Skillet.

    What Is a British Pudding Basin?

    A British pudding basin is a deep, rounded bowl designed for steaming puddings.

    Traditional versions are usually made from ceramic or earthenware and have a noticeably different shape from an ordinary mixing bowl. They tend to be deeper, with gently sloping sides and a pronounced rim around the top.

    That rim has an important job.

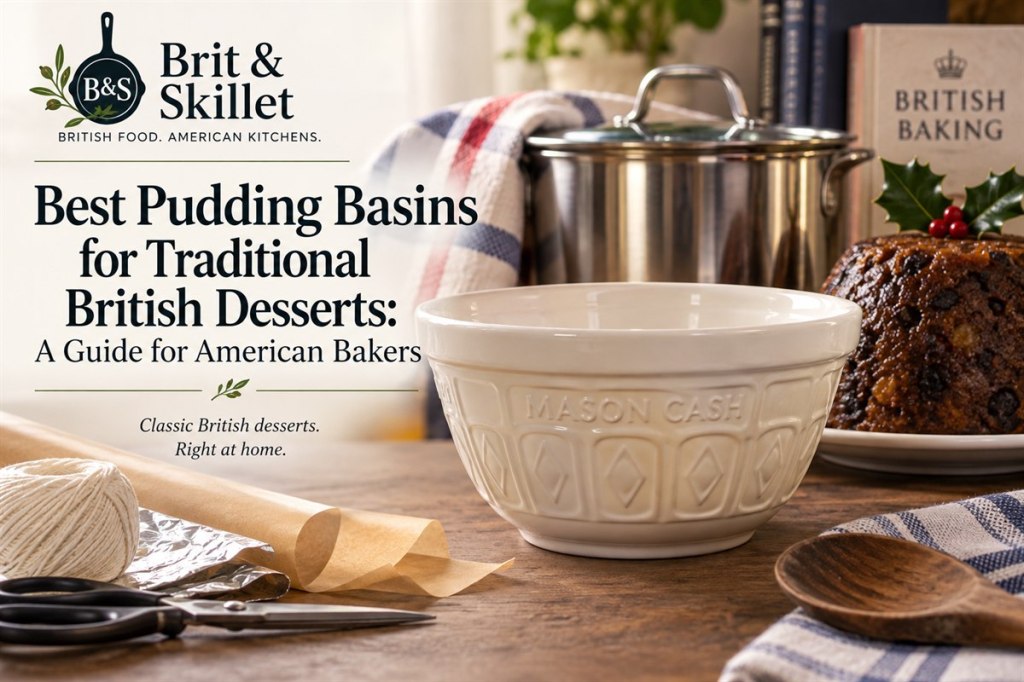
    When making a steamed pudding, the top of the basin is traditionally covered with baking parchment and foil and secured with kitchen string. The projecting rim gives the string somewhere to grip, helping keep the covering securely in place during a long steaming time. Mason Cash, one of the traditional manufacturers of pudding basins, specifically designs the rim of its basins for sealing puddings before steaming. Mason Cash

    Why Is the Basin Rounded?

    The classic rounded shape helps create the familiar domed appearance of a steamed British pudding once it’s turned out onto a serving plate.

    It’s also designed to help the cooked pudding release from the bowl. Mason Cash describes the traditional shape of its basins as helping the pudding release after steaming while giving it its characteristic shape. Mason Cash

    Some traditional basins also have a vented base. When the basin sits in a pan of simmering water, the vents allow bubbles trapped underneath to escape, helping prevent the bowl from wobbling or tipping during steaming. Mason Cash

    What Do You Make in a Pudding Basin?

    The classic use is a steamed pudding.

    That includes desserts such as Christmas pudding, treacle sponge, steamed fruit puddings, and other steamed sponge puddings. Good Food, for example, specifies a 1.2-liter pudding basin for its steamed sponge recipe. BBC Good Food

    The same basic method appears again and again: grease the basin, add the pudding mixture, cover the top securely, and place the basin into a pan or steamer containing simmering water.

    And despite the name, pudding basins aren’t limited to sweet recipes. Traditional British cooking also uses them for savory steamed puddings.

    Can You Use a Regular Bowl Instead?

    Sometimes, yes.

    If you already own a heat-safe bowl suitable for prolonged steaming, it may work for some recipes. The most important considerations are whether the bowl can safely withstand the cooking method, whether it fits comfortably inside your steaming pan, and whether you can securely cover it.

    But an ordinary bowl may lack the pronounced rim that makes tying parchment and foil around a traditional pudding basin so convenient.

    There’s also the shape to consider. A wide, shallow mixing bowl isn’t going to produce quite the same tall, rounded pudding as a purpose-made basin.

    So if you’re only trying one steamed pudding, you may be able to improvise with suitable cookware you already own.

    But if Christmas pudding, treacle sponge, or other steamed puddings are going to become regular visitors to your kitchen, a proper pudding basin is an inexpensive piece of traditional equipment that’s actually designed for the job.

    And unlike some extremely specialized kitchen gadgets, it doesn’t necessarily have to sit around doing nothing between puddings. Traditional pudding basins can also serve as prep or serving bowls; Mason Cash explicitly markets its basins for those additional uses. Mason Cash

    Brit & Skillet tip: Before buying one, check the largest pot you plan to use for steaming. The perfect pudding basin isn’t terribly useful if you discover it won’t fit inside the pot. 😂

    What Size Pudding Basin Do You Need?

    Pudding basins come in a surprisingly wide range of sizes, from small individual molds to large bowls capable of holding a substantial Christmas pudding.

    For most American bakers who want to try traditional British recipes, you don’t need an entire cupboard full of them.

    A 1- to 1.2-liter pudding basin is the most useful place to start.

    The 1.2-liter size appears frequently in British steamed-pudding recipes. Good Food, for example, specifies a 1.2-liter basin for several traditional steamed sponge puddings. Good Food

    Pudding Basin Size Conversion Guide

    British Basin SizeApprox. US CapacityBest For
    400–500 mL1¾–2 cupsSmall puddings or individual portions
    900 mL–1 LAbout 4 cupsMedium steamed puddings
    1.2 L / about 2 British pintsAbout 5 US cupsTraditional family-size steamed puddings and Christmas pudding
    1.5 LAbout 6⅓ cupsLarger puddings
    2 LAbout 8½ cupsLarge recipes or bigger gatherings

    These conversions are approximate. When a British recipe specifies the capacity of the basin, follow that capacity rather than relying only on its diameter.

    Why We Recommend About 1.2 Liters

    A basin around 1.2 liters (roughly 5 US cups) is an especially practical first purchase because it’s large enough for many classic family-size steamed puddings without becoming enormous.

    It’s also a size you’ll encounter repeatedly in British recipes. One Good Food Christmas-style pudding recipe uses two 1.2-liter basins, while another traditional recipe specifies a 1.25-liter/2-pint basin. Good Food

    That makes the traditional 2-pint basin a useful phrase for American bakers to recognize when reading older or British recipes.

    One important warning, though:

    A British pint is not the same size as an American pint.

    So don’t see “2-pint pudding basin” and automatically reach for a 4-US-cup bowl. A traditional British 2-pint pudding basin is generally around 1.1 to 1.2 liters, or roughly 5 US cups.

    What About Smaller Basins?

    Smaller basins can be useful if you’re making individual puddings or dividing a recipe into several portions.

    For example, Mason Cash currently makes traditional pudding basins in multiple sizes. Its 12.5 cm model holds 400 mL, while its 16 cm Cane basin holds 900 mL. Mason Cash

    Smaller basins are charming—and dangerous if you’re the sort of person who suddenly decides every dinner guest requires their own tiny steamed pudding. 😂

    But they’re optional for a beginner.

    Don’t Forget the Size of Your Steaming Pot

    Before buying a basin, measure the pot you’ll use for steaming.

    The basin needs to sit comfortably inside with enough room for water around it, and you’ll need to be able to put the lid securely on the pot.

    Some traditional steaming methods place the basin on an upturned heat-safe saucer or similar support rather than directly on the bottom of the pan. Good Food’s instructions for a 1.2-liter pudding, for example, place the basin on a small upturned plate and bring the water partway up the sides. Good Food

    That means you should check both the diameter and height of your basin against your steaming pot.

    Brit & Skillet recommendation: If you’re buying your first pudding basin, look for approximately 1 to 1.2 liters, with 1.2 liters / roughly 2 British pints being an especially versatile traditional size.

    You can always acquire the adorable tiny ones later.

    Because apparently that’s how pudding-basin collections begin. 😂

    Ceramic vs. Plastic Pudding Basins: Which Is Better?

    Traditional pudding basins are commonly made from ceramic or earthenware, but reusable plastic pudding basins are also available. Both can work well for steamed puddings, but they have different advantages.

    Ceramic Pudding Basins

    If you’re picturing the classic British pudding basin, you’re probably imagining ceramic.

    Traditional ceramic or earthenware basins are sturdy, attractive, and particularly well suited to the long, gentle steaming used for Christmas puddings and steamed sponge puddings.

    Purpose-made designs can also include useful details. Mason Cash’s traditional earthenware basins, for example, have a shaped rim for securing the pudding before steaming, a vented base designed to let trapped bubbles escape, and a rounded shape intended to help the finished pudding release cleanly. Mason Cash

    Advantages of ceramic:

    • Traditional look and feel
    • Sturdy and stable during steaming
    • Can double as a prep or serving bowl
    • Many models are microwave, dishwasher, and freezer safe
    • Some ceramic models can also be oven safe, depending on the manufacturer’s instructions

    The main disadvantage is weight. Ceramic is heavier than plastic, and you need to handle it carefully when lifting a hot basin from a steamer.

    There’s also the possibility of thermal shock, so always follow the manufacturer’s care instructions. Mason Cash, for example, warns against placing a hot basin directly into cold water. Mason Cash

    Plastic Pudding Basins

    Reusable plastic pudding basins are the practical alternative.

    They’re lightweight, inexpensive, and often come with fitted lids, eliminating some of the parchment-and-string gymnastics associated with traditional basins.

    Food-grade polypropylene pudding basins designed specifically for steaming can be reusable, microwave safe, freezer safe, and dishwasher safe. However, that does not automatically make them oven safe. Just Pudding Basins, for example, specifically states that its polypropylene basins can be steamed, microwaved, frozen, and washed in the dishwasher but must not be used in a conventional oven. Just Pudding Basins

    That’s an important distinction because heat tolerances vary between products.

    Never assume that a plastic bowl—or even a plastic pudding basin—can handle every cooking method. Follow the manufacturer’s temperature and cooking instructions for the specific basin you own.

    Which Should an American Baker Buy?

    For most Brit & Skillet readers buying their first traditional pudding basin, we’d lean toward ceramic or earthenware.

    It gives you the traditional shape and rim, works beautifully for classic steamed puddings, and can often serve another purpose in the kitchen when you’re not making pudding.

    If convenience matters more than tradition, however, a purpose-made reusable plastic basin with a fitted lid can be extremely handy—especially for batch-making Christmas puddings or when you want something lightweight.

    There’s no requirement that your Christmas pudding be steamed in a bowl that looks as though your grandmother inherited it from her grandmother.

    Although admittedly, that does add to the atmosphere. 😂

    What to Look for in Any Pudding Basin

    Whatever material you choose, concentrate on a few practical details:

    Capacity: Around 1 to 1.2 liters is a useful starting point for many traditional recipes.

    Shape: A deep, rounded basin produces the classic pudding shape and makes turning out the finished pudding easier.

    Rim: A pronounced rim is particularly useful when securing parchment and foil with kitchen string.

    Cooking compatibility: Make sure the manufacturer specifically approves the basin for the cooking method you intend to use.

    Pot fit: Check the basin’s outside dimensions against your steaming pot—not just its stated capacity.

    Ease of removal: Remember that you’ll eventually have to lift a very hot basin out of a pot containing very hot water. A design that’s easy to grip is worth considering.

    Brit & Skillet recommendation: For someone beginning with British steamed puddings, a traditional ceramic basin around 1 to 1.2 liters is our favorite starting point. If you later become the sort of person producing six Christmas puddings at once, plastic basins with lids may suddenly start looking extremely sensible.

    At that point, however, you have bigger problems.

    You’ve become British. 🇬🇧😂

    The Best Pudding Basins for British Desserts

    You don’t need an expensive pudding basin to make a good steamed pudding. What matters most is choosing the right capacity, a practical shape, and a basin specifically suited to the cooking method you plan to use.

    For American bakers starting with traditional British puddings, we’ve narrowed the choices down by use case rather than simply ranking a long list of similar bowls.

    Our recommendations are based on manufacturer specifications, traditional pudding-basin design, recipe requirements, and current product research rather than personal testing by Brit & Skillet.

    Best Overall: Mason Cash Original White 1-Liter Pudding Basin

    If we were choosing one traditional pudding basin for an American kitchen, the Mason Cash Original White 1-Liter Pudding Basin would be our starting point.

    Mason Cash has been making pudding basins since the early 1800s, and the company’s current traditional design retains several features specifically intended for steaming puddings. Mason Cash

    The 1-liter model measures approximately 16.7 cm (6.6 inches) across and 10 cm (3.9 inches) high. That’s large enough to be useful for many family-size steamed puddings while still being manageable inside an ordinary large cooking pot. Mason Cash

    The shaped rim provides somewhere to secure the covering before steaming, while the vented base allows bubbles underneath the basin to escape. Mason Cash says this helps prevent the basin from tipping in the pan. Its traditional rounded shape is also designed to help the cooked pudding release cleanly. Mason Cash

    Why we like it:

    • Traditional earthenware pudding-basin design
    • Useful 1-liter capacity
    • Shaped rim for securing the pudding covering
    • Vented base for stability during steaming
    • Rounded shape designed for easy pudding release
    • Dishwasher, microwave, and freezer safe according to Mason Cash
    • Can double as a preparation or serving bowl

    For someone making their first treacle sponge, steamed fruit pudding, or Christmas pudding, this is about as traditionally British as you can get without somebody appearing in your kitchen and putting the kettle on.

    Best for: The American baker who wants one traditional, versatile pudding basin.

    Best Traditional Alternative: Mason Cash Original Cane 900 mL Pudding Basin

    If you want something that looks even more like it wandered out of an old British kitchen, consider the Mason Cash Original Cane Pudding Basin.

    The current Cane model has a capacity of 900 mL and measures approximately 16 cm across by 9 cm high. Mason Cash

    It’s slightly smaller than our 1-liter overall pick, but that makes it useful for medium-size puddings and recipes that don’t require a full 1.2-liter basin.

    The warm cane color also gives it the classic appearance associated with traditional Mason Cash kitchenware.

    Best for: Bakers who want a smaller traditional basin with classic British styling.

    Best Larger Option: Mason Cash Original White 1.75-Liter Pudding Basin

    If you regularly make larger puddings—or simply believe Christmas pudding should be capable of feeding a small village—the 1.75-liter Original White Pudding Basin is worth considering.

    The current Mason Cash range lists this larger basin at approximately 20 cm across and 11 cm high. Mason Cash

    It uses the same traditional pudding-basin concept as the smaller versions but provides considerably more capacity.

    That extra room can be useful for larger recipes, but don’t automatically assume bigger is better.

    A pudding basin should correspond reasonably closely to the amount of mixture specified in the recipe. Using a basin that’s much larger than intended can change the depth of the pudding and potentially affect cooking time.

    And remember our earlier warning: make sure this one fits inside your steaming pot before buying it.

    Best for: Larger steamed puddings, bigger households, or bakers who already know they’ll use the extra capacity.

    Which One Should You Buy?

    For most beginners, we’d choose the 1-liter Mason Cash Original White basin.

    It’s traditional, practical, and close to the roughly 1-to-1.2-liter capacity that appears frequently in British pudding recipes.

    If your recipe specifically calls for a 1.2-liter or 2-British-pint basin, however, we’d prioritize finding a basin with that actual capacity rather than assuming the 1-liter model is automatically interchangeable.

    Choose the 900 mL Cane basin if you generally make smaller puddings and prefer its traditional appearance.

    Choose the 1.75-liter basin when you specifically need the extra room.

    The important thing isn’t owning the fanciest bowl.

    It’s owning a basin that fits your recipe and your steaming pot.

    Brit & Skillet pick: For a first pudding basin, the Mason Cash Original White 1-Liter Pudding Basin gets our vote.

    It’s practical, unmistakably British, and unlikely to lead to the discovery that you’ve accidentally bought a ceramic object too large to fit inside any saucepan you own.

    Which would be a remarkably British way for Christmas pudding to defeat you. 😂

    How to Use a Pudding Basin for Steaming

    Using a pudding basin can look slightly intimidating the first time, but the basic method is surprisingly simple.

    The exact cooking time and instructions will depend on your recipe, so always follow the recipe you’re making. However, traditional steamed puddings generally use the same basic technique.

    1. Prepare the Pudding Basin

    Grease the inside of the basin as directed by your recipe.

    Some puddings also begin with golden syrup, jam, fruit, or another topping in the bottom of the basin. Once the pudding is turned out, that becomes the top.

    Add your pudding mixture, leaving whatever space the recipe specifies for expansion during cooking.

    2. Cover the Basin

    Traditional steamed-pudding recipes commonly use baking parchment and aluminum foil to cover the basin.

    Place a sheet of parchment with a sheet of foil over it and make a small pleat through the center. The pleat gives the pudding room to expand as it cooks.

    Secure the covering tightly underneath the rim of the basin with kitchen string.

    You can also use the string to create a handle over the top. That’s particularly useful when it’s time to lift a hot pudding basin out of a deep saucepan. Good Food’s steamed-pudding instructions use this same parchment, foil, string, and handle technique. Good Food

    3. Prepare the Steaming Pot

    Choose a large, deep saucepan with a tight-fitting lid.

    Many traditional recipes place an upturned heat-safe saucer, small plate, or trivet in the bottom of the pan and sit the pudding basin on top rather than placing it directly against the bottom.

    The saucepan needs to be large enough for the basin while still allowing the lid to close properly. Good Food

    4. Add Hot Water

    Carefully pour hot or boiling water into the saucepan around the basin.

    A common instruction is to bring the water approximately halfway up the sides of the pudding basin, although some recipes specify a little more. Follow the recipe you’re using rather than treating one water level as universal. Good Food

    The water should surround the basin without getting inside it.

    5. Cover and Steam Gently

    Put the lid on the saucepan and maintain a gentle simmer for the amount of time specified in your recipe.

    And this is where British pudding making requires a little patience.

    A steamed sponge might take around 1½ to 2½ hours, while some traditional Christmas puddings can steam for considerably longer. For example, Good Food’s treacle sponge steams for 1 hour 45 minutes, while one of its Christmas puddings steams for six hours. Good Food

    6. Keep an Eye on the Water

    This part is important:

    Don’t let the saucepan boil dry.

    Long steaming times mean some of the water will evaporate. Check the level periodically and add more boiling water when necessary.

    Using boiling rather than cold water helps avoid dramatically lowering the temperature inside the steaming pot.

    7. Check That the Pudding Is Cooked

    Follow your individual recipe for doneness.

    For many steamed sponge puddings, inserting a skewer into the center is a useful test. It should come out without raw cake mixture attached.

    If the pudding isn’t ready, cover it again and continue steaming as directed. Good Food

    8. Remove the Basin Carefully

    Turn off the heat and carefully lift the basin from the saucepan.

    Remember that the basin, water, steam, foil, and pan will all be extremely hot.

    This is where that string handle can earn its keep, but you should still use appropriate heat protection and work carefully.

    Remove the covering according to the recipe, place a serving plate over the basin, and invert the pudding onto the plate.

    With a little luck, you lift the basin and discover a magnificent domed British pudding underneath.

    With slightly less luck, you discover why custard was invented.

    Custard hides many sins. 😂

    A Few Steaming Tips for Beginners

    Keep the simmer gentle rather than violently boiling the water.

    Use a saucepan with a lid that fits properly so steam doesn’t escape unnecessarily.

    Check the water level during long cooking times and top it up with boiling water when necessary.

    And don’t improvise with cookware unless you know it’s suitable for prolonged exposure to the temperatures and cooking method involved.

    Brit & Skillet tip: Read the entire pudding recipe before you start steaming. Discovering at 9 p.m. that your Christmas pudding requires another four hours is the sort of cultural immersion nobody requested.

    Do You Really Need a Pudding Basin?

    Not necessarily.

    If you’re making a steamed pudding for the first time, you may already own a heat-safe bowl that’s suitable for steaming and fits comfortably inside a large saucepan. For an occasional pudding, that can be perfectly reasonable.

    But a purpose-made pudding basin becomes much more useful if you plan to make traditional British puddings regularly.

    The deep, rounded shape gives steamed puddings their familiar domed appearance, while the pronounced rim found on traditional basins makes it easier to secure parchment and foil with kitchen string. Some purpose-made basins also include design features intended specifically for steaming.

    There’s also something to be said for having a piece of equipment that simply fits the recipe.

    When a British cookbook tells you to use a pudding basin, you don’t have to stand in front of the kitchen cupboard holding three bowls and wondering which one the author would approve of.

    When We’d Buy One

    A pudding basin is worth adding to your kitchen if you want to make Christmas pudding, treacle sponge, steamed fruit puddings, or other traditional steamed desserts more than occasionally.

    For most beginners, we’d start with one ceramic basin around 1 to 1.2 liters rather than buying several different sizes.

    If you discover that steamed puddings are becoming a regular occurrence, you can always add smaller or larger basins later.

    This is how it starts.

    First you buy one innocent pudding basin.

    Six months later you’re explaining to an American friend why you own four bowls specifically designed for boiling cake. 😂

    When We’d Skip It

    If you’re trying a single recipe and already have an appropriately sized, heat-safe bowl that your recipe or the bowl manufacturer confirms is suitable for the cooking method, we’d use what you have.

    Brit & Skillet is supposed to help make British cooking more approachable, not convince you that every recipe requires another specialized gadget.

    That’s especially important with traditional cooking, where perfectly good results were being produced long before kitchens contained seventeen different appliances and a drawer dedicated exclusively to silicone utensils.

    Brit & Skillet verdict: A pudding basin isn’t essential for experimenting with your first steamed pudding, but for anyone who plans to make traditional British puddings regularly, a proper basin is inexpensive, practical, and genuinely useful rather than gimmicky.

    The Bottom Line

    A traditional pudding basin is one of those pieces of British kitchen equipment that looks mysterious until you understand what it’s designed to do.

    For most American bakers, we’d recommend starting with a ceramic or earthenware basin around 1 to 1.2 liters. That’s a useful size for many family-style steamed puddings and gives you the traditional rounded shape and rim that make covering, steaming, and turning out a pudding easier.

    Our overall starting pick is the Mason Cash Original White 1-Liter Pudding Basin, while smaller and larger basins make sense when a particular recipe calls for them.

    But always let the recipe determine the basin size rather than assuming one bowl works for everything.

    And before you buy anything, measure your steaming pot.

    Because discovering that your beautiful new British pudding basin is half an inch too tall for the saucepan is precisely the sort of problem that can turn a peaceful Sunday afternoon into an international incident.

    Once you’ve got the right basin, however, the process is wonderfully old-fashioned: fill it, cover it, steam it gently, turn it out—and preferably serve the result with an unreasonable quantity of custard.

    Some British traditions do not require translation. 🇬🇧🍮


    Yes — I would. 👍

    Put a Separator block directly after the final sentence ending:

    Some British traditions do not require translation. 🇬🇧🍮

    Then put the affiliate disclosure under the separator in italics.

    That gives a nice visual break between the actual article and the legal/affiliate information, and it’ll match the clean style we’ve been building across Brit & Skillet.

    So the bottom will look like:

    Some British traditions do not require translation. 🇬🇧🍮


    Affiliate disclosure: Brit & Skillet may earn a commission from qualifying purchases made through links on this page, at no additional cost to you.

  • How to Convert British Baking Measurements for American Recipes

    How to Convert British Baking Measurements for American Recipes

    British recipes can sometimes look like they’re written in another language—even when every word is technically English.

    Instead of cups of flour and sticks of butter, you may see ingredients measured in grams and milliliters. Oven temperatures might be listed in Celsius or for a fan oven, while familiar ingredients such as caster sugar and self-raising flour come with their own translation challenges.

    For an American baker trying a Victoria sponge, sticky toffee pudding, scones, or another British favorite, all those little differences can make a straightforward recipe feel more complicated than it really is.

    The good news is that you don’t need to rewrite every British recipe before you start baking.

    In many cases, the easiest—and most accurate—approach is simply to use a digital kitchen scale and follow the gram measurements given in the original recipe. Professional baking resources such as King Arthur Baking also recommend weighing ingredients when possible because weight measurements avoid many of the inconsistencies that come with measuring dry ingredients by volume. King Arthur Baking

    But sometimes you really do need a conversion. Maybe your oven only displays Fahrenheit, you don’t own a metric measuring jug, or you’re trying to understand how 200 grams of an ingredient relates to the cups and ounces you’re accustomed to using.

    That’s where this guide comes in.

    We’ll explain how to handle grams, ounces, cups, milliliters, Celsius, Fahrenheit, fan ovens, butter measurements, and some of the most common British baking ingredients so you can follow British recipes confidently in an American kitchen.

    Most importantly, we’ll explain when converting a measurement is perfectly reasonable—and when you’re better off leaving the recipe in grams.

    Why British Recipes Use Grams Instead of Cups

    Great. Next add this as an H2:

    Why British Recipes Use Grams Instead of Cups

    Then paste:

    One of the biggest adjustments for American bakers using British recipes is getting used to seeing ingredients measured in grams rather than cups.

    The difference comes down to what the two systems are actually measuring. Grams measure weight, while cups measure volume. That distinction matters in baking because two ingredients that fill the same measuring cup can weigh very different amounts.

    A cup of flour, for example, does not weigh the same as a cup of sugar. Even two people measuring the same cup of flour can end up with different amounts depending on how tightly the flour is packed into the cup.

    That’s one reason weighing ingredients can make baking more consistent. Instead of worrying about whether flour has been scooped, spooned, packed, or leveled correctly, you can place a bowl on a digital scale, reset it to zero, and add the ingredient until you reach the weight specified in the recipe.

    Why This Is Actually Good News for American Bakers

    At first, a British recipe calling for 225 g of flour may look less familiar than one calling for cups.

    But if you own a digital kitchen scale, there’s usually no conversion required at all.

    Set the scale to grams, place your mixing bowl on top, press the tare or zero button, and weigh the amount listed in the recipe.

    You can then reset the scale between ingredients and continue adding them to the bowl when the recipe allows.

    This approach can also mean fewer measuring cups to wash—which is perhaps the most persuasive argument of all. 😂

    Why We Don’t Recommend Converting Every Gram Measurement to Cups

    It can be tempting to find a conversion calculator and translate every ingredient into American cups before starting a British recipe.

    The problem is that grams and cups don’t have a single universal conversion.

    Different ingredients have different densities. King Arthur Baking’s ingredient weight chart, for example, lists one cup of all-purpose flour at 120 grams, while one cup of granulated sugar is 198 grams.

    That means a conversion needs to be specific to the ingredient—not simply the size of the measurement.

    Even flour conversions can differ slightly between recipe publishers because their measuring methods and reference weights aren’t always identical. For that reason, when a trustworthy British recipe already gives you weights in grams, using those original gram measurements is usually the simplest choice.

    For Brit & Skillet recipes and guides, we’ll make American terminology easier to understand whenever possible, but we don’t want to sacrifice the accuracy that makes weight-based baking so useful.

    British Grams to American Cups: Common Baking Conversions

    If you don’t have a kitchen scale, the following conversions can help you understand common gram measurements found in British baking recipes.

    Keep in mind that these are approximate conversions. The weight of one cup depends on the ingredient, and different recipe publishers sometimes use slightly different reference weights. When the original recipe provides grams, using those gram measurements will generally give you the most reliable result. King Arthur Baking likewise recommends following the weight stated in a recipe when one is provided. King Arthur Baking

    Common Ingredient Conversions

    Ingredient1 Cup (approx.)1/2 Cup (approx.)British/American Note
    All-purpose flour120 g60 gSimilar role to UK plain flour
    Caster/superfine sugar190 g95 gCaster sugar is commonly sold as superfine sugar in the US
    Granulated sugar198 g99 gStandard white granulated sugar
    Brown sugar, packed213 g107 gWeight assumes the sugar is packed
    Icing/confectioners’ sugar113 g57 gIcing sugar = confectioners’ or powdered sugar
    Butter227 g113 g1 US cup = 2 sticks
    Demerara sugar220 g110 gCoarse, golden-colored sugar

    These reference weights are based on King Arthur Baking’s current ingredient-weight chart: it lists all-purpose flour at 120 g per cup, superfine/caster sugar at 190 g, granulated sugar at 198 g, packed brown sugar at 213 g, unsifted confectioners’ sugar at 113 g, butter at 227 g per cup, and demerara sugar at 220 g. King Arthur Baking

    A Quick Example

    Suppose a British cake recipe calls for:

    225 g of plain flour

    Using the 120 g-per-cup reference above, that’s roughly:

    225 ÷ 120 = 1.875 cups

    —or about 1 7/8 cups.

    But here’s the important part: if the recipe already says 225 g, don’t convert it unless you have to.

    Put your bowl on a digital kitchen scale, press tare, and weigh out 225 g. It’s easier, involves less guesswork, and preserves the measurement the recipe developer actually intended.

    What About Oats?

    Oats are a particularly good example of why conversion charts need to be treated carefully.

    King Arthur lists ordinary old-fashioned or quick-cooking oats at approximately 89 g per cup, while its own rolled oats are listed at 113 g per cup. King Arthur Baking

    Differences in the type and cut of an ingredient can change how much fits into a cup. That’s another reason we recommend treating cup conversions as a convenience rather than an exact replacement for the original weight.

    Brit & Skillet tip: When a British recipe gives you grams, think of your kitchen scale as the translator. You don’t actually have to convert the recipe—you just have to change the scale to g.

    British Butter Measurements: Grams to American Sticks and Tablespoons

    British baking recipes usually measure butter by weight. An American recipe, on the other hand, might call for sticks, tablespoons, or cups.

    Fortunately, butter is one of the simpler ingredients to translate.

    In the United States, one standard stick of butter is approximately 113 grams, or 4 ounces. That same stick equals 1/2 cup or 8 tablespoons. King Arthur Baking’s ingredient chart confirms 8 tablespoons (1/2 cup) of butter at 113 grams.

    Quick Butter Conversion Chart

    British WeightApprox. US SticksTablespoonsCups
    57 g1/2 stick4 tbsp1/4 cup
    113 g1 stick8 tbsp1/2 cup
    170 g1 1/2 sticks12 tbsp3/4 cup
    225–227 g2 sticks16 tbsp1 cup
    340 g3 sticks24 tbsp1 1/2 cups

    Why 225 Grams Appears So Often in British Baking

    If you’ve spent much time looking at British cake recipes, you’ll probably encounter 225 g of butter sooner or later.

    For an American baker, that’s conveniently close to two sticks of butter. Two US sticks weigh approximately 226–227 grams, so the tiny difference between 225 g and 227 g isn’t something you need to lose sleep over in an ordinary cake recipe. King Arthur’s reference weight puts one cup—or two sticks—at 226 grams when calculated from its rounded 113 g half-cup measurement. King Arthur Baking

    So when a British recipe calls for 225 g of softened butter, two standard American sticks will generally put you right where you need to be.

    What About 100 Grams of Butter?

    This is where using a scale becomes much easier than trying to slice a stick into increasingly mysterious fractions. 😂

    Since one stick is approximately 113 g, 100 g is a little less than one full stick.

    Rather than estimating visually, place the butter on your kitchen scale and cut off enough to reach 100 g. This is especially useful when a recipe calls for less convenient amounts such as 75 g, 100 g, or 150 g.

    Salted or Unsalted?

    The measurement conversion itself doesn’t substantially change depending on whether you’re using salted or unsalted butter.

    What does matter is what the recipe calls for. If a British recipe specifies unsalted butter, use unsalted butter. If it simply says butter, check the recipe author’s notes before making assumptions—particularly if the recipe also contains added salt.

    Brit & Skillet shortcut: Remember just one number:

    1 American stick of butter ≈ 113 g.

    Once you know that, translating British butter measurements becomes considerably less intimidating.

    Celsius to Fahrenheit: British Oven Temperature Conversions

    British recipes generally give oven temperatures in Celsius, while most American ovens are set in Fahrenheit. Fortunately, converting between the two is fairly straightforward.

    The extra wrinkle is the fan oven.

    British recipes often provide two temperatures, such as:

    180°C / 160°C fan

    The first temperature is for a conventional oven. The second, lower temperature is for an oven using a fan to circulate hot air.

    Fan oven temperatures are commonly around 20°C lower than conventional oven temperatures because the circulating air transfers heat more efficiently. Which?’s current oven conversion guidance uses that same 20°C difference across its standard conversion table. Which?

    British Oven Temperature Conversion Chart

    Conventional °CFan °CFahrenheit °FGas Mark
    140°C120°C fan275°F1
    150°C130°C fan300°F2
    160°C140°C fan325°F3
    180°C160°C fan350°F4
    190°C170°C fan375°F5
    200°C180°C fan400°F6
    220°C200°C fan425°F7

    These are standard rounded cooking conversions rather than exact mathematical equivalents. For example, Which? lists 180°C conventional / 160°C fan / 350°F / Gas Mark 4 and 200°C conventional / 180°C fan / 400°F / Gas Mark 6. Which?

    What Does “180°C Fan” Mean?

    This is where it’s easy to make a mistake.

    If a British recipe specifically says:

    180°C fan

    don’t treat that as the same instruction as 180°C conventional.

    Using the standard conversion chart, 180°C fan corresponds roughly to 200°C conventional, or 400°F. Which?

    So if you’re using an American conventional oven and the British recipe specifically calls for 180°C fan, approximately 400°F is the corresponding conventional setting.

    On the other hand, if the recipe says:

    180°C / 160°C fan

    then an American conventional oven would normally be set to approximately 350°F.

    That’s why it’s important to notice whether the word fan appears next to the temperature rather than simply converting the Celsius number by itself.

    A Common British Recipe Example

    You may encounter an instruction such as:

    200°C / 180°C fan / Gas 6

    For an American conventional oven, that translates neatly to approximately:

    400°F

    British recipes commonly use exactly this style of notation. Good Food, for example, gives recipes at 200°C conventional / 180°C fan / Gas 6. Good Food

    Don’t Forget That Ovens Vary

    Even after you’ve converted the temperature correctly, your actual oven may run somewhat hotter or cooler than its setting.

    Which? has found substantial temperature variation in oven testing and notes that even a 20°C difference can noticeably affect a Victoria sponge’s appearance and texture. Which?

    If cakes consistently brown too quickly, take much longer than expected, or bake unevenly, an inexpensive oven thermometer can help you determine whether your oven temperature matches the setting on the dial.

    Brit & Skillet shortcut: When you see a British recipe written as:

    180°C / 160°C fan / Gas 4

    think:

    350°F in a conventional American oven.

    Once you’ve recognized that pattern, British oven instructions become considerably less mysterious.

    Milliliters to American Cups, Tablespoons, and Teaspoons

    British recipes commonly measure liquids in milliliters (mL) rather than cups and fluid ounces. You might see milk, cream, water, or another liquid listed as 100 mL, 250 mL, or 500 mL.

    Unlike converting cups of flour into grams, this is a true volume-to-volume conversion, so it’s much more straightforward.

    A standard US cup holds approximately 236.6 mL. A US tablespoon holds approximately 14.79 mL, and a US teaspoon holds approximately 4.93 mL, according to NIST’s conversion guidance. NIST

    Quick Milliliter Conversion Chart

    MillilitersUS Cups (approx.)US Fluid Ounces (approx.)Handy Kitchen Measure
    5 mL1 tsp
    15 mL1/2 fl oz1 tbsp
    60 mL1/4 cup2 fl oz4 tbsp
    120 mL1/2 cup4 fl oz8 tbsp
    240 mL1 cup8 fl oz16 tbsp
    250 mL1.06 cups8.45 fl ozJust over 1 US cup
    500 mL2.11 cups16.9 fl ozJust over 2 US cups

    These are rounded kitchen conversions. Technically, one US cup is about 236.6 mL, so the familiar 240 mL figure is a convenient kitchen approximation rather than an exact conversion. King Arthur similarly lists one US fluid ounce as 29.57 mL. King Arthur Baking

    The 250 mL Cup Trap

    Here’s one worth remembering.

    A 250 mL metric cup is not exactly the same as an American measuring cup.

    One US cup is approximately 236.6 mL, so 250 mL is a little more than one US cup. The difference isn’t enormous, but it can matter when you’re trying to follow a baking recipe accurately. NIST

    If the original British recipe gives a liquid measurement in milliliters and your measuring jug has metric markings, the easiest solution is simple:

    Use the milliliter markings and don’t convert it at all.

    What About Tablespoons and Teaspoons?

    For everyday cooking, British metric recipes commonly work with approximately 15 mL per tablespoon and 5 mL per teaspoon. Those figures are extremely close to American measures: NIST gives the US tablespoon as approximately 14.79 mL and the US teaspoon as approximately 4.93 mL. NIST

    So if a modern British recipe calls for 1 teaspoon or 1 tablespoon, your standard American measuring spoons will generally do the job just fine.

    Don’t Confuse Fluid Ounces With Ounces by Weight

    This one deserves a warning because the names are spectacularly unhelpful. 😂

    A fluid ounce measures volume.

    An ounce measures weight.

    They’re different measurements, even though both use the word ounce.

    King Arthur’s conversion guidance puts one US fluid ounce at approximately 29.57 mL, while one ounce by weight equals approximately 28.35 grams. King Arthur Baking

    So if a British recipe says 200 g of flour, don’t try to convert that using fluid ounces. And if it says 200 mL of milk, don’t treat that as 200 grams unless the recipe specifically provides that equivalence.

    Brit & Skillet shortcut: If your American liquid measuring cup already has mL markings on the side, use them. Sometimes the easiest conversion is no conversion at all. 😄

    British vs. American Measuring Cups: Are They the Same?

    Not necessarily—and this is where international recipes can become surprisingly confusing.

    A standard US customary cup holds approximately 236.6 mL. A metric cup holds 250 mL, while the older British imperial cup was approximately 284 mL. Modern British recipes, however, generally rely much more heavily on grams and milliliters than on traditional imperial cups. Precision Convert

    That means you shouldn’t automatically assume that every recipe using the word cup is referring to exactly the same amount.

    American Recipes and Cups

    Cup measurements remain extremely common in American home baking. A standard set typically includes measurements such as:

    • 1 cup
    • 1/2 cup
    • 1/3 cup
    • 1/4 cup

    Good Food even describes measuring cups as particularly useful when following American recipes, where cup measurements are standard. BBC Good Food

    If you’re following an American recipe, your ordinary US measuring cups are therefore exactly what you would expect to use.

    British Recipes Are Different

    With a modern British baking recipe, you’re much more likely to encounter flour, sugar, and butter measured in grams, with liquids given in milliliters.

    That’s actually helpful for an American baker because grams and milliliters don’t change when they cross the Atlantic.

    200 g is still 200 g.

    250 mL is still 250 mL.

    There’s no need to determine which country’s cup the recipe author had sitting in the cupboard.

    Be Careful With Older British Cookbooks

    Older British recipes can require a little more attention because you may encounter imperial measurements.

    A traditional imperial cup is approximately 284 mL, substantially larger than the approximately 236.6 mL US customary cup. CoolConversion

    So if an older British cookbook genuinely uses imperial cups, substituting an American cup measure without converting it could change the proportions of the recipe.

    Fortunately, this isn’t something you’re likely to encounter frequently in modern British baking recipes.

    The Simplest Rule

    When following a British recipe:

    If it gives grams, use grams. If it gives milliliters, use milliliters.

    If a recipe specifically uses cups, check where the recipe originated before assuming that your American measuring cup represents exactly the same volume.

    For a deeper look at this particular difference, see our guide How British and American Measuring Cups Differ.

    Brit & Skillet tip: You don’t need to convert a perfectly good metric recipe just because your kitchen is in America. A digital scale and a measuring jug marked in milliliters can do most of the translating for you.

    British Baking Ingredient Names Americans Need to Know

    Sometimes the measurements aren’t the confusing part of a British recipe—the ingredient names are.

    British and American bakers often use different names for ingredients that are identical or very similar. Learning a handful of these translations makes British recipes much easier to shop for and understand.

    Quick British-to-American Ingredient Guide

    British Recipe SaysLook for in the USWhat to Know
    Plain flourAll-purpose flourUsually the closest everyday equivalent
    Caster sugarSuperfine sugarFiner crystals than ordinary granulated sugar
    Icing sugarConfectioners’ or powdered sugarUsed for buttercream, icing and dusting
    Self-raising flourSelf-rising flourContains raising agents; formulations can vary
    Double creamHeavy creamClosest commonly available US option, though not identical
    Bicarbonate of sodaBaking sodaSame basic leavening ingredient
    CornflourCornstarchIn British recipes, cornflour usually means the fine starch Americans call cornstarch

    Caster Sugar vs. Superfine Sugar

    Caster sugar is one of the most common ingredients American bakers encounter in British cake recipes.

    In the United States, look for superfine sugar, sometimes sold as baker’s sugar. King Arthur describes superfine sugar as also being known as caster sugar and notes that its smaller crystals dissolve particularly easily, making it useful for cakes, meringues, and other delicate mixtures. King Arthur Baking

    If you can’t find it, ordinary granulated sugar can sometimes be processed briefly in a blender or food processor to make the crystals finer. King Arthur recommends this approach as a substitute, preferably measuring the sugar by weight. King Arthur Baking

    Icing Sugar vs. Powdered Sugar

    When a British recipe calls for icing sugar, an American baker should generally reach for confectioners’ sugar or powdered sugar.

    These names refer to the finely powdered sugar commonly used for buttercream, glazes, and dusting cakes. King Arthur specifically identifies confectioners’ sugar as also being called powdered sugar or icing sugar. King Arthur Baking

    So if your Victoria sponge tells you to dust the top with icing sugar, there’s no need to hunt down a mysterious imported ingredient. The powdered sugar already sitting in your pantry is what you’re looking for.

    Plain Flour vs. All-Purpose Flour

    British plain flour generally fills the role that all-purpose flour does in an American kitchen.

    However, flours aren’t necessarily manufactured to identical specifications across countries and brands, so treating the terms as practical equivalents doesn’t mean every bag will perform exactly the same way.

    For most ordinary cakes, biscuits, pastry, and similar recipes, though, American all-purpose flour is the natural starting point when a British recipe specifies plain flour.

    Self-Raising vs. Self-Rising Flour

    Here’s one where the names are nearly identical:

    British recipes say self-raising flour.

    American packages usually say self-rising flour.

    Both combine flour with leavening, but formulations can vary. Good Food describes self-raising flour as plain flour combined with baking powder. Good Food

    If you don’t have self-rising flour, don’t automatically add a random amount of baking powder. Follow a substitution from a reliable recipe source. King Arthur’s Victoria Sandwich instructions, for example, provide a specific all-purpose-flour, baking-powder and salt substitution for the self-rising flour used in its recipe. King Arthur Baking Shop

    Double Cream vs. Heavy Cream

    British double cream doesn’t have a perfect everyday American equivalent.

    For many recipes, heavy cream or heavy whipping cream is the most practical American choice, particularly for whipping and fillings. But they’re not literally identical products, so it’s better to think of heavy cream as a common substitute rather than a translation that’s exact in every recipe.

    This is another good example of why translating British recipes is sometimes about understanding the ingredient’s purpose, rather than simply swapping one name for another.

    Bicarbonate of Soda

    This one’s easy:

    British bicarbonate of soda is what Americans normally call baking soda.

    Don’t confuse it with baking powder, though. Baking powder contains both alkaline and acidic components, whereas bicarbonate of soda is the alkaline component itself. Good Food’s baking-powder guide explains that distinction and notes that baking powder combines bicarbonate of soda with an acid and a moisture-absorbing filler. Good Food

    Cornflour vs. Cornstarch

    This translation can be especially confusing because corn flour means something different in American cooking.

    When a British baking recipe calls for cornflour, it generally means the fine white starch Americans know as cornstarch.

    So don’t automatically grab an American product labeled corn flour. Check what role the ingredient is playing in the recipe first.

    Brit & Skillet tip: When a British ingredient sounds unfamiliar, don’t assume you need to order an expensive imported version. Quite often, the ingredient is already available in an American supermarket—it just has a different name.

    Should You Convert a British Recipe or Bake It in Grams?

    Yep — this is the section where we give readers permission to stop doing unnecessary baking algebra. 😂

    Add this as the next H2:

    Should You Convert a British Recipe or Bake It in Grams?

    Then paste:

    If a British recipe already provides ingredient weights in grams, the simplest approach is usually to leave the recipe exactly as it is and bake by weight.

    That might feel unfamiliar at first if you’re accustomed to American cups and measuring spoons, but it actually removes one of the biggest sources of uncertainty in baking.

    King Arthur Baking recommends weighing ingredients with a digital scale for best results and points out that the amount of flour contained in a cup can vary depending on how it is measured. A weight such as 120 grams, on the other hand, remains 120 grams regardless of how you scoop it. King Arthur Baking

    When You Should Keep the Original Measurements

    If the recipe gives you:

    225 g flour
    225 g caster sugar
    225 g butter

    there’s usually no advantage to converting those amounts into cups.

    Put your bowl on the scale, press the tare or zero button, and weigh each ingredient according to the original recipe.

    This is particularly useful for ingredients such as flour and sugar because their cup-to-gram conversions aren’t interchangeable. For example, King Arthur’s current reference chart lists a cup of all-purpose flour at 120 g and a cup of superfine/caster sugar at 190 g. King Arthur Baking

    When Converting Makes Sense

    There are still plenty of situations where a conversion is useful.

    You may need to convert the oven temperature from Celsius to Fahrenheit, for example, because your American oven displays Fahrenheit.

    You might also convert milliliters if your measuring jug doesn’t have metric markings, or translate a British ingredient name so you know what to look for at an American supermarket.

    And if you simply don’t own a kitchen scale yet, ingredient-specific cup conversions can help you get started.

    The important thing is to convert only what actually needs converting.

    Don’t Convert Grams to Cups With One Formula

    This is perhaps the most important rule in the entire guide:

    There is no universal formula that converts grams into cups for every ingredient.

    Grams measure mass, while cups measure volume. Different ingredients have different densities, which is why the same cup can contain very different weights depending on what’s inside it.

    If you must convert a weight measurement to cups, use a conversion specifically for that ingredient rather than a generic grams-to-cups calculator.

    A Kitchen Scale Makes British Recipes Much Easier

    If you expect to bake British recipes regularly, a digital kitchen scale is one of the simplest tools you can add to your kitchen.

    You don’t need a special British scale. A normal American digital kitchen scale that can switch to grams will do the job.

    It can also make scaling recipes easier. Instead of trying to divide awkward measurements such as 1 3/4 cups, weight measurements can simply be divided mathematically. King Arthur recommends using gram measurements when reducing recipes for precisely this reason. King Arthur Baking

    And we’ve already covered this topic in more detail in our guide Best Kitchen Scales for British Recipes: A Guide for American Bakers.

    Highlight that article title in WordPress and link it to your existing kitchen-scale post. That’s another nice internal link for #13.

    The Brit & Skillet Rule

    When you’re standing in an American kitchen with a British recipe in front of you, remember:

    Keep grams as grams.
    Keep milliliters as milliliters when you can.
    Convert Celsius to Fahrenheit if your oven requires it.
    Translate unfamiliar British ingredient names into their American equivalents.

    Do that, and you’ll avoid a surprising amount of unnecessary conversion.

    After all, the goal isn’t to turn baking into a mathematics exam.

    It’s to get the Victoria sponge into the oven. 😂

    Quick British-to-American Baking Conversion Cheat Sheet

    If you’re standing in the kitchen with a British recipe in one hand and an American measuring cup in the other, this quick-reference chart covers many of the conversions you’re most likely to need.

    Remember that ingredient weights are different from liquid-volume conversions. Don’t use one universal grams-to-cups formula. Different ingredients have different weights per cup; for example, King Arthur lists all-purpose flour at 120 g per cup but superfine/caster sugar at 190 g per cup.

    British Recipe SaysAmerican EquivalentQuick Note
    113 g butter1 stickAlso 1/2 cup
    225–227 g butter2 sticksAbout 1 cup
    120 g all-purpose/plain flourAbout 1 cupIngredient-specific conversion
    190 g caster sugarAbout 1 cupLook for superfine sugar
    250 mL liquidJust over 1 US cup1 US cup is about 237 mL
    15 mLAbout 1 US tbspUS tbsp is 14.79 mL
    5 mLAbout 1 US tspUS tsp is 4.93 mL
    180°C conventional350°FCommon cake temperature
    200°C conventional400°FCommon hotter oven setting
    160°C fanAbout 350°F conventionalEquivalent to roughly 180°C conventional

    NIST’s official conversion guidance gives a US tablespoon as approximately 14.79 mL, a teaspoon as 4.93 mL, a fluid ounce as 29.57 mL, and a US cup as approximately 0.24 liter.

    The Bottom Line

    British baking measurements can look unfamiliar at first, but you don’t need to convert every number in a recipe before you can start baking.

    If a recipe provides ingredients in grams, use the grams whenever possible. A digital kitchen scale removes much of the uncertainty involved in converting ingredients into cups, and baking resources such as King Arthur recommend weighing ingredients when a scale is available. King Arthur Baking

    Use milliliters directly if your measuring jug has metric markings. Convert Celsius to Fahrenheit when your oven requires it, and pay attention to whether a British recipe specifies a conventional or fan oven.

    For unfamiliar ingredient names, remember that many have perfectly ordinary American counterparts. Caster sugar becomes superfine sugar, icing sugar becomes confectioners’ sugar, bicarbonate of soda becomes baking soda, and British cornflour generally means American cornstarch.

    Most importantly, don’t feel as though a British recipe has to be rewritten into American measurements before you can make it.

    A kitchen scale that reads grams and a measuring jug marked in milliliters will do most of the translating for you.

    The recipe may be British. Your kitchen doesn’t have to be.

    And if all else fails, put the kettle on and reread the instructions. That part translates perfectly on both sides of the Atlantic. 😂

    Note: Baking conversions in this guide are approximate and may vary slightly depending on the ingredient, brand, measuring method, and recipe source. When a recipe provides measurements in grams, we recommend using the original weight measurements whenever possible.

  • Best Food Processors for British Baking and Cooking: What American Home Cooks Need

    Best Food Processors for British Baking and Cooking: What American Home Cooks Need

    British cooking has plenty of recipes that can be made with little more than a good knife, a wooden spoon, and a mixing bowl. But a food processor can make some of the more time-consuming jobs considerably easier.

    From rubbing cold butter into flour for pastry and scones to chopping vegetables, making breadcrumbs, grating cheese, and preparing fillings, a food processor can quickly become one of the most useful appliances in a busy kitchen.

    For American cooks exploring British recipes, it can be particularly handy. Classic dishes such as sausage rolls, savory pies, shortcrust pastry, scones, crumbles, and homemade breadcrumbs often involve preparation jobs that a food processor can handle in seconds.

    The challenge is choosing the right one.

    Food processors vary considerably in bowl capacity, attachments, power, storage requirements, and price. A large premium machine may be wonderful for someone who cooks every day, while a smaller and simpler processor may make far more sense in an occasional baker’s kitchen.

    In this guide, we’ll explain what to look for in a food processor for British baking and cooking and compare several strong options available to American home cooks. Our recommendations are based on current independent testing and manufacturer information rather than personal testing by Brit & Skillet.

    Current independent testing supports that general use case: Food Network’s 2026 testing included chopping vegetables, shredding cheese, making pesto and making pie dough, while Bon Appétit describes food processors as useful for chopping, slicing, grating, kneading and preparing pie crusts.

    Do You Need a Food Processor for British Baking and Cooking?

    You certainly don’t need a food processor to make British food. Pastry, scones, breadcrumbs, and chopped vegetables were being prepared long before food processors arrived on kitchen counters.

    But a food processor can make some of those jobs considerably quicker.

    One of its biggest advantages for baking is working cold butter into flour. Shortcrust pastry and scones depend on handling the mixture carefully, and a food processor can cut cold butter into flour very quickly. The key is using short pulses rather than letting the machine run continuously. King Arthur Baking’s food-processor pie crust method, for example, uses very brief pulses to incorporate chilled butter while deliberately leaving pieces of butter visible in the dough. King Arthur Baking

    The same technique can work particularly well for scones. British recipes from Good Food use a food processor to pulse cold butter into flour before the wet ingredients are added. BBC Good Food

    Beyond baking, a food processor can also be useful for everyday kitchen jobs such as chopping vegetables, grating cheese, making breadcrumbs, preparing pastry, and creating fillings for savory pies and other dishes.

    There is one important limitation: a food processor can make it very easy to over-process a mixture. Scones and pastry generally benefit from gentle handling, so once the machine has done the hard work of cutting in the butter, it’s often better to finish the dough by hand. King Arthur similarly cautions against over-handling scone dough because it can produce tougher results. King Arthur Baking

    For someone who only bakes occasionally, a food processor isn’t essential. But if you regularly make pastry, scones, savory pies, breadcrumbs, or recipes involving lots of chopping and grating, it can be one of the most useful multipurpose appliances in the kitchen.

    What to Look for in a Food Processor for British Baking and Cooking

    Choosing a food processor isn’t simply a matter of buying the biggest or most powerful machine. The best choice depends on what you cook, how much food you normally prepare, and how much kitchen space you’re willing to give the appliance.

    Bowl Capacity

    Capacity is one of the first things to consider. Small processors are convenient for chopping herbs, nuts, or small quantities of ingredients, but they can become restrictive when you’re making pastry, scones, pie fillings, or larger family meals.

    For many home cooks, a medium-sized processor in roughly the 8- to 12-cup range provides a useful balance between capacity and storage. Cuisinart similarly positions its 8- to 11-cup machines for larger meals and bulkier jobs such as dough preparation. Cuisinart

    A larger 14- or 16-cup processor can be worthwhile for frequent cooks or large batches, but it also requires considerably more cupboard or counter space.

    A Good Pulse Control

    For British baking, a reliable pulse button is particularly important.

    Pastry and scone mixtures often need short bursts of processing rather than continuous mixing. Pulsing gives you greater control and makes it easier to stop before the ingredients become overworked.

    It’s a simple feature, but for the kinds of recipes we’re interested in, it’s one we’d consider essential.

    Useful Blades and Discs

    Most full-size food processors include an S-shaped chopping blade, but additional discs can make the appliance considerably more versatile.

    A slicing disc can quickly prepare vegetables or fruit for pies and other dishes, while a shredding disc is useful for cheese, carrots, potatoes, and similar ingredients. Some machines also include a dedicated dough blade.

    Cuisinart notes that food-processor blades and discs can cover chopping, mixing, dough preparation, slicing and shredding, depending on the model. Cuisinart

    Dough and Pastry Capability

    If British baking is one of the main reasons you’re buying a processor, look carefully at its dough capabilities.

    Some processors include a dedicated dough blade, while others use their main blade for certain doughs. Breville, for example, provides instructions for preparing pastry by processing chilled cubed butter with flour before gradually adding liquid. Breville

    That can be useful for shortcrust pastry and similar recipes, but remember that more processing isn’t necessarily better. You still want control over the mixture rather than simply running the machine until everything is completely smooth.

    Storage and Counter Space

    Food processors can come with a surprising collection of blades, discs, pushers, and accessories. Before buying one, consider where all of those pieces will actually live.

    Some models provide in-bowl storage, while larger premium processors may include a separate accessory box. Cuisinart currently offers processors with attachments that nest inside the work bowl, while Breville’s larger Sous Chef models include dedicated accessory storage. Cuisinart

    If your kitchen is short on storage space, this can matter just as much as another attachment.

    Easy Cleaning

    A food processor that takes forever to clean has a remarkable ability to remain permanently inside the cupboard. 😂

    Look for a bowl, lid, and accessories that are straightforward to remove and wash. It’s also worth checking the manufacturer’s instructions rather than assuming every component can go in the dishwasher. For example, Cuisinart identifies the removable components of many current models as dishwasher safe, while cleaning recommendations can differ between manufacturers and models. Cuisinart

    Don’t Choose by Wattage Alone

    As with hand mixers, wattage isn’t the only indication of how useful a food processor will be.

    Motor strength becomes more important for demanding jobs and larger machines, but blade design, bowl capacity, controls, attachments, and overall construction also affect how useful the processor is in everyday cooking. Cuisinart’s own buying guidance recommends considering power alongside size, capacity, attachments, price, and the foods you plan to prepare. Cuisinart

    For most Brit & Skillet readers, a practical bowl size, good pulse control, useful slicing and shredding attachments, and easy cleanup are more important than simply choosing the machine with the largest wattage number.

    Our Food Processor Picks for British Baking and Cooking

    All right — recommendation time. 😄 One important update from the research: Breville’s older BFP660 Sous Chef 12 has been discontinued, but Breville now sells a newer Sous Chef 12 (BFP710). So we’re going to avoid accidentally recommending the discontinued version. Breville

    Add this H2:

    Our Food Processor Picks for British Baking and Cooking

    Then paste:

    There isn’t one food processor that’s right for every kitchen. A frequent baker may appreciate a premium machine with an adjustable slicing system and dough blade, while someone who mainly makes pastry, scones, and occasional family meals may be happier with a simpler processor.

    For our recommendations, we considered current independent testing, manufacturer specifications, bowl capacity, attachments, storage, and how useful each machine would be for the kinds of British recipes featured on Brit & Skillet. These recommendations are based on research rather than personal testing.

    Best Overall: Breville Sous Chef 12

    For home cooks who expect to use a food processor regularly, the current Breville Sous Chef 12 is our premium overall choice.

    Breville’s current 12-cup model includes an S-blade, reversible shredder, adjustable slicer, and dedicated dough blade. One particularly useful improvement is its onboard storage caddy, which keeps those accessories inside the bowl rather than requiring a separate box in the cupboard. It also has a wide feed chute and a heavy-duty induction motor. Breville

    Those features translate particularly well to British cooking. The dough blade adds versatility for baking projects, while the chopping, shredding, and slicing accessories can handle everything from breadcrumbs and grated cheese to vegetables for savory pies.

    Independent testing also gives the Breville line a strong showing. Food Network’s 2026 tests named the Sous Chef 12-Cup its best overall processor after evaluating tasks including puréeing, slicing, grating, and dough making. One caveat is that Food Network tested the earlier 12-cup version, rather than the newly updated model we’re recommending here. Food Network

    The biggest drawback is cost. This is a premium food processor, so it makes the most sense for someone who cooks or bakes frequently enough to take advantage of its capabilities.

    Best for: Frequent bakers and home cooks who want a versatile premium food processor for both baking and everyday meal preparation.

    Breville Sous Chef 12-Cup Food Processor

    Breville Sous Chef 12-Cup Food Processor

    $449.95Williams-Sonoma

    Best Classic Workhorse: Cuisinart Custom 14-Cup

    The Cuisinart Custom 14-Cup Food Processor takes a somewhat different approach. Instead of loading the machine with complicated controls, Cuisinart has kept the design relatively straightforward while providing a generous 14-cup work bowl.

    The current model has a 720-watt motor and includes a stainless-steel chopping and mixing blade, 4mm slicing disc, medium shredding disc, and extra-large feed tube. Cuisinart also lists kneading dough among the machine’s capabilities. Cuisinart

    That large bowl can be particularly useful for cooks preparing bigger batches of pastry, breadcrumbs, grated cheese, vegetables, or fillings. It may be more capacity than a very occasional baker needs, but families and frequent cooks may appreciate the additional room.

    The Cuisinart also performed extremely well in current independent testing. Tom’s Guide named the Custom 14-Cup its best food processor overall for 2026, praising its performance, relatively quiet operation, and ability to complete preparation tasks with little mess. Bon Appétit also lists the Custom 14-Cup as a runner-up among its current food-processor recommendations. Tom’s Guide

    Best for: Home cooks who want a large, proven food processor with straightforward controls and plenty of capacity.

    Cuisinart Custom 14-Cup Food Processor

    Cuisinart Custom 14-Cup Food Processor

    $299.99Target

    Best Value: Ninja Professional Plus Food Processor

    For someone who wants useful food-processing capability without spending as much as the premium machines, the Ninja Professional Plus is worth considering.

    It has a 9-cup bowl and is designed for chopping, slicing, puréeing, shredding, and dough preparation. That capacity should be sufficient for many everyday baking and cooking jobs without requiring as much storage space as a 14-cup processor.

    Food Network selected the Ninja Professional Plus as its Best Value food processor in its 2026 testing, making it an appealing option for someone who wants a capable multipurpose processor while keeping the budget under control. Food Network

    For British baking, that makes it particularly attractive to beginners. It provides the functionality needed for jobs such as pastry preparation, breadcrumbs, grated cheese, and everyday chopping without requiring the investment of a premium processor.

    Best for: Beginners and occasional bakers who want a capable food processor at a more approachable price.

    Ninja Professional Plus Food Processor

    Ninja Professional Plus Food Processor

    $129.99Staples

    Food Processor Comparison at a Glance

    Food ProcessorBest ForCapacityStandout FeaturesPrice Level
    Breville Sous Chef 12Best overall12 cupsAdjustable slicer, reversable shredder, dough blade, onboard accessory storage$$$
    Cuisinart Custom 14-CupClassic workhorse14 cupsLarge bowl, 720W motor, slicing and shredding discs, simple controls$$-$$$
    Ninja Professional PlusBest value9 cupsPreset programs, slicing/shredding, dough capability, compact size$

    Which Food Processor Should You Choose?

    For most home cooks, the right food processor depends on how often you’ll use it and how much food you normally prepare.

    Choose the Breville Sous Chef 12 if you want the most versatile premium option. Its adjustable slicing system, reversible shredding disc, dough blade, and onboard accessory storage make it particularly appealing for someone who expects to use a food processor for both British baking and everyday cooking.

    Choose the Cuisinart Custom 14-Cup if you want a large, straightforward workhorse. Its generous bowl is useful for bigger batches, while the chopping blade and slicing and shredding discs cover most everyday food-processing jobs. Cuisinart also specifically lists chopping, shredding cheese and kneading dough among its capabilities. Cuisinart

    Choose the Ninja Professional Plus if budget and kitchen space are bigger considerations. Its 9-cup bowl is smaller, but that may actually be an advantage for someone who doesn’t routinely cook large batches. Current shopping results show the BN601 with a 9-cup bowl and dough functionality at a much lower price than our two premium choices.

    For many Brit & Skillet readers, the Cuisinart is probably the sweet spot if you regularly cook for a family or make larger batches. The Ninja makes more sense for beginners trying to keep costs down, while the Breville is the splurge option for someone who expects their food processor to earn a permanent place in the kitchen.

    Food Processor vs. Blender: Which Do You Need?

    A food processor and blender may look as though they perform similar jobs, but they’re designed for different kinds of kitchen tasks.

    A blender is generally better for liquids. Smoothies, soups, sauces, and other mixtures that need to become very smooth are where a blender is most at home.

    A food processor is better suited to chopping, slicing, shredding, and working with thicker or relatively dry mixtures. Depending on the attachments, it can grate cheese, slice vegetables, make breadcrumbs, chop nuts, and prepare certain types of dough and pastry. Food Network

    That distinction makes the food processor particularly useful for British baking and cooking. If you’re making shortcrust pastry, for example, a processor can quickly pulse cold butter into flour while leaving small pieces of butter in the mixture. King Arthur Baking uses precisely this technique for its food-processor pastry method and cautions against overworking the finished dough. King Arthur Baking

    If your kitchen revolves around smoothies and blended soups, buy a blender first. But if you’re more interested in pastry, scones, breadcrumbs, grated cheese, chopped vegetables, and savory cooking, a food processor will probably be the more useful appliance.

    The Bottom Line

    A food processor isn’t essential for making British food, but it can remove a surprising amount of repetitive preparation from both baking and everyday cooking.

    The Breville Sous Chef 12 is our overall choice for frequent cooks who want a premium, versatile machine.

    The Cuisinart Custom 14-Cup is a strong choice for home cooks who value a large capacity and straightforward design, particularly if they’ll regularly prepare bigger batches.

    And the Ninja Professional Plus offers a more approachable option for beginners who want useful food-processing capabilities without making the same investment as the premium machines.

    Whichever model you choose, think about the jobs you’ll actually ask it to perform. Bowl capacity, pulse control, useful blades and discs, storage, and easy cleaning will usually matter more in everyday cooking than simply choosing the machine with the longest specification sheet. Cuisinart’s buying guidance similarly emphasizes capacity, attachments, power, price, kitchen space, and intended use when choosing a processor. Cuisinart

    For British baking in particular, the humble pulse button may end up being one of your favorite features. A few quick pulses can take much of the work out of preparing pastry—while still leaving you in control of the final dough.

    And anything that gets a homemade pie onto the table a little faster sounds like a worthwhile kitchen assistant to us.


    This article may contain affiliate links. If you make a purchase through one of these links, Brit & Skillet may earn a commission at no additional cost to you. Our recommendations are based on independent research and product information; we do not claim to have personally tested products unless explicitly stated.

  • Best Electric Hand Mixers for British Baking: What American Bakers Should Look For

    Best Electric Hand Mixers for British Baking: What American Bakers Should Look For

    British baking doesn’t require a kitchen full of expensive equipment, but a good electric hand mixer can make some classic recipes much easier.

    From creaming butter and caster sugar for a Victoria sponge to whipping cream, beating buttercream and whisking egg whites for meringue, an electric hand mixer handles many jobs that would otherwise require a fair amount of elbow grease.

    If caster sugar is unfamiliar, our guide to caster sugar vs. granulated sugar explains the difference and what American bakers can use instead.

    For American bakers exploring British recipes, the good news is that you don’t necessarily need a large stand mixer. A hand mixer is compact, easier to store and well suited to everyday jobs such as cake batters, frosting, whipped cream and creaming butter and sugar.

    But hand mixers aren’t all the same. Speed control, attachments, weight, low-speed performance and storage can make a noticeable difference—especially when you’re working with everything from delicate whipped cream to thicker cake mixtures.

    In this guide, we’ll explain what to look for in an electric hand mixer for British baking and compare three strong options for American home bakers.

    Affiliate disclosure: Brit & Skillet may earn a commission from qualifying purchases made through links on this page, at no additional cost to you. Our recommendations are based on independent research and manufacturer information; we do not claim to have personally tested these products unless explicitly stated.

    Do You Need an Electric Hand Mixer for British Baking?

    You don’t need an electric hand mixer to make British cakes and desserts. Generations of home bakers managed perfectly well with a wooden spoon, whisk and a little determination.

    But an electric hand mixer can make several common baking jobs considerably faster and easier.

    One of the best examples is a classic Victoria sponge. Creaming softened butter and caster sugar until the mixture becomes pale and fluffy incorporates air and helps create the light texture associated with a good sponge.

    A hand mixer is also useful for:

    • Creaming butter and sugar
    • Making smooth buttercream
    • Whipping double cream — heavy cream in the US
    • Whisking egg whites for meringues
    • Mixing ordinary cake and cupcake batters
    • Beating eggs and other light mixtures

    For many home bakers, a hand mixer also makes more sense than a full-size stand mixer. It takes up very little cupboard space, works with the mixing bowls you already own and usually costs considerably less.

    If you’re building your British baking setup, take a look at our guide to the best mixing bowls for British baking, including the most useful sizes and materials for an American kitchen.

    There are limits, though. A hand mixer isn’t necessarily the best tool for frequent bread making or particularly heavy doughs. If you regularly make bread, enriched doughs or very large batches, a stand mixer may eventually be the better investment.

    For most beginners exploring British baking, however, a good electric hand mixer is more than enough to get started.

    What to Look for in a Hand Mixer for British Baking

    A hand mixer doesn’t need dozens of complicated features to be useful. For British baking, the most important qualities are good speed control, comfortable handling and attachments that suit the cakes and desserts you actually make.

    A Gentle Low Speed

    One of the most useful features is a genuinely low starting speed.

    Starting too quickly can send flour, icing sugar or cocoa powder flying out of the bowl. A controlled low speed makes it easier to begin combining ingredients before increasing the speed.

    This is particularly useful for cake batters, buttercream and other mixtures containing dry ingredients.

    Several Useful Speeds

    You don’t necessarily need the mixer with the highest number of speeds, but having a good range makes it easier to move between different baking jobs.

    Lower speeds are useful for combining ingredients, while higher speeds work well for whipping cream, beating egg whites and creating light buttercream.

    The important thing isn’t simply the number printed on the box—it’s having useful control across that range.

    Comfortable Weight and Handle

    Unlike a stand mixer, you’ll be holding a hand mixer throughout much of the mixing process.

    A comfortable handle and manageable weight therefore matter more than you might expect, particularly when creaming butter and sugar or whipping a mixture for several minutes.

    Look for a mixer that’s comfortable to hold and easy to maneuver around your mixing bowl.

    The Right Attachments

    Standard beaters will handle most everyday British baking jobs, including sponge cakes, traybakes, buttercream and many biscuit mixtures.

    A whisk attachment is particularly useful for whipped cream and egg whites.

    Some hand mixers also include dough hooks. These can add versatility, but they’re better considered an occasional extra rather than a substitute for a stand mixer if you regularly make heavy bread dough.

    Easy Storage

    Hand mixers are popular partly because they don’t require much kitchen space, but loose beaters and whisks have an impressive ability to disappear into the back of a drawer.

    A storage case or attachment bag can therefore be genuinely useful, particularly in a smaller kitchen.

    Don’t Choose by Wattage Alone

    A larger wattage number doesn’t automatically mean a mixer will perform better for your baking.

    Design, gearing, attachments, speed control and how efficiently the mixer delivers its power all matter.

    For the average Brit & Skillet reader, good low-speed control, comfortable handling and useful attachments are more important than simply buying the mixer with the biggest number printed on the box.

    Our Hand Mixer Picks for British Baking

    There are plenty of electric hand mixers available in the United States, but you don’t need the most expensive model to make a good Victoria sponge or bowl of buttercream.

    For this guide, we considered manufacturer specifications, attachments, speed control, storage and how well each mixer suits the everyday jobs involved in British-style home baking.

    These recommendations are based on research rather than personal testing by Brit & Skillet.

    Best Premium Pick: Breville Handy Mix Scraper

    For frequent bakers who want a feature-rich hand mixer, the Breville Handy Mix Scraper is our premium pick.

    Breville gives the mixer nine speed settings plus a boost function. Its Beater IQ technology detects the attachment being used and adjusts the speed range accordingly.

    It comes with scraper beaters, balloon whisks and dough hooks, along with a detachable storage compartment that keeps the attachments and cord together.

    For British baking, that versatility is particularly appealing. The scraper beaters are useful for cake mixtures and creaming, while the balloon whisks suit jobs such as whipped cream and egg whites.

    The biggest drawback is price. At the time of this update, Breville lists it at around $160, making it considerably more expensive than many conventional hand mixers.

    Best for: Frequent bakers who want premium features and don’t mind paying more for them.

    Best Value for Serious Home Bakers: Cuisinart Power Advantage Plus 9-Speed

    The Cuisinart Power Advantage Plus 9-Speed Hand Mixer offers an appealing middle ground between inexpensive basic mixers and premium models.

    It has nine speeds and three low starting speeds designed to reduce splattering. Its 220-watt motor uses automatic feedback, and the set includes beaters, a chef’s whisk and dough hooks.

    The attachments fit into a storage case beneath the mixer, which is particularly useful if you’re trying to keep a small kitchen organized.

    That combination makes the Cuisinart particularly well suited to someone building a British baking toolkit. You get lower speeds for bringing flour into a cake mixture, higher speeds for whipping, and several useful attachments without needing to store a large stand mixer.

    At the time of this update, Cuisinart lists the model at around $100.

    Best for: Home bakers who want plenty of useful features and attachments without moving into premium pricing.

    Best Versatile Alternative: KitchenAid 9-Speed Hand Mixer

    The KitchenAid 9-Speed Hand Mixer is another strong option for bakers who want plenty of control without giving up countertop or cupboard space to a stand mixer.

    Its nine speeds cover everything from gently incorporating chunky ingredients at the lower end to whipping egg whites at the highest setting.

    The current model includes stainless steel Turbo Beaters, a Pro Whisk, dough hooks and a blending rod, along with a storage bag to keep the accessories together.

    That makes it particularly versatile for a baker who wants one compact appliance capable of handling cake mixtures, buttercream, whipped cream and other everyday baking jobs.

    At the time of this update, KitchenAid’s U.S. site lists this model around the $100 mark, although prices and promotions can change.

    Best for: Bakers who want a familiar, versatile mixer with a particularly useful selection of attachments.

    Hand Mixer Comparison at a Glance

    MixerBest ForSpeedsStandout Features
    Breville Handy Mix ScraperPremium / frequent baking9 + BoostBeater IQ, scraper beaters, whisks, dough hooks
    Cuisinart Power Advantage Plus 9-SpeedBest value9Low-start speeds, whisk, dough hooks, storage case
    KitchenAid 9-Speed Hand MixerVersatile alternative9Turbo Beaters, whisk, dough hooks, blending rod

    Which Hand Mixer Should You Choose?

    For most American home bakers interested in British recipes, you don’t need to buy the most expensive hand mixer available.

    The right choice depends on how frequently you bake and which features matter most to you.

    Choose the Breville Handy Mix Scraper if you bake frequently and want the premium option. Its scraper beaters, balloon whisks, dough hooks, nine speeds and attachment-sensing system give it an unusually broad set of capabilities for a hand mixer.

    Choose the Cuisinart Power Advantage Plus 9-Speed if value is your priority. Its nine speeds, low-start mixing capability and storage case give you many of the practical features a home baker needs without moving into Breville’s premium price range.

    Consider the KitchenAid 9-Speed Hand Mixer if you want versatility and a particularly useful attachment selection. Its whisk, dough hooks and blending rod expand what you can do beyond ordinary cake batter.

    Our recommendation: If you’re buying your first electric hand mixer specifically for British baking, the Cuisinart is probably the sweet spot for many home bakers. It offers plenty of speed control and useful attachments without requiring the premium investment of the Breville.

    Frequent bakers who want more sophisticated features may find the Breville worth the extra cost, while KitchenAid offers another compelling all-purpose alternative.

    Hand Mixer vs. Stand Mixer for British Baking

    If you’re just getting started with British baking, you may wonder whether it makes more sense to buy a hand mixer or invest in a stand mixer.

    For many everyday British bakes, a hand mixer is perfectly capable.

    Victoria sponge, buttercream, whipped cream, meringues, cupcakes and many traybakes involve relatively light mixtures that suit a hand mixer well.

    A stand mixer becomes more useful when you regularly work with heavy doughs, large batches or recipes requiring longer mixing times. It also has the advantage of working hands-free while you prepare other ingredients.

    There’s also the question of space.

    A hand mixer can usually be stored in a cupboard or drawer, while a stand mixer takes up considerably more room and may end up living permanently on the countertop.

    If your baking plans mainly involve cakes, buttercream, whipped cream and other traditional British treats, start with a good hand mixer.

    If you later find yourself regularly making bread, enriched doughs or large batches, that may be the point when a stand mixer becomes worth the investment.

    If you’d like help putting together the rest of your baking setup, see our British Baking Equipment Guide for the essential tools an American kitchen needs for British recipes.

    The Bottom Line

    You don’t need an elaborate collection of appliances to start baking British recipes in an American kitchen.

    For many home bakers, a reliable electric hand mixer provides the right balance of convenience, versatility and easy storage.

    The Breville Handy Mix Scraper is our premium choice for frequent bakers who want additional features and a versatile attachment set.

    The Cuisinart Power Advantage Plus 9-Speed is our choice for many home bakers looking for a strong balance of features and value.

    And the KitchenAid 9-Speed Hand Mixer is a strong alternative for bakers who value versatility and a broad attachment selection.

    Whichever model you choose, the most important thing is finding a mixer that suits the recipes you actually make.

    A good hand mixer should make British baking easier—not make your kitchen more complicated.

    And once you have one, a Victoria sponge seems like a very good place to start.

  • Best Baking Tins for British Recipes: What American Bakers Should Buy

    Best Baking Tins for British Recipes: What American Bakers Should Buy

    If you’ve ever opened a British baking recipe and wondered what on earth a “20cm sandwich tin” or “2lb loaf tin” is supposed to mean in an American kitchen, you’re not alone.

    British and American bakeware isn’t always described in the same way. British recipes commonly use centimeters, refer to baking pans as tins, and sometimes specify traditional sizes that don’t have an obvious American name.

    Choosing the wrong pan can affect more than the appearance of your bake. It can change its depth, baking time and even how evenly it cooks.

    Fortunately, you don’t need an entirely separate collection of British bakeware to follow recipes from across the pond. A few versatile tins and pans will handle most classic British cakes, loaves, traybakes and puddings.

    In this guide, we’ll explain the British baking tins American bakers are most likely to encounter, how their sizes translate to familiar American bakeware and what to consider when choosing pans for British recipes.

    Affiliate disclosure: Brit & Skillet may earn a commission from qualifying purchases made through links on this page, at no additional cost to you. We only recommend products and resources we believe may be useful to our readers.

    What Does “Baking Tin” Mean in a British Recipe?

    In British recipes, the word tin generally means what American bakers would call a baking pan.

    A cake tin is a cake pan, a loaf tin is a loaf pan, and a roasting tin is essentially a roasting pan.

    The terminology is different, but the basic equipment is usually very familiar.

    The bigger challenge is size.

    British recipes commonly give tin dimensions in centimeters, while American bakeware is normally labeled in inches. A British recipe might call for a 20cm round cake tin, for example, while an American store is much more likely to sell an 8-inch or 9-inch round cake pan.

    Those differences may sound small, but pan size affects the depth of the batter. Put the same amount of batter into a larger pan and it will be shallower and may bake more quickly. Use a substantially smaller pan and the batter will be deeper, potentially requiring a longer baking time or risking overflow.

    If British measurements are causing confusion beyond bakeware, our guide to How British and American Measuring Cups Differ explains another common difference American bakers encounter.

    Brit & Skillet tip: Don’t worry about finding a pan with an absolutely identical measurement every time. For many recipes, a close American equivalent works perfectly well—you simply need to understand how changing the size may affect the bake.

    British-to-American Baking Tin Size Guide

    British tin measurements don’t always have an exact American equivalent, but these common conversions will get you very close for most everyday baking.

    British Recipe Calls ForApproximate Size in InchesAmerican Pan to Look For
    18cm round tin7 inches7-inch round cake pan
    20cm round tin8 inches8-inch round cake pan
    23cm round tin9 inches9-inch round cake pan
    20cm square tin8 inches8-inch square baking pan
    23cm square tin9 inches9-inch square baking pan
    20 x 30cm rectangular tinAbout 8 x 12 inchesSimilar-size rectangular baking pan

    Important: These are practical size equivalents rather than guarantees that every British and American pan will have exactly the same capacity. Pan depth and shape matter too, so always check the recipe for any additional instructions.

    What Is a Sandwich Tin?

    A sandwich tin is a shallow, round cake pan traditionally used to bake the separate layers of British sandwich cakes.

    The classic example is a Victoria sponge, where two round cakes are baked separately and then “sandwiched” together with jam and, depending on the recipe, buttercream or another filling.

    If a British recipe asks for two 20cm sandwich tins, an American baker should generally look for two 8-inch round cake pans of a similar depth.

    Sandwich tins tend to be shallower than some of the deeper round cake pans sold in the United States. That doesn’t necessarily mean you need to buy special British pans, but it does mean you should pay attention to the depth of the pans you already own.

    Our Pick for British Sandwich Cakes: Fat Daddio’s Anodized Aluminum Round Cake Pans

    For American bakers who need round pans for British cakes, Fat Daddio’s Anodized Aluminum Round Cake Pans are a particularly useful option because the range is available in multiple sizes.

    For a British recipe calling for a 20cm round or sandwich tin, look for an 8-inch option and then compare the depth with the dimensions specified by your recipe.

    Fat Daddio’s uses anodized aluminum for these pans. The light-colored aluminum construction makes them a practical choice for cakes where even baking and controlled browning are important.

    Because the pans are available in multiple dimensions, the same product range can also be useful when a British recipe specifies a less familiar tin size.

    What to look for: A pair of sturdy 8-inch round cake pans is one of the most useful purchases for anyone who regularly makes British cakes. Straight sides help produce neat layers, and having two matching pans means both halves of a sandwich cake can bake at the same time.

    Brit & Skillet tip: If you’re buying round cake pans specifically for British baking, buy two matching pans rather than one. Victoria sponge and many other British layer cakes are designed around two separately baked layers, so you’ll use the pair surprisingly often.

    What Is a 2lb Loaf Tin?

    British recipes frequently call for a 1lb or 2lb loaf tin, particularly for loaf cakes, tea breads, fruit loaves and traditional breads.

    The “2lb” description comes from the traditional size of loaf the tin was designed to hold—it doesn’t mean you need to put exactly two pounds of cake batter into it.

    For American bakers, a typical 2lb loaf tin is broadly comparable to a standard 9 × 5-inch loaf pan, although dimensions and capacity can vary between manufacturers.

    What to look for: A sturdy 9 × 5-inch loaf pan is a practical choice for an American kitchen and can handle many British loaf recipes as well as familiar American breads and cakes.

    If a recipe specifies the exact dimensions or capacity of its loaf tin, use those measurements as your best guide rather than relying only on the “1lb” or “2lb” description.

    Brit & Skillet tip: Pay attention to how full the recipe expects the tin to be. If your American loaf pan is noticeably smaller than the one intended by the recipe, don’t force all the batter into it. Leaving adequate room for the bake to rise is much better than cleaning overflow from the bottom of your oven.

    Square Tins and Traybake Tins

    Square and rectangular tins are common in British baking, particularly for flapjacks, brownies, millionaire’s shortbread, traybakes and cakes designed to be cut into individual squares or slices.

    A British recipe calling for a 20cm square tin is generally asking for something very close to an 8-inch square baking pan in the United States. Likewise, a 23cm square tin is approximately equivalent to a 9-inch square pan.

    The term traybake tin can be a little less precise. British recipes may use rectangular tins of different dimensions and depths, so it’s particularly important to check the measurements given in the individual recipe rather than assuming every traybake uses the same pan.

    Our Pick for Flapjacks and Square Bakes: Fat Daddio’s Anodized Aluminum Square Cake Pans

    Fat Daddio’s Anodized Aluminum Square Cake Pans are available in multiple dimensions, making the range useful for translating British square-tin measurements into American bakeware.

    An 8-inch square option is a practical match for many recipes calling for a 20cm square tin. That makes this size especially useful for flapjacks, brownies, millionaire’s shortbread and smaller traybakes.

    As with the round pans, check the depth as well as the width before assuming two pans are interchangeable.

    What to look for: An 8-inch square pan is an especially versatile addition to a British baking setup. For rectangular traybakes, choose a sturdy pan with straight sides and compare its dimensions with the recipe before you begin.

    If you’d like to put that square tin to work immediately, our British Flapjacks recipe is an easy place to start.

    Brit & Skillet tip: Don’t automatically reach for a large American sheet pan when a British recipe says “traybake.” Many British traybakes are baked in a smaller, deeper rectangular tin rather than on a wide, shallow baking sheet.

    Springform and Loose-Bottomed Tins

    British recipes sometimes call for a loose-bottomed tin, especially when making cheesecakes, tarts and cakes that would be difficult to remove neatly from an ordinary pan.

    A loose-bottomed tin has a removable base that allows the finished bake to be pushed upward and lifted away from the sides.

    In American kitchens, a springform pan is often the more familiar option. Instead of pushing out the base, the side of a springform pan releases with a clasp and expands away from the bake.

    The two styles aren’t identical, but they serve a similar purpose: making delicate or presentation-focused bakes easier to remove without turning them upside down.

    What to look for: If a British recipe specifies a round loose-bottomed tin, check its diameter and depth before choosing an American springform pan. An 8-inch or 9-inch springform pan is useful for many cakes and cheesecakes, but the recipe’s dimensions should always take priority.

    Brit & Skillet tip: Removable-bottom pans aren’t always completely leakproof. If you’re working with a particularly thin batter or using a water bath, check the recipe’s instructions carefully and protect against leaks where appropriate.

    What Is a Pudding Basin?

    A pudding basin is a deep, round bowl traditionally used for steamed British puddings.

    Classics such as Christmas pudding and various steamed sponge puddings may be cooked in one rather than in an ordinary cake tin.

    Traditional pudding basins are often made from ceramic, although heat-safe versions made from other materials are also available. Their rounded shape helps give a steamed pudding its characteristic domed appearance when it’s turned out onto a serving plate.

    Where American bakers may get confused is that British recipes often specify pudding basins by capacity rather than just diameter. If a recipe calls for a particular size, comparing the volume or capacity is usually more useful than trying to match the diameter alone.

    What to look for: Choose a heat-safe basin intended for cooking and make sure its capacity is reasonably close to the one specified by the recipe. A rim around the top can also be useful when securing parchment and foil over a pudding before steaming.

    If steamed puddings are on your baking list, our guide to the Best Pudding Basins for Traditional British Desserts explains the sizes and styles American bakers should look for.

    Brit & Skillet tip: Don’t substitute an ordinary decorative serving bowl unless you know it’s suitable for the cooking method being used. Steamed puddings can spend a long time exposed to heat, so the bowl needs to be designed to handle it safely.

    What Material Is Best for British Baking Tins?

    Once you’ve found the right size and shape, the material of your baking tin is worth considering too.

    Different materials conduct heat differently, which can affect browning and how evenly a cake or loaf bakes.

    Aluminum

    Lightweight aluminum pans conduct heat efficiently and are a popular choice for cakes.

    A good-quality light-colored aluminum pan can provide even baking without encouraging the outside of a cake to brown too quickly.

    Anodized Aluminum

    Anodized aluminum starts with aluminum that has undergone an electrochemical process that changes and hardens its surface.

    Fat Daddio’s uses anodized aluminum extensively across its bakeware range. According to the manufacturer, its anodized surface is not a separate coating.

    As with any bakeware, follow the manufacturer’s cleaning and care instructions.

    Aluminized or Coated Steel

    Steel pans are sturdy and durable, and many are coated to improve release or resist corrosion.

    Because construction and finishes vary considerably between brands, follow the manufacturer’s care instructions.

    Nonstick

    Nonstick bakeware can make cakes and traybakes easier to release and clean up afterward.

    Darker nonstick surfaces, however, may brown the edges and bottom of some bakes more quickly than lighter-colored pans.

    What Matters Most

    For everyday British baking, prioritize the correct size, appropriate depth, sturdy construction and even heat distribution rather than choosing a pan simply because it has a particular coating.

    Brit & Skillet tip: Even when you’re using a pan designed for easy release, don’t automatically skip greasing or lining it. If a British recipe tells you to grease the tin or line it with baking parchment, follow those instructions—they’re there to help your bake release cleanly.

    Which Baking Tins Do You Actually Need?

    You don’t need to replace all your American bakeware before you start making British recipes.

    A small collection of versatile pans will cover a surprisingly large number of traditional bakes.

    For most American home bakers interested in British baking, a practical starter collection would include:

    • Two 8-inch round cake pans — useful for Victoria sponge and other British sandwich cakes.
    • One 9 × 5-inch loaf pan — a practical American option for many recipes calling for a 2lb loaf tin.
    • One 8-inch square baking pan — useful for flapjacks, brownies, millionaire’s shortbread and smaller traybakes.
    • One 8- or 9-inch springform pan — useful for cheesecakes and other bakes that benefit from removable sides.
    • One pudding basin — worth adding if you plan to make traditional steamed British puddings regularly.

    If you already own the first four, you may have nearly everything you need.

    The important thing is to compare your pan’s dimensions and depth with the recipe rather than assuming that British and American bakeware labels always mean exactly the same thing.

    If you’re building the rest of your British baking setup too, see our guide to 10 Essential Kitchen Tools for British Baking in America.

    Brit & Skillet tip: Build your collection around the recipes you actually want to make. There’s little reason to buy a specialty pudding basin immediately if you’re mainly interested in Victoria sponges, loaf cakes and flapjacks.

    How to Choose a Baking Tin for British Recipes

    When you’re shopping for bakeware to use with British recipes, don’t choose a pan based on its name alone.

    A few simple checks can help you find something that will work well in both British and American recipes.

    Check the dimensions. Convert centimeters to inches when necessary and look for the closest practical equivalent. A 20cm round tin, for example, is approximately an 8-inch round pan.

    Check the depth. Two pans can have the same diameter but very different capacities. A deep cake pan isn’t necessarily interchangeable with a shallow sandwich tin simply because both are 8 inches across.

    Consider the shape. Straight-sided pans are particularly useful for layer cakes and traybakes because they produce neat edges and consistent layers.

    Choose sturdy construction. A pan that feels reasonably substantial and sits flat is preferable to very thin bakeware that can warp or heat unevenly.

    Think about release and cleanup. Removable bottoms and nonstick surfaces can be convenient, but they’re not essential for every bake. Proper greasing and parchment lining can make a simple pan extremely versatile.

    Don’t buy a complete set just for one recipe. Start with the pans you’ll use repeatedly and add specialty pieces only when your baking interests justify them.

    Brit & Skillet tip: When comparing bakeware online, look at the actual dimensions listed by the manufacturer rather than relying only on descriptions such as “medium,” “standard,” or “2lb.” Exact measurements make it much easier to compare a pan with the British recipe you’re planning to bake.

    British Baking Tin Cheat Sheet

    When you’re standing in an American kitchen with a British recipe in front of you, these are some of the most useful equivalents to remember:

    • 18cm round tin → about 7 inches
    • 20cm round tin → about 8 inches
    • 23cm round tin → about 9 inches
    • 20cm square tin → about 8 inches
    • 23cm square tin → about 9 inches
    • 2lb loaf tin → often similar to a 9 × 5-inch loaf pan
    • Sandwich tin → shallow round cake pan
    • Loose-bottomed tin → removable-bottom pan; a springform pan may work for some recipes
    • Baking parchment → parchment paper

    Brit & Skillet tip: Save the measurements from the pans you already own somewhere handy. Once you know their diameter, depth and approximate capacity, translating British recipes becomes much easier.

    You Don’t Need British Bakeware to Bake British Recipes

    British baking terminology can make familiar equipment sound more complicated than it really is.

    A cake tin is still a cake pan, a loaf tin is still a loaf pan, and many of the centimeter measurements used in British recipes have close American equivalents.

    The key is to pay attention to more than the name on the pan. Diameter, length, width, depth and capacity can all affect how a recipe bakes, so compare those measurements whenever you’re adapting a British recipe to the bakeware you already own.

    For most American bakers, a pair of 8-inch round cake pans, a 9 × 5-inch loaf pan, an 8-inch square pan and a springform pan will cover an impressive range of British recipes.

    Specialty pieces can always be added later as you discover the bakes you enjoy making most.

    Once you understand the terminology and a handful of common size conversions, British baking tins stop feeling particularly British at all—and you can get back to the important part:

    deciding what to bake next.


  • Best Kitchen Scales for British Recipes: A Guide for American Bakers

    Best Kitchen Scales for British Recipes: A Guide for American Bakers

    If you’ve ever opened a British recipe and wondered why the flour, sugar, and butter are listed in grams instead of cups, you’re not alone. For American bakers, one of the simplest ways to make British recipes easier to follow is to use a digital kitchen scale.

    Weighing ingredients lets you follow the recipe as it was originally written instead of converting every measurement into cups and tablespoons. It can also give you more consistent results, particularly with ingredients such as flour, where the amount that fits into a measuring cup can vary.

    The good news is that you don’t need an expensive professional scale. For many home bakers, a simple digital model with the right features is all you need. But if you frequently switch between British metric recipes and American volume measurements, some premium scales offer additional features that can be genuinely useful.

    Affiliate disclosure: Brit & Skillet may earn a commission from qualifying purchases made through links on this page, at no additional cost to you.

    In this guide, we’ll explain what to look for in a kitchen scale for British recipes, which features actually matter, and how to choose the right one for your kitchen.

    Why British Recipes Use Grams

    British recipes commonly measure ingredients by weight rather than volume. That means you’ll often see flour, sugar, butter, and other ingredients listed in grams instead of American cups.

    There’s a practical reason for this: weight is generally more consistent. A cup of flour can contain different amounts depending on how the flour is scooped, packed, or leveled, while 120 grams is 120 grams regardless of how it gets into the bowl.

    Using a scale also makes British recipes much easier for American bakers. Instead of stopping to convert grams into cups, you can place your bowl on the scale, select grams, and weigh the amount shown in the original recipe.

    This is particularly useful for baking, where relatively small differences in ingredient quantities can affect the texture and consistency of cakes, biscuits, pastry, and bread.

    Brit & Skillet tip: When a British recipe provides measurements in both grams and cups, try using the gram measurements. It removes one more variable from the baking process and helps you follow the recipe closer to the way its author intended.

    What to Look for in a Kitchen Scale

    Kitchen scales can range from very simple models to more elaborate devices with features most home bakers will rarely use. For British baking, the basics matter much more than having lots of extras.

    A good scale should be accurate, easy to read, simple to clean, and capable of switching between the measurement units you’re most likely to encounter in British and American recipes.

    Measures in Grams and Ounces

    At a minimum, choose a scale that can display both grams and ounces. Grams will be your main setting for British recipes, while ounces can still be useful for American recipes and everyday kitchen tasks.

    A Tare Function

    The tare button resets the displayed weight to zero after you place a bowl or container on the scale. It also lets you weigh several ingredients into the same bowl by resetting the scale between additions.

    An Easy-to-Read Display

    Look for a display that remains visible when a reasonably large mixing bowl is sitting on the weighing platform. A scale isn’t very convenient if your favorite bowl covers the numbers every time you use it.

    A Practical Capacity

    Most home bakers don’t need an industrial-capacity scale, but the scale should comfortably handle the weight of your mixing bowl plus the ingredients inside it. This becomes particularly important when you’re making larger batches of bread dough, cakes, or puddings.

    Brit & Skillet tip: Don’t choose a kitchen scale based on the number of features printed on the box. For British baking, reliable gram measurements, a tare button, and a display you can actually see are more valuable than a long list of functions you’ll never use.

    How Accurate Does a Baking Scale Need to Be?

    For everyday British baking, a kitchen scale that measures in 1-gram increments is generally suitable for ingredients such as flour, sugar, butter, dried fruit, and chocolate.

    Very small quantities are a little different. Ingredients such as yeast, salt, baking powder, and spices may be used in amounts that are too small for an ordinary kitchen scale to measure reliably. In those cases, measuring spoons are often the simpler choice when the recipe provides spoon measurements.

    You may see specialized precision scales that measure fractions of a gram, but most home bakers don’t need one for everyday cakes, biscuits, scones, and puddings.

    What’s more important is consistency. Place your scale on a firm, level surface, make sure it reads zero before you begin, and avoid weighing ingredients while the scale is sitting on a soft tea towel or uneven countertop.

    Brit & Skillet tip: Your kitchen scale and measuring spoons make a great team. Use the scale for larger ingredients measured in grams and measuring spoons for the tiny quantities specified that way in the recipe.

    Our Kitchen Scale Picks for British Baking

    You don’t need a specialized British kitchen scale to follow British recipes. A reliable digital scale that measures accurately in grams is usually all an American home baker needs.

    However, different scales make sense for different bakers. Some people simply want an inexpensive way to start weighing flour in grams, while others regularly switch between British metric recipes and American volume measurements.

    We’ve divided our recommendations into four practical categories so you can choose the scale that best fits the way you bake.

    Quick Picks for American Bakers

    Best Premium Pick: King Arthur Volume and Weight Scale — A particularly useful choice for frequent bakers who regularly move between British metric recipes and American volume measurements.

    Best Everyday Pick: Escali Primo Digital Kitchen Scale — A straightforward choice for everyday British baking when you primarily want reliable gram measurements without lots of extras.

    Best for Large Mixing Bowls: OXO Good Grips 11 lb Food Scale with Pull-Out Display — A useful choice when large bowls or plates would otherwise block the scale’s display.

    Best Budget Pick: Amazon Basics Digital Kitchen Scale — A simple option for bakers who are just getting started with weighing ingredients in grams.

    For frequent Brit & Skillet bakers who work with both British and American recipes, the King Arthur scale offers the most interesting additional functionality. If you simply need a dependable everyday scale for weighing ingredients in grams, the Escali Primo keeps things simpler.

    Best Premium Pick: King Arthur Volume and Weight Scale

    For American bakers who frequently follow British recipes, the King Arthur Volume and Weight Scale offers an unusual combination of features that fits particularly well with the kind of baking we do at Brit & Skillet.

    The scale was developed by Escali with King Arthur’s test bakers and can work with both weight and volume. In addition to weighing ingredients, it includes hundreds of commonly used ingredients programmed into the scale so it can provide corresponding volume measurements.

    It can display weight in grams, ounces, and pounds and ounces, while volume measurements include cups, tablespoons, fluid ounces, and milliliters.

    That combination can be especially useful in an American kitchen where one recipe may call for 250 grams of flour while another gives ingredients in cups. Rather than being designed solely as a basic weighing scale, it provides additional tools for moving between the measurement systems American and British bakers commonly encounter.

    The trade-off is price. This is a premium scale, and someone who only needs to weigh ingredients in grams certainly doesn’t need to spend this much. Its extra functionality makes the most sense for frequent bakers who will actually use it.

    Best for: Frequent bakers who regularly switch between British metric recipes and American volume measurements.

    Keep in mind: The additional measurement functionality comes at a higher price than a basic digital kitchen scale.

    Best Everyday Pick: Escali Primo Digital Kitchen Scale

    For American home bakers who primarily want a straightforward way to follow British recipes in grams, the Escali Primo Digital Kitchen Scale is our everyday pick.

    The Primo measures in grams as well as ounces and pounds, has an 11-pound capacity, measures in 1-gram increments, and includes the tare function you’ll use constantly when weighing several ingredients into the same mixing bowl.

    Its simple design is part of its appeal. If your main goal is to put a bowl on the scale, press tare, and weigh 250 grams of flour, you don’t necessarily need the additional functionality of a premium model.

    Its raised weighing platform can also help keep the display visible when you’re using a reasonably large mixing bowl.

    Best for: Home bakers who want a simple, dependable scale for following British recipes in grams.

    Keep in mind: It doesn’t offer the more advanced weight-and-volume functionality of the King Arthur premium pick, but many bakers won’t need those additional features.

    Best for Large Mixing Bowls: OXO Good Grips 11 lb Food Scale with Pull-Out Display

    If you frequently weigh ingredients directly into large mixing bowls, the OXO Good Grips 11 lb Food Scale with Pull-Out Display is an especially practical choice.

    Its standout feature is the display, which pulls forward from the base of the scale. That means a large mixing bowl or plate can sit on the weighing platform without blocking your view of the measurement — a surprisingly useful feature when you’re weighing several ingredients into the same bowl.

    The scale has an 11-pound capacity, measures metric weights in 1-gram increments, and includes a zero function for taring your bowl between ingredients.

    Best for: Bakers who regularly use large mixing bowls, make bigger batches, or simply want an easier-to-see display.

    Keep in mind: The extra cost makes the most sense if you’ll actually benefit from the pull-out display.

    Best Budget Pick: Amazon Basics Digital Kitchen Scale

    If you’re new to weighing ingredients and want an inexpensive way to start following British recipes in grams, the Amazon Basics Digital Kitchen Scale is our budget pick.

    It offers the basic functionality needed to get started with weighing ingredients, including gram measurements and a tare function.

    Its simple design also makes it a sensible choice if you’re not yet sure how often you’ll use a kitchen scale and don’t want to spend much on your first one.

    Best for: Beginners and occasional bakers who want an inexpensive introduction to weighing British recipes in grams.

    Keep in mind: If you begin baking frequently, you may eventually appreciate the design or additional functionality offered by one of the other choices.

    Which Kitchen Scale Should You Choose?

    Choose the King Arthur Volume and Weight Scale if you bake frequently and regularly move between British metric recipes and American recipes using cups and other volume measurements. Its ability to work with both weight and volume makes it our premium choice for that particular kind of baking.

    Choose the Escali Primo if you don’t need those additional features and simply want a straightforward everyday scale for weighing British recipes in grams.

    Choose the OXO Good Grips 11 lb Food Scale with Pull-Out Display if you frequently weigh ingredients in large mixing bowls and want a display that won’t disappear underneath them.

    Choose the Amazon Basics Digital Kitchen Scale if you’re new to weighing ingredients and keeping the initial cost as low as possible is your priority.

    Whichever model you choose, prioritize gram measurements, a tare function, sufficient capacity for your mixing bowl and ingredients, and a design that’s easy for you to use.

    Kitchen Scale Comparison at a Glance

    ScaleBest ForKey Advantage
    King Arthur Volume and Weight ScaleFrequent British & American bakingWeight and volume measurements
    Escali PrimoEveryday bakingSimple gram weighing
    OXO Good Grips 11 lbLarge mixing bowlsPull-out display
    Amazon Basics Digital Kitchen ScaleBudget-conscious beginnersLow-cost way to start

    Our recommendation: If you frequently bake from both British and American recipes and want the additional measurement functionality, the King Arthur Volume and Weight Scale is our premium pick. For straightforward everyday weighing in grams, the Escali Primo remains the simpler choice. Choose the OXO if large bowls frequently block your scale display, or consider the Amazon Basics model if keeping the initial cost as low as possible is your priority.

    How to Use a Kitchen Scale with a British Recipe

    Once you get used to weighing ingredients, following a British recipe can actually feel simpler than measuring everything with cups.

    Start by placing your scale on a firm, level countertop and switching the measurement unit to grams.

    Put your empty mixing bowl on the scale and press the tare or zero button. The display should return to zero even though the bowl is still sitting on the platform.

    Add your first ingredient until the display reaches the weight specified in the recipe. If the next ingredient can go into the same bowl, press tare again to return the display to zero and then add the next ingredient.

    For example, if a cake recipe calls for 200 grams of flour and 200 grams of sugar, you can weigh the flour, press tare, and then weigh the sugar without having to calculate the combined weight yourself.

    Continue this process for ingredients that can safely be combined in the same bowl. For small quantities listed in teaspoons or tablespoons, simply use your measuring spoons as directed by the recipe.

    Brit & Skillet tip: Before adding an ingredient, glance at the scale and make sure it still says g for grams. Accidentally switching measurement units halfway through a recipe can produce a very unexpected cake!

    Do You Really Need a Kitchen Scale for British Baking?

    Technically, no. Many British recipes can be converted into American volume measurements, and some recipe writers provide both grams and cups.

    But if you plan to make British recipes regularly, a digital kitchen scale is one of the simplest and most useful additions you can make to your kitchen.

    Instead of searching for conversions every time you encounter 225 grams of flour or 100 grams of butter, you can simply weigh the amount the recipe calls for. It keeps you closer to the original recipe and eliminates much of the uncertainty that comes with converting ingredients by volume.

    You also don’t need to spend a fortune. For straightforward everyday weighing, the Escali Primo provides the basic functionality many home bakers need.

    If you frequently switch between British and American recipes and want the additional convenience of working with both weight and volume measurements, the King Arthur Volume and Weight Scale is our premium choice.

    The OXO is particularly useful if large mixing bowls tend to block your scale’s display, while the Amazon Basics model provides an inexpensive way to get started with baking by weight.

    The right choice ultimately depends on how often you bake and which features you’ll genuinely use.

    Once you start weighing ingredients, you may discover that British recipes aren’t harder to follow at all — they’re just measured a little differently.

    Happy baking!

    — Jane at Brit & Skillet


  • British Flapjacks: The Easy Oat Treat Americans Need to Try

    British Flapjacks: The Easy Oat Treat Americans Need to Try

    If you grew up in Britain, chances are you know exactly what a flapjack is: a chewy, buttery oat bar held together with golden syrup. But in America, “flapjack” usually means a pancake. So consider this your introduction to the British kind — simple, comforting, and dangerously easy to make.

    Affiliate disclosure: This post may contain affiliate links. If you make a purchase through one of these links, I may earn a small commission at no additional cost to you.

    What Is a British Flapjack?

    A British flapjack is an oat bar traditionally made with oats, butter, brown sugar and golden syrup. The mixture is baked until golden, then sliced into squares or rectangles. Depending on how long you bake them, flapjacks can be wonderfully soft and chewy or a little firmer around the edges.

    Stack of golden oat bars on a plate beside syrup jar
    Golden oat bars are stacked on a plate beside syrup, oats, and a spoon in a sunlit kitchen.

    Classic British Flapjack Recipe

    Ingredients

    2 cups (180 g) rolled oats
    ½ cup (113 g) unsalted butter
    ⅓ cup (70 g) packed light brown sugar
    3 tablespoons (60 g) golden syrup
    Pinch of salt

    Instructions

    1. Preheat the oven to 350°F (175°C). Line an 8-inch (20 cm) square baking pan with parchment paper.
    2. Add the butter, brown sugar and golden syrup to a saucepan. Heat gently, stirring until the butter has melted and everything is smooth. Don’t let it boil.
    3. Remove the pan from the heat. Stir in the rolled oats and a pinch of salt until all the oats are thoroughly coated.
    4. Spoon the mixture into the prepared baking pan. Press it down firmly and evenly with the back of a spoon.
    5. Bake for about 20–25 minutes, until the edges are golden brown. For softer, chewier flapjacks, don’t let them get too dark.
    6. Remove from the oven and let them cool in the pan for about 10 minutes. While still warm, lightly score into squares.
    7. Allow the flapjacks to cool completely before removing them from the pan and cutting.

    Serving Ideas

    British flapjacks are perfect with a cup of tea or coffee. Enjoy them plain, or try adding a drizzle of chocolate, a handful of raisins, or a few chopped nuts for a simple variation.

    Golden Syrup in America: What to Buy and What to Substitute

    Golden syrup is one of the ingredients that gives a traditional British flapjack its distinctive buttery, caramel-like flavor. If you grew up in Britain, you probably recognize the familiar green-and-gold tin of Lyle’s Golden Syrup.

    The good news is that golden syrup is much easier to find in the United States than it used to be. Look in the international or baking aisle of larger supermarkets, British specialty shops, or online.

    If you can’t find golden syrup, honey or maple syrup can work in a pinch, but the flavor will be different. For the most traditional British-style flapjack, golden syrup is worth seeking out.

    Tips for Perfect British Flapjacks

    For softer flapjacks: Take them out when the edges are golden but the center still looks slightly soft. They will firm up as they cool.

    For firmer flapjacks: Bake them a few minutes longer, watching carefully so the edges don’t burn.

    Press the mixture firmly into the pan: This helps the flapjacks hold together when sliced.

    Don’t cut them immediately: Score the flapjacks while they’re warm, but wait until they’re completely cool before cutting them into individual bars.

    Use rolled oats: Old-fashioned rolled oats give the best traditional texture. Quick oats can produce a softer, less distinctive flapjack.

    How to Store Flapjacks

    Once completely cool, store the flapjacks in an airtight container at room temperature. They’re best enjoyed within about a week. Place parchment paper between layers if you’re stacking them.

    A Little Taste of Britain at Home

    British flapjacks are proof that some of the best treats are also the simplest. With just a handful of ingredients, you can make a chewy, buttery oat bar that feels right at home with an afternoon cup of tea. Whether you grew up eating flapjacks or you’re trying them for the first time, this classic British bake is an easy recipe worth keeping.